Creating filters
This topic describes how to create and edit filters using Filter Designer.
A filter has a specific type, which defines the data category of its targeting criteria, for example Profile Data or Email behavior. For a list of all available filter types, see About filter types.
You create a filter by building rules. Rules are composed of attributes and conditions, for example customers who opened an email campaign (attribute) within the past 7 days (condition).
The rules are applied at the time the filter is evaluated. This means that the most current records are always selected as your List evolves through changes.
Creating and editing filters
Use the Filter Designer to create and edit filters.
To create a new filter:
- Click the navigation menu (
 ), and then select Manage Customer Data from the Data menu.
 - On the Manage Customer Data page, ensure that the List for which you want to create a filter is selected. To create a filter for a different List, click the Change List menu and select the desired List.
If you are integrated with Responsys and want to create a Responsys behavioral filter, choose the List with the check mark icon. The label "Responsys Integration Enabled" is displayed when the List is displayed.
- Click the Filter tab to display the Filters page.
- Click the Create Filter button to display the list of filter types.
- Select the type of filter you want to create:
- Profile data Includes attributes from the Customer Data List and its Profile Extensions.
- Custom Tables Includes attributes from all Custom Tables associated with the List.
- Datalogix Data Includes attributes from Datalogix Data (Oracle Data Cloud) associated with the List.
- Omniture Events Includes attributes from Omniture Events (Adobe Analytics Data Connectors data) associated with the List.
- Responsys Email behavior Includes interaction and recency attributes for the email channel.
- Responsys Mobile App behavior Includes interaction and recency attributes for the mobile app channel (Push Notifications and In-app Messages), as well as device profile data attributes from the App Channel List.
- Responsys SMS behavior Includes interaction and recency attributes for the SMS channel.
- Infinity Events data Includes attributes from Infinity data associated with the List.
- Crowdtwist data Includes attributes from Crowdtwist data associated with the List.
The Datalogix Data, Infinity Events, Omniture Events, Crowdtwist Data, and Responsys behavioral filter types are available only if the integrations are configured for your CX Audience account.
For Responsys behavior filters, the List you have selected must also be the one configured in the Responsys integrations settings to receive the Responsys behavioral data. The message "Responsys Integration Enabled" is displayed on the Manage Customer Data page when that List is selected, and you can quickly identify it in the Change List drop-down list by the check mark by the List name.
For questions about your CX Audience account's integration configurations, see your Account Administrator.
- Drag the attributes you want from the palette to the canvas and specify conditions for each attribute.
Use enclosures to group rules together. You can add one by dragging Insert Enclosure into the Profile Attributes section of the designer page.
When you delete an enclosure, all rules within it are deleted as well.
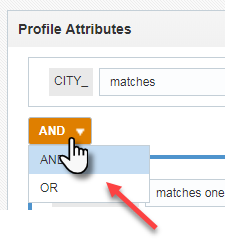
- To change operators, comparisons, and values, click the item to change and select the value you want. If you find it difficult to locate an attribute, type its name in the search box.

- Click Save.
The Save dialog opens.
- Type a unique name and enter a description.
The filter description appears in the Audience Designer canvas. We highly recommend adding a meaningful description so that you can easily identify the filter later.
- Click Save.
You can now use the filter in audiences, campaigns, and programs.
To edit an existing filter:
- Click
 and select Manage Customer Data from the Data menu.
The list of filters for the selected List appears on the Filters tab of the Manage Customer Data page.
To select a different List, select it from the Change List menu.
- Click the name of the filter you want to edit.
Viewing filter counts
You can get filter counts to see how many customer records will result from a particular filter. This helps you design filters that will generate the right-sized audience.
You can run only one count at a time. If the count query does not finish during your session, you can see it the next time you open the Manage Lists page.