-
In the Shared Library or Application pane, right-click a dimension and select Grid Editor.
Note:
The Grid Editor option is not available if you right-click a member. You must right-click a dimension.
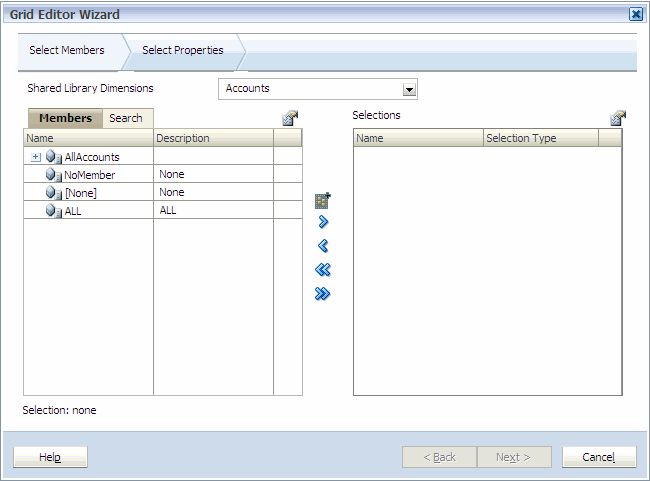
The Grid Editor Wizard is displayed.

The Grid Editor Wizard enables you to display up to 2000 members within a dimension. You can expand and collapse members within a dimension using the [+] and [-].
The Grid Editor Wizard has two panes—all members in the dimension on the left and selections in the Grid Editor on the right. The left pane has two tabs—Members and Search. The Members tab displays all members available in the dimension, including the member name and a short description, if available. You can use the Search tab to find members. The right pane shows selections for the Grid Editor and displays the member name and the selection type.
You can use the Menu button above each pane to change the columns in the Grid Editor Wizard.
If you are selecting members for a Shared Library dimension, the Grid Editor displays “Shared Library Dimensions,” above the Members and Search tab. However, if you are selecting members in an application, the application name appears above the Members and Search tab. For example, “NewApp Dimensions.”
-
While displaying the Members tab, to collapse all members in a dimension, click
 , and select Collapse All.
Note:
When you select Collapse All, all members under the dimension or member that you selected are collapsed. When a dimension or member is collapsed, rest the mouse pointer over the artifact to display a ToolTip indicating the number of descendants.
-
To modify the columns in the Selections pane, in the Selections pane, click
 , Show, Selection Type.
Name automatically displays in the Selections pane, however you can decide if you want the Selection Type to display.