You can define external files to use as sources in data synchronizations. Data Synchronization supports a delimited file with data in the last column, and does not support fixed length fields. You must enter all mapping rules and filters pertaining to the flat file source.
Before you create a synchronization that uses an external file as the source, you must define the external file.
-
Select File, New, External File Definition.
The External File Mapping Wizard is displayed.
-
-
Select the Delimiter—the character that separates the fields of external files. You can use a comma ( , ), semicolon ( ; ), tab, or space as the file delimiter. You can also specify a delimiter using the “Other” field.
-
Select the Quote character—the character that identifies text values. For example, if the quote character is " (double quotation mark), the parser expects all members to be enclosed in double quotation marks. If the parser finds text values that are not enclosed in the double quotation marks the parser returns an error.
Note:
If the delimiter appears in the member name or data value, you must specify the quote character. The delimiter and quote character cannot be the same.
-
Enter the number of Header lines to skip. For example, an external file may have headings such as Name, Address, City, State, and ZipCode to skip.
-
Enter the Line number of dimension fields. The following example shows an external file where the total number of header lines to skip is 4 and the line number with dimension names is line 3.
#first Row of the header
#Second Row of the header
Account,Time,Data
#fourth Row of the header
Sales,FY10,34.123
-
-
Perform an action to preview a file:
-
Click
 , click Browse, select the file, and click Upload.
 -
Select Specify a file URL to preview and enter a URL; for example, file:///c:/data/previewfile.csv.
Because you specify the format of the external file, you are not constrained to a rigid format. However, remember the following rules:
-
Every line must contain the same number of columns.
-
Every line must have a member value for each dimension (no blank values).
-
The last column of every line is the value for the intersection (text or numeric value).
-
-
-
When you preview a file, the options specified in the wizard are applied so you can see how the options affect the data.
-

-
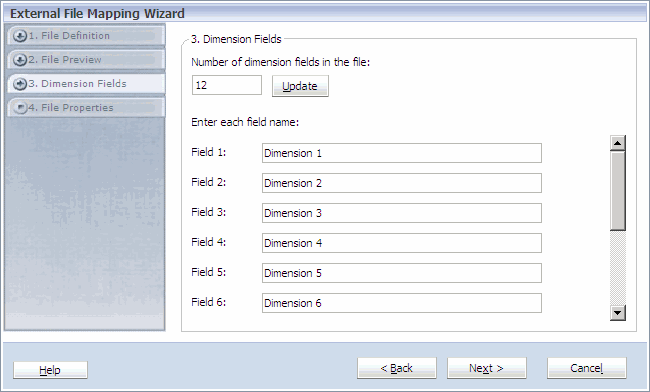
Enter the number of dimensions in the file, and then click Update.
-
Enter the field label, which corresponds to the dimensions in the target, and then click Next.
-
Enter the external file name, optionally enter a description, and then click Finish.