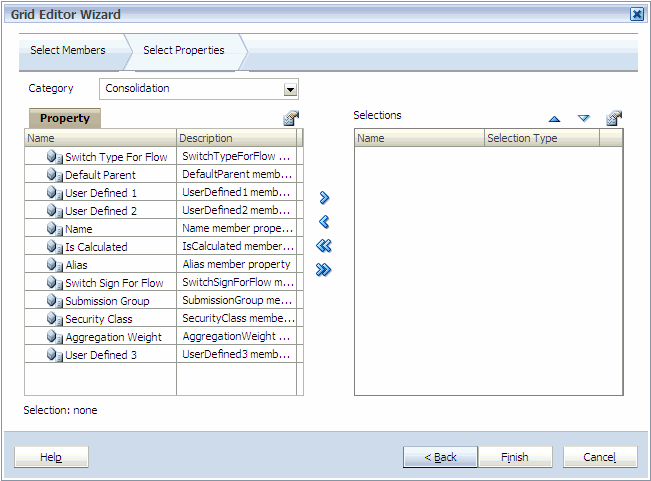
You can select the properties that you want to modify using the Grid Editor. When selecting properties using the Grid Editor Wizard, make sure to select the appropriate category.
-
Since properties can differ by category, select the category that includes the properties you want to edit.

-
Repeat the steps above until you select all properties you want to edit in the Grid Editor.
-
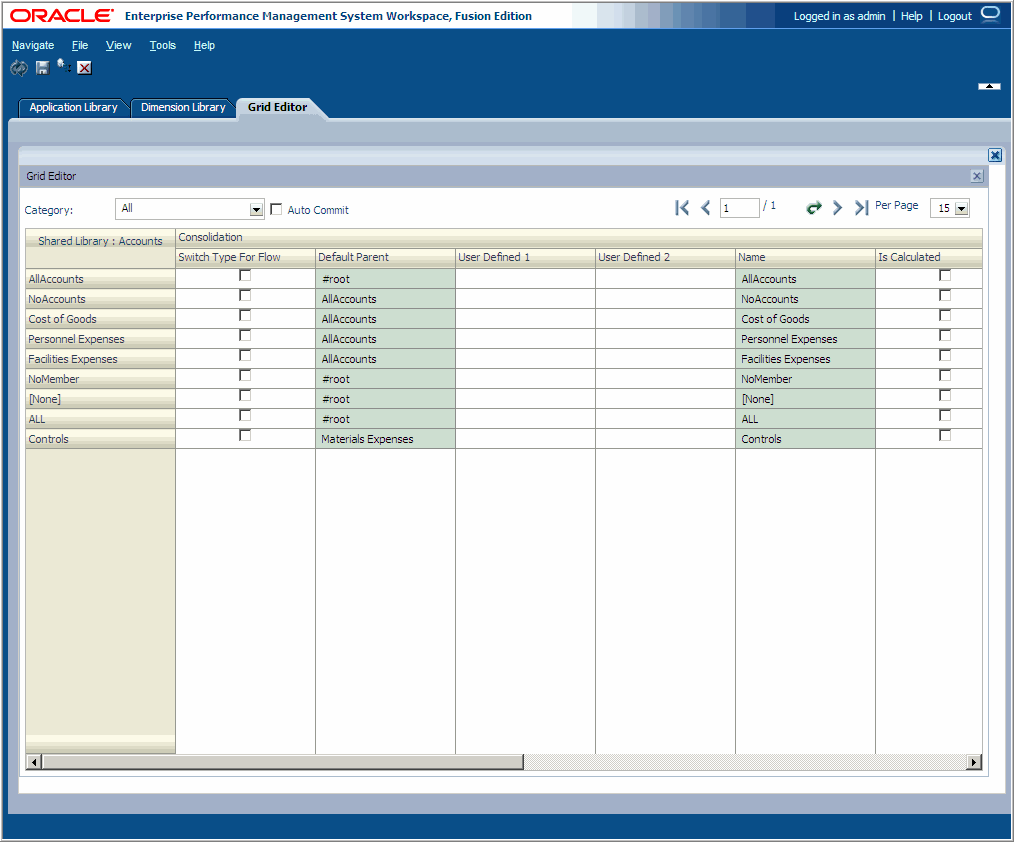
The Grid Editor is displayed.

Grid cells that represent read-only properties are dimmed and disabled. Properties utilizing special controls such as check boxes within the Dimension Library Property Grid also use the same controls within the Grid Editor.
If you are editing a Shared Library dimension, the Grid Editor shows the dimension name after “Shared Library,” such as “Shared Library: Account.” However, if you are editing a dimension in an application, the name of the application appears before the dimension name. For example, “NewApp: Account”. In addition, each property category name is displayed above the property columns. For example, Consolidation displays above the properties you selected in the Consolidation category.