2.3.6.7 Creating a Control Break from the Actions Menu in an Interactive Grid
Break an interactive grid (that is, compartmentalize the layout) by column by selecting Control Break in the Actions, Format submenu.
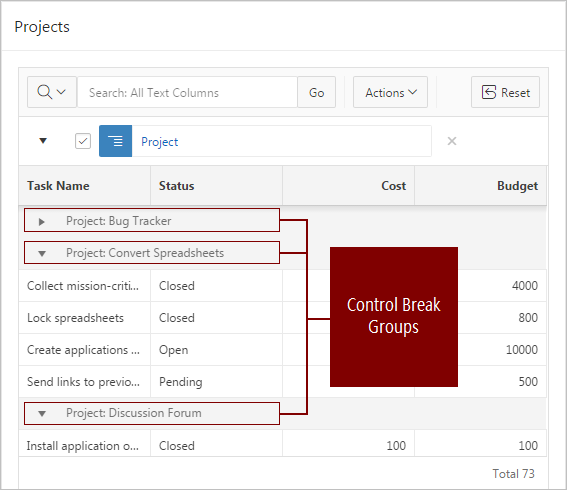
Creating a break group pulls the columns out of the interactive grid and displays them as a master record.
To create a control break:
The interactive grid reloads with the control break applied for the selected column, and a control break filter appears above the grid near the toolbar.
In the following example, a control break has been applied to the interactive grid for the Project column.

Description of the illustration GUID-0FDBFD91-D7AC-442F-890D-7ED5C4986CA0-default.png
To edit a control break, click the name to display the Control Break dialog. You can also add, edit, and delete other control breaks in the Control Break dialog.
To remove a control break, click the Remove Control Break icon (X) on the control break filter.
See Also:
About Filters in Interactive Grids