Resource Sharing (Optional)
Resource Sharing uses AWS Resource Access Manager (RAM) to grant controlled access without duplicating resources. This helps reduce costs, centralize management, and simplify cross-account networking and service usage.
- ODB Network
- Oracle Exadata Infrastructure
You can only share resources with a trusted account that has not accepted any private Oracle Database@AWS offer.
Share Resources from the Buyer Account to Trusted Account
Complete the following steps:- Sign in to your AWS buyer account.
- From the AWS console, select Resource Access Manager, and then select the Resource shares link from the left menu.
- Select the Create resource share button, and then complete the following substeps:
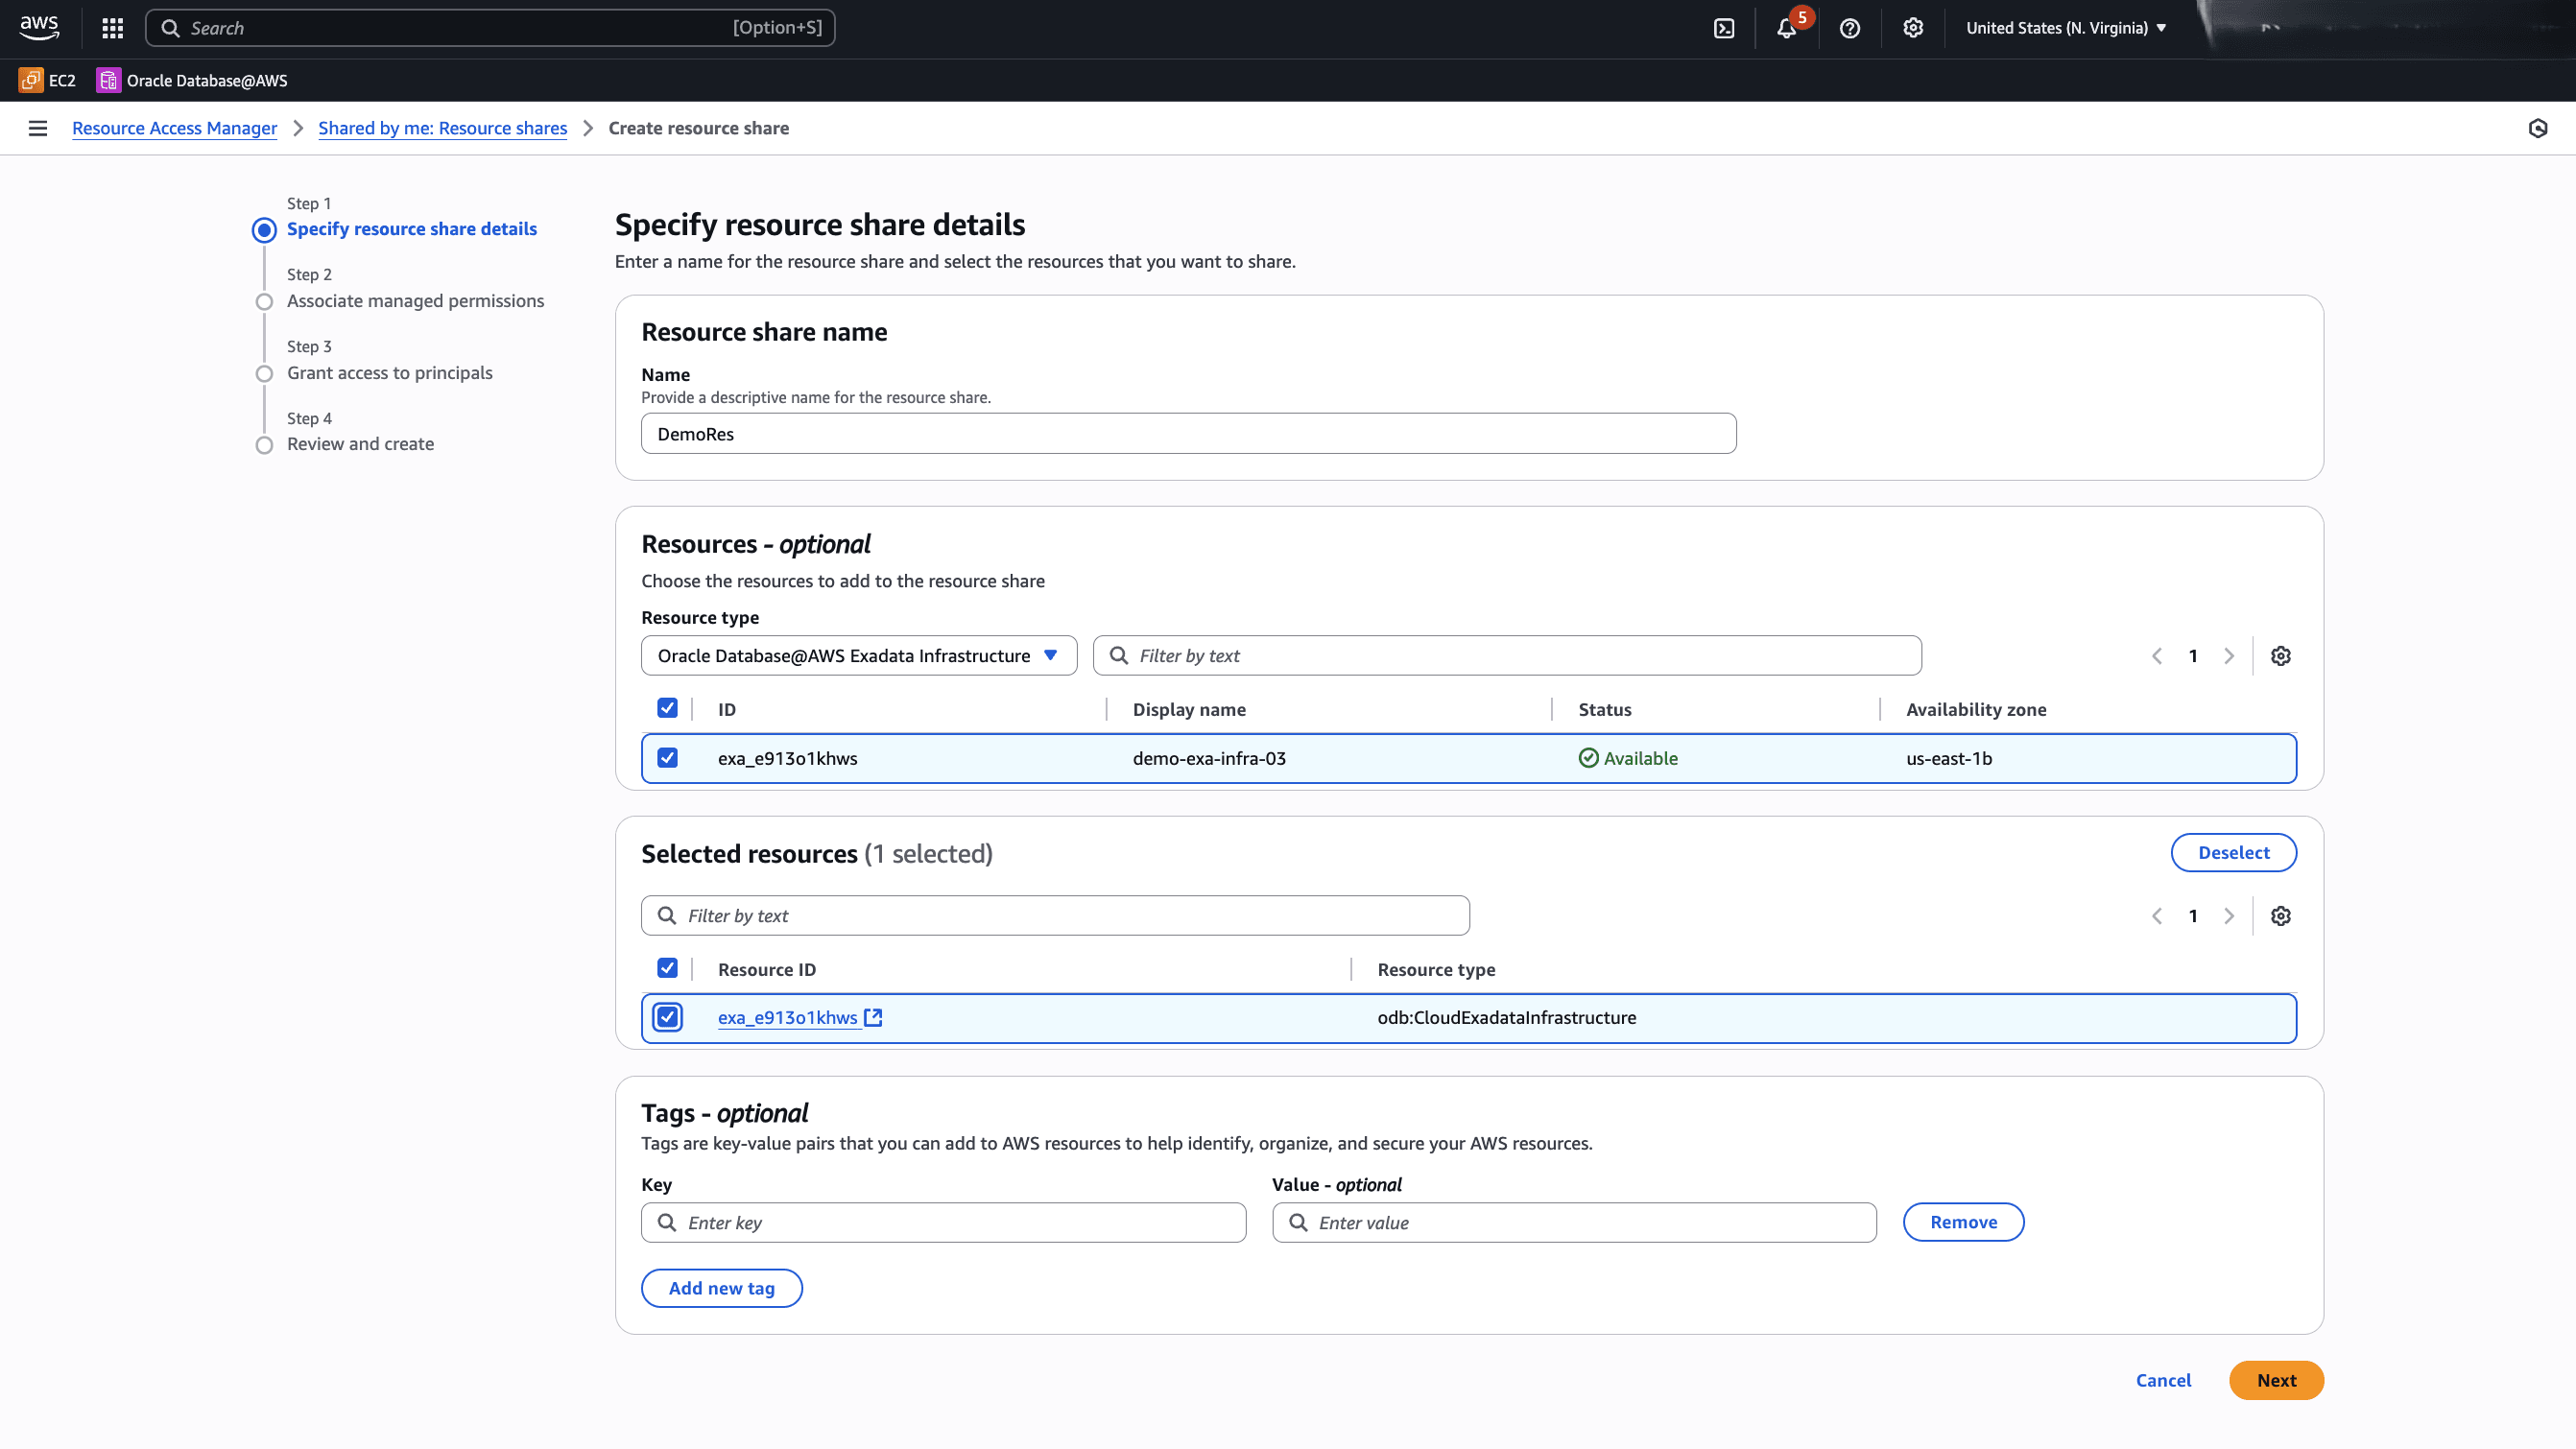
- In the Specify resource share details section, enter the following information:
- Enter a Name to provide a description for your resource share.
Note
The resource share name must contain only alphabetic characters, numbers, spaces, periods, and dashes. - The Resources section is optional. For example, if you select your resource type as Oracle Database@AWS Exadata Infrastructure from the dropdown list, it populates available Exadata Infrastructure resource(s) that you can choose to add to the resource share.
- From the Selected resources section, select the checkbox of your resource.
- The Tags section is optional. Select the Add new tag button if you want to add one.
Note
Tags are key-value pairs that enable you to add to AWS resources to identify, organize and secure them. - Select the Next button to proceed.

- Enter a Name to provide a description for your resource share.
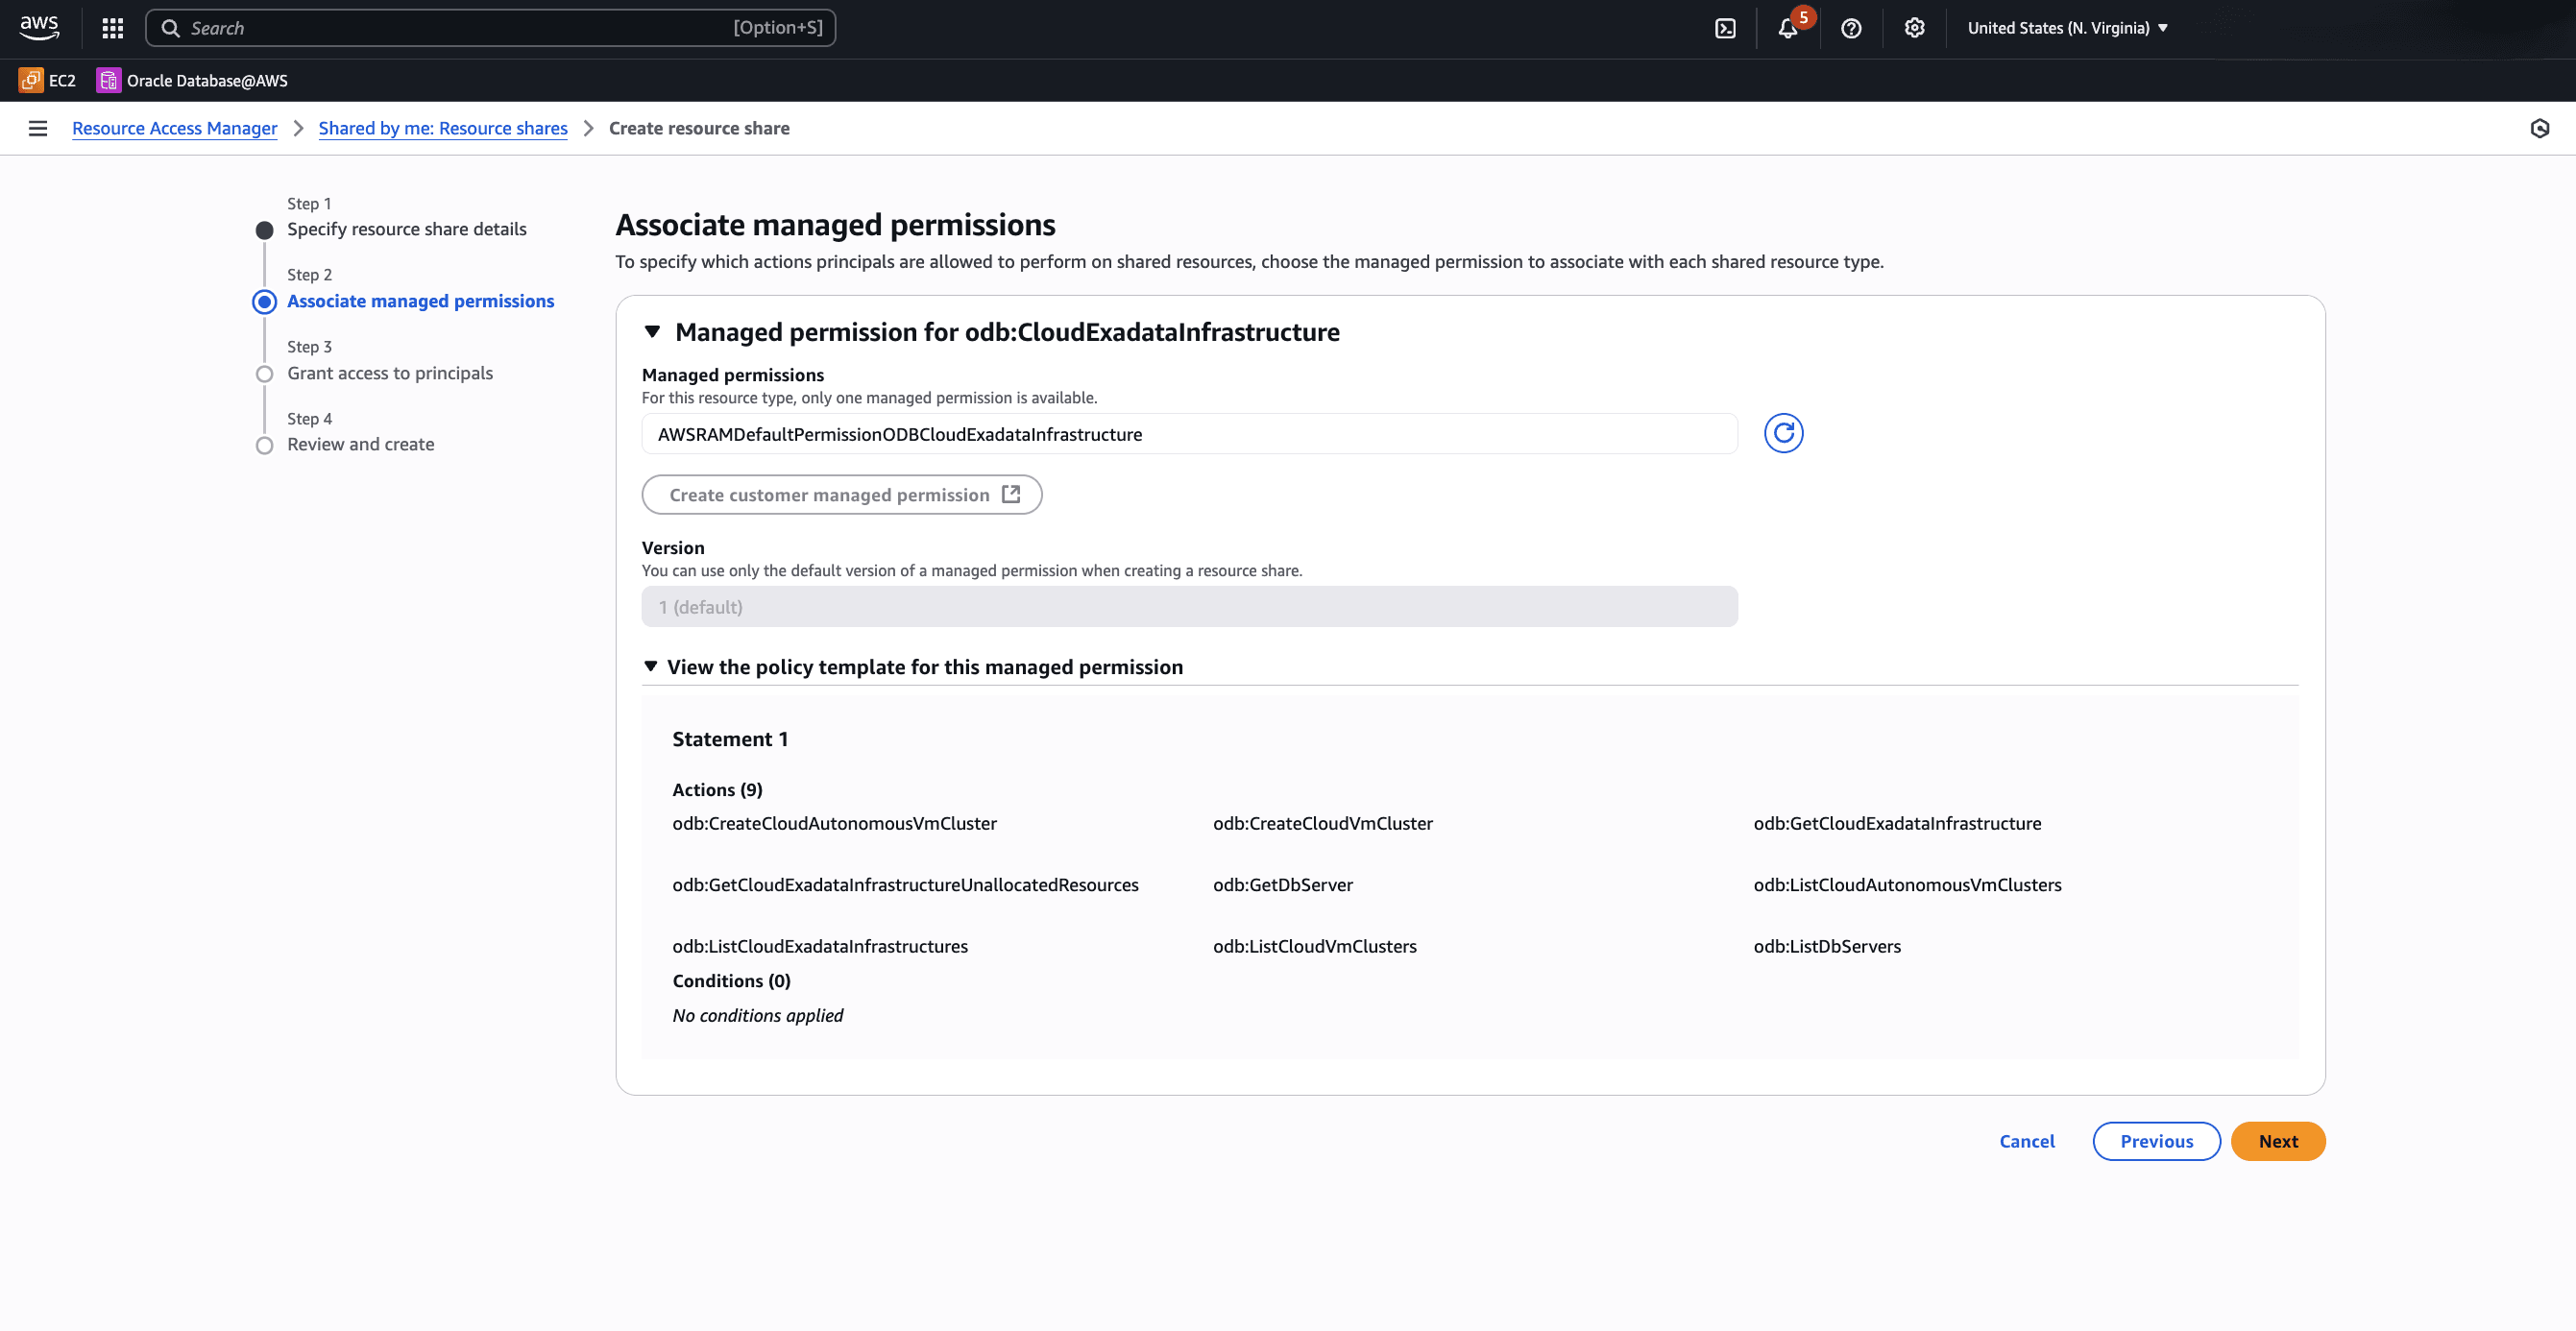
- In the Associate managed permissions section, you can view the Managed Permissions, Version and View the policy template for this managed permission details. These automatically populates based on your Resource selection. The View the policy template for this managed permission section lists all permissions that are going to be granted. Select the Next button to proceed.

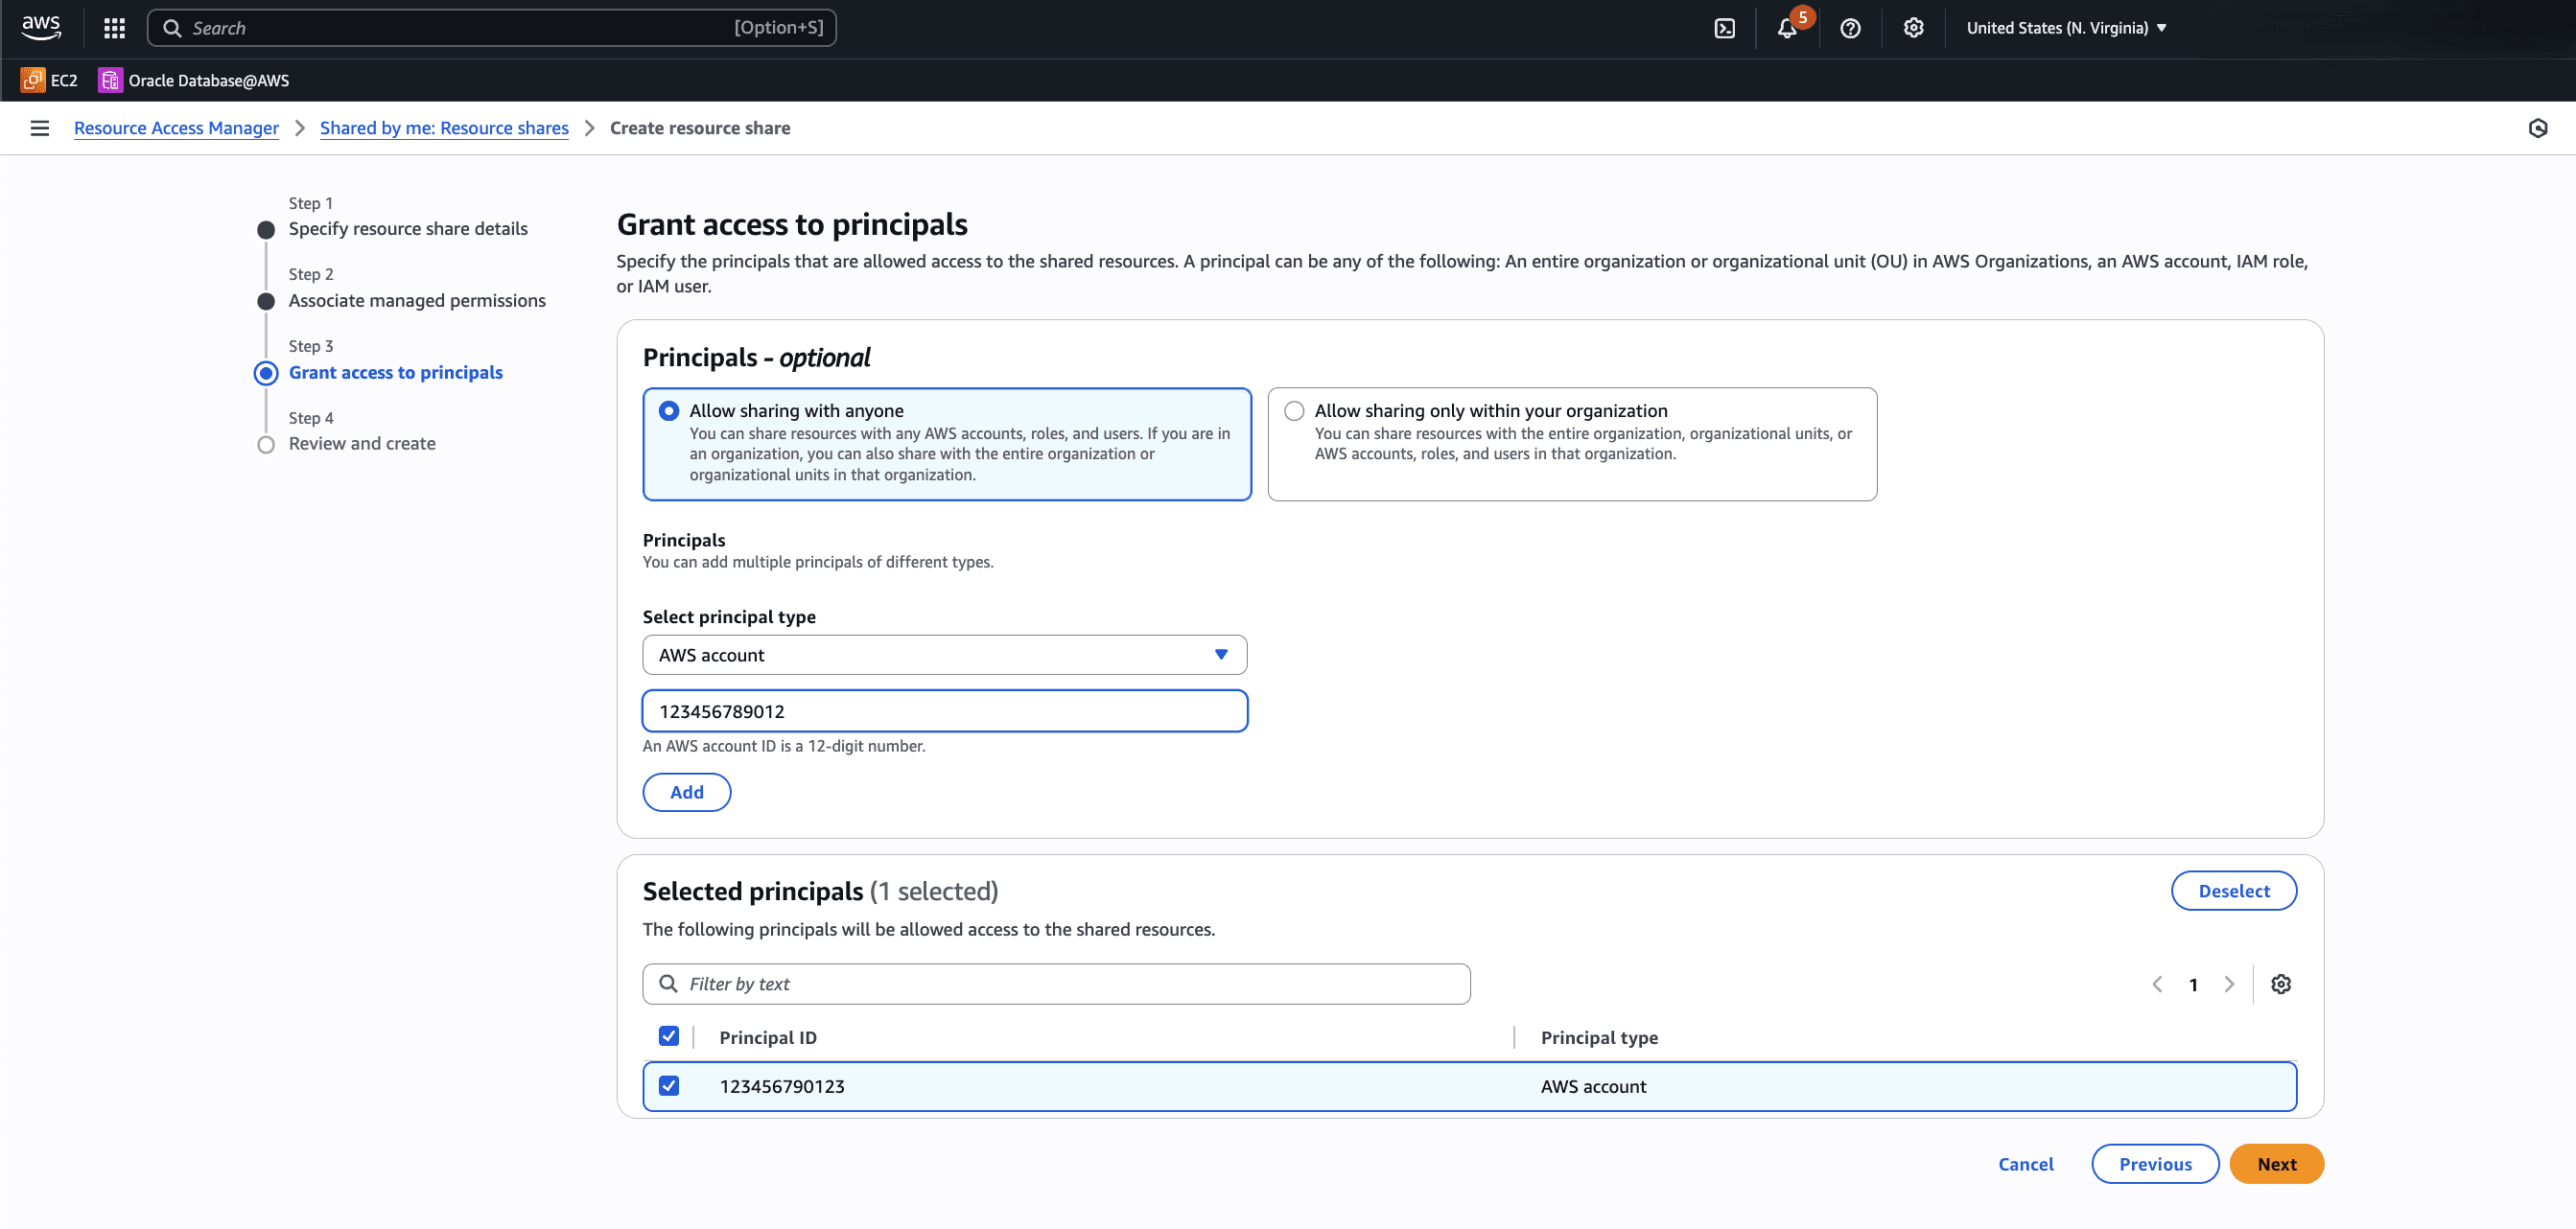
- In the Grant access to principals step, enter the following information:
- The Principal section is optional. If you want to grant access to principal, complete the following steps:
- Select the Allow sharing only within your organization option.
- From the dropdown list, select the principal type.
- Enter an AWS account ID of trusted account.
- Select the Add button to grant access to your selected principals.
- Once you add your principal(s), the Selected principals section displays the list of Principal ID. Select the checkbox to allow principals access to the shared resources.
- Select the Next button to proceed.

- The Principal section is optional. If you want to grant access to principal, complete the following steps:
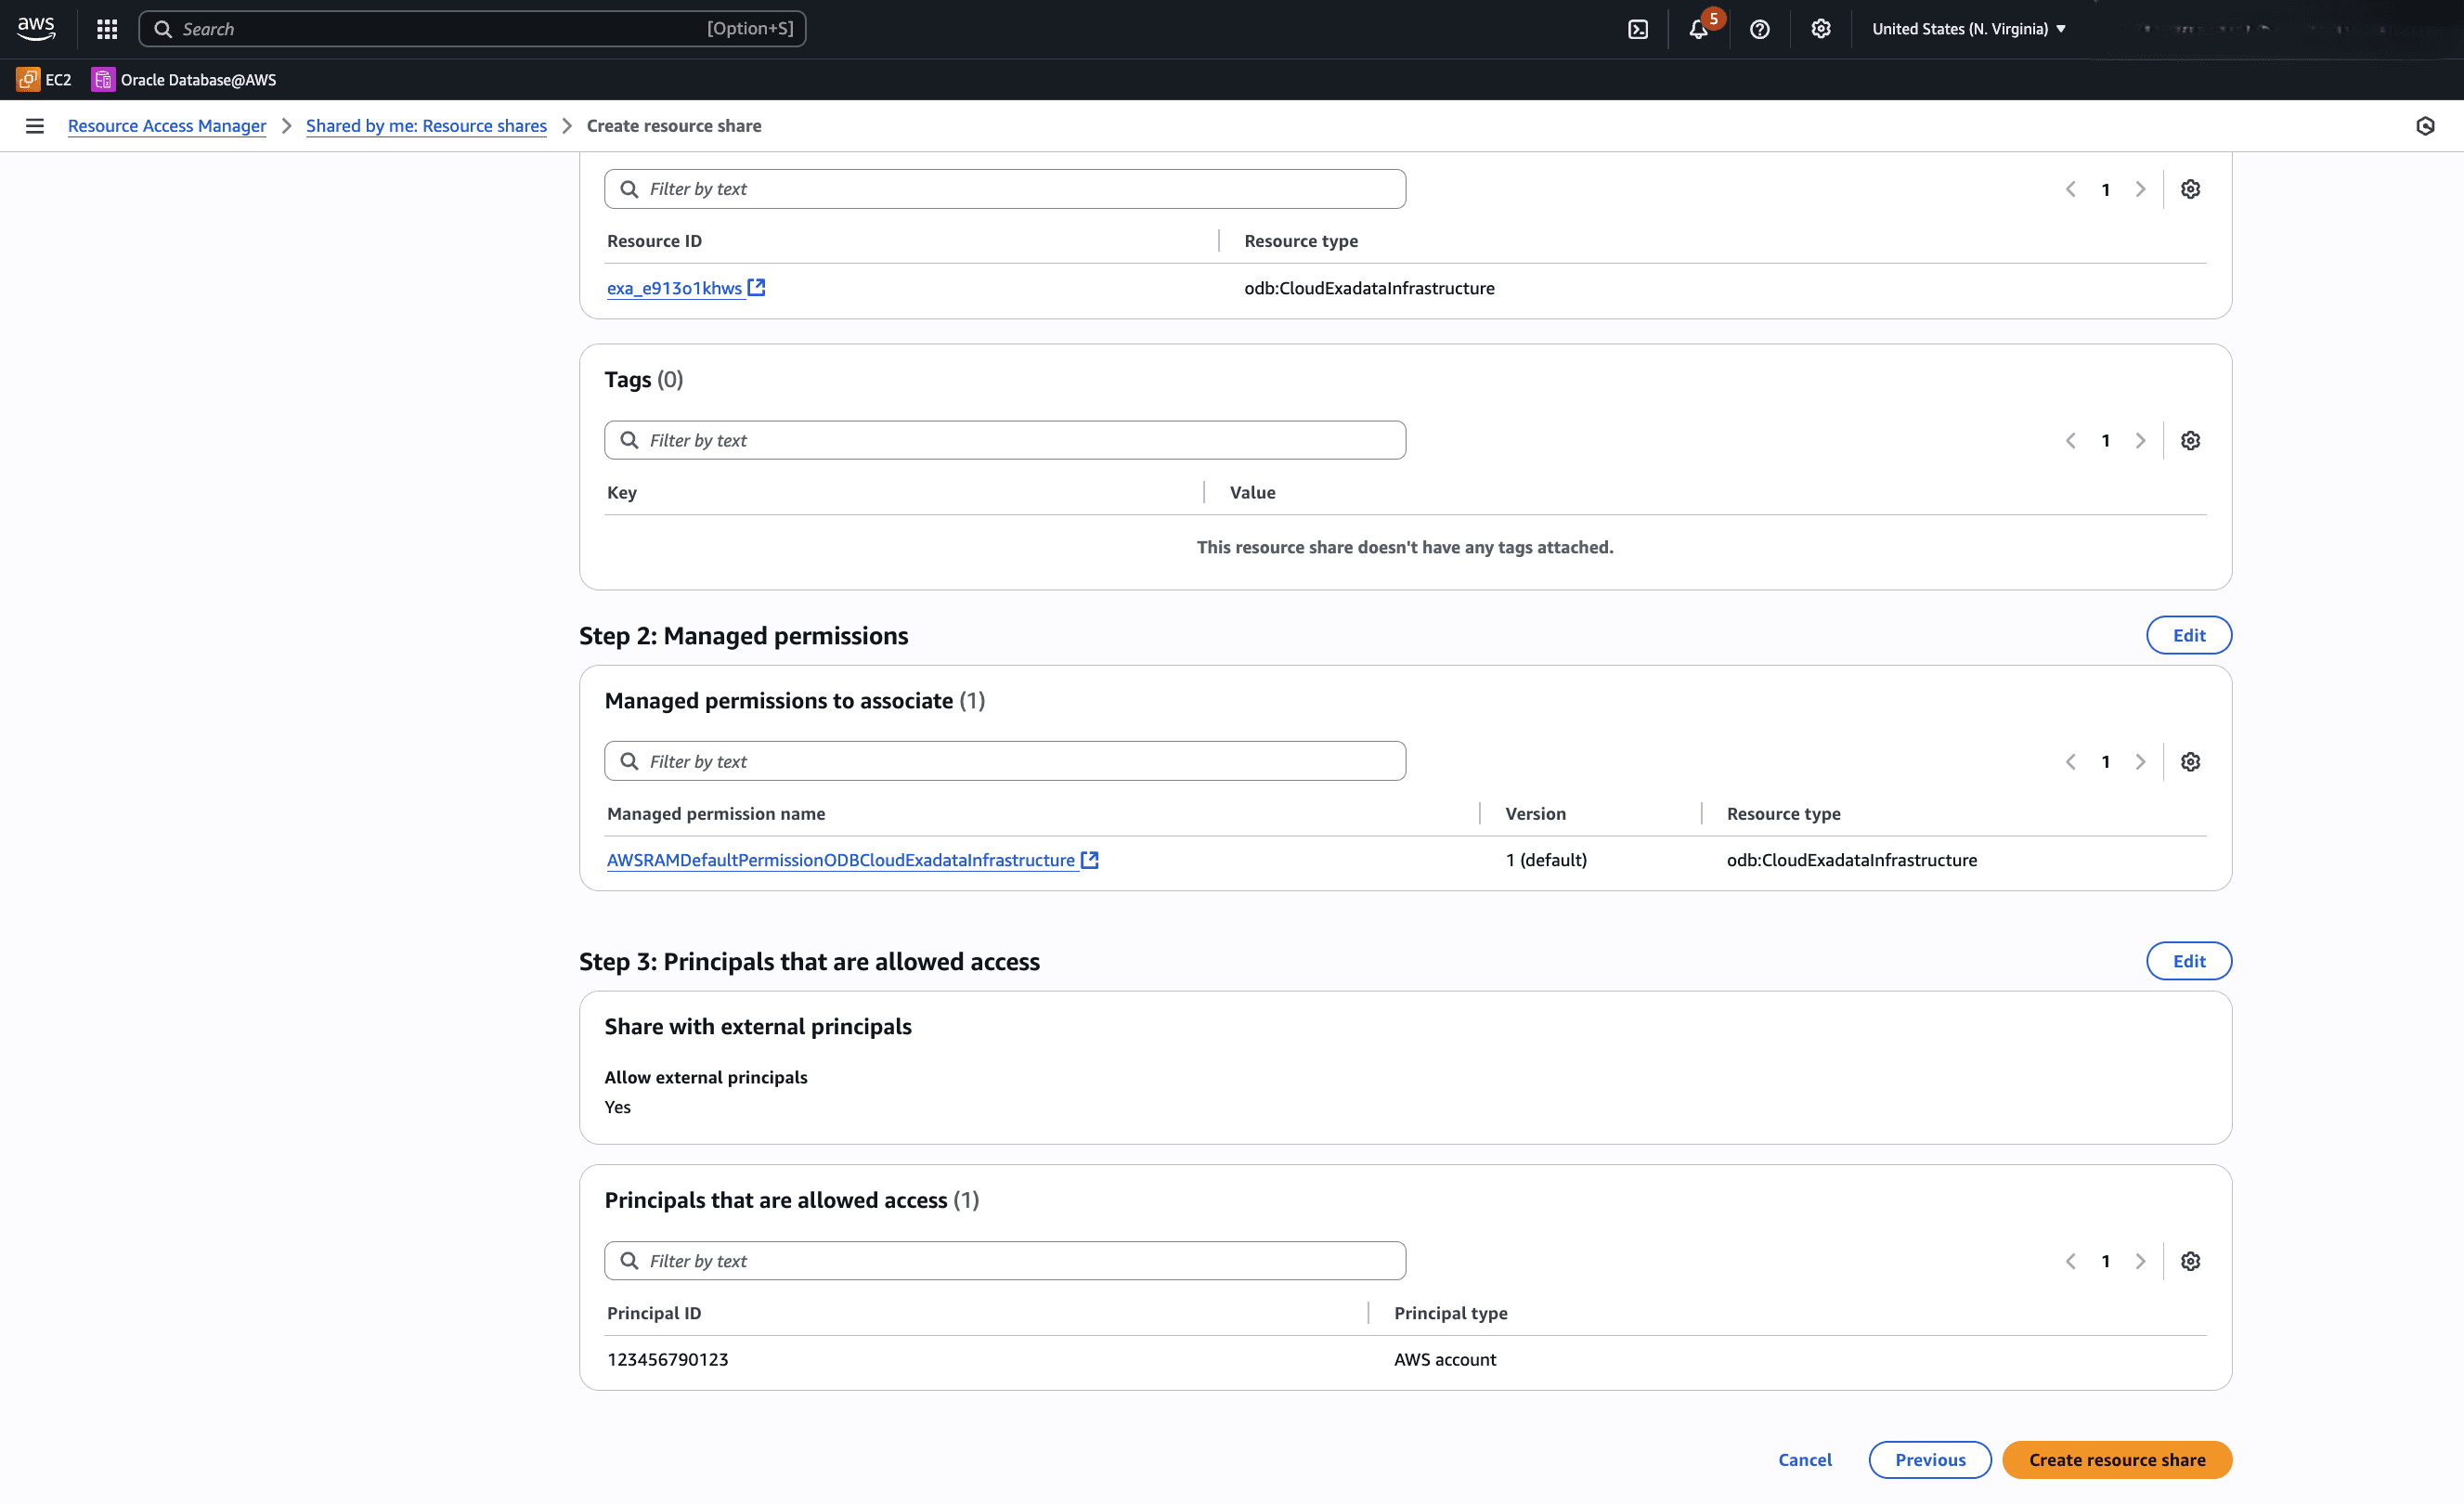
- In the Review and create step, review your selection and return to previous steps if you want to make any changes. Once you complete, select the Create resource share.

- In the Specify resource share details section, enter the following information:
Activate and Access Shared Resources from the Trusted Account
- Sign in to your AWS trusted account.
- From the AWS console, select Oracle Database@AWS, and then select the Activate account button to activate a trusted account and create resource(s) for this account.

- Once the activation is complete, the Dashboard button will be enabled. Select the Dashboard button.
- From the Oracle Database@AWS dashboard, you can access the shared resources.

Note
- Currently, ODB Network and Exadata Infrastructure creation is only allowed in the buyer account.
- You can only create ODB peering connection with a ODB Network which is not peered with any existing VPC.
Resource sharing is only available through the AWS Console and AWS CLI.
There is currently no content for this page. Oracle Database@AWS team intends to add content here, and this placeholder text is provided until that text is added. The Oracle Database@AWS team is excited about future new features, enhancements, and fixes to this product and this accompanying documentation. We strongly recommend you watch this page for those updates.
What's Next?
You can now create Exadata VM Cluster, Autonomous VM Cluster, Exadata Databases and Autonomous AI Databases in trusted account using the Exadata Infrastructure created in the owner account.