Exadata Database - OCI Vault
Oracle Exadata Database Service on Dedicated Infrastructure in Oracle AI Database@Azure integrates with OCI Vault to provide data encryption using a customer-managed key (CMK). This integration centralizes key storage and management, significantly simplifying your overall key lifecycle.
Oracle Exadata Database Service on Dedicated Infrastructure integration with OCI Vault is only available through OCI Console.
- Create an OCI Vault
For more information, see Create an Oracle Cloud Infrastructure Vault.
- Create a Master Encryption Key in the Vault
For more information, see Create a Master Encryption Key in the Vault.
- Create an OCI Dynamic Group
- From the OCI console, select Oracle AI Database, and then select Oracle Exadata Database Service on Dedicated Infrastructure.
- From the left menu, select Exadata VM Clusters, and then select the name of the Exadata VM Cluster.
- Select the VM Cluster information tab, scroll down to the General information section. Take a note of your Exadata VM Cluster Compartment information.
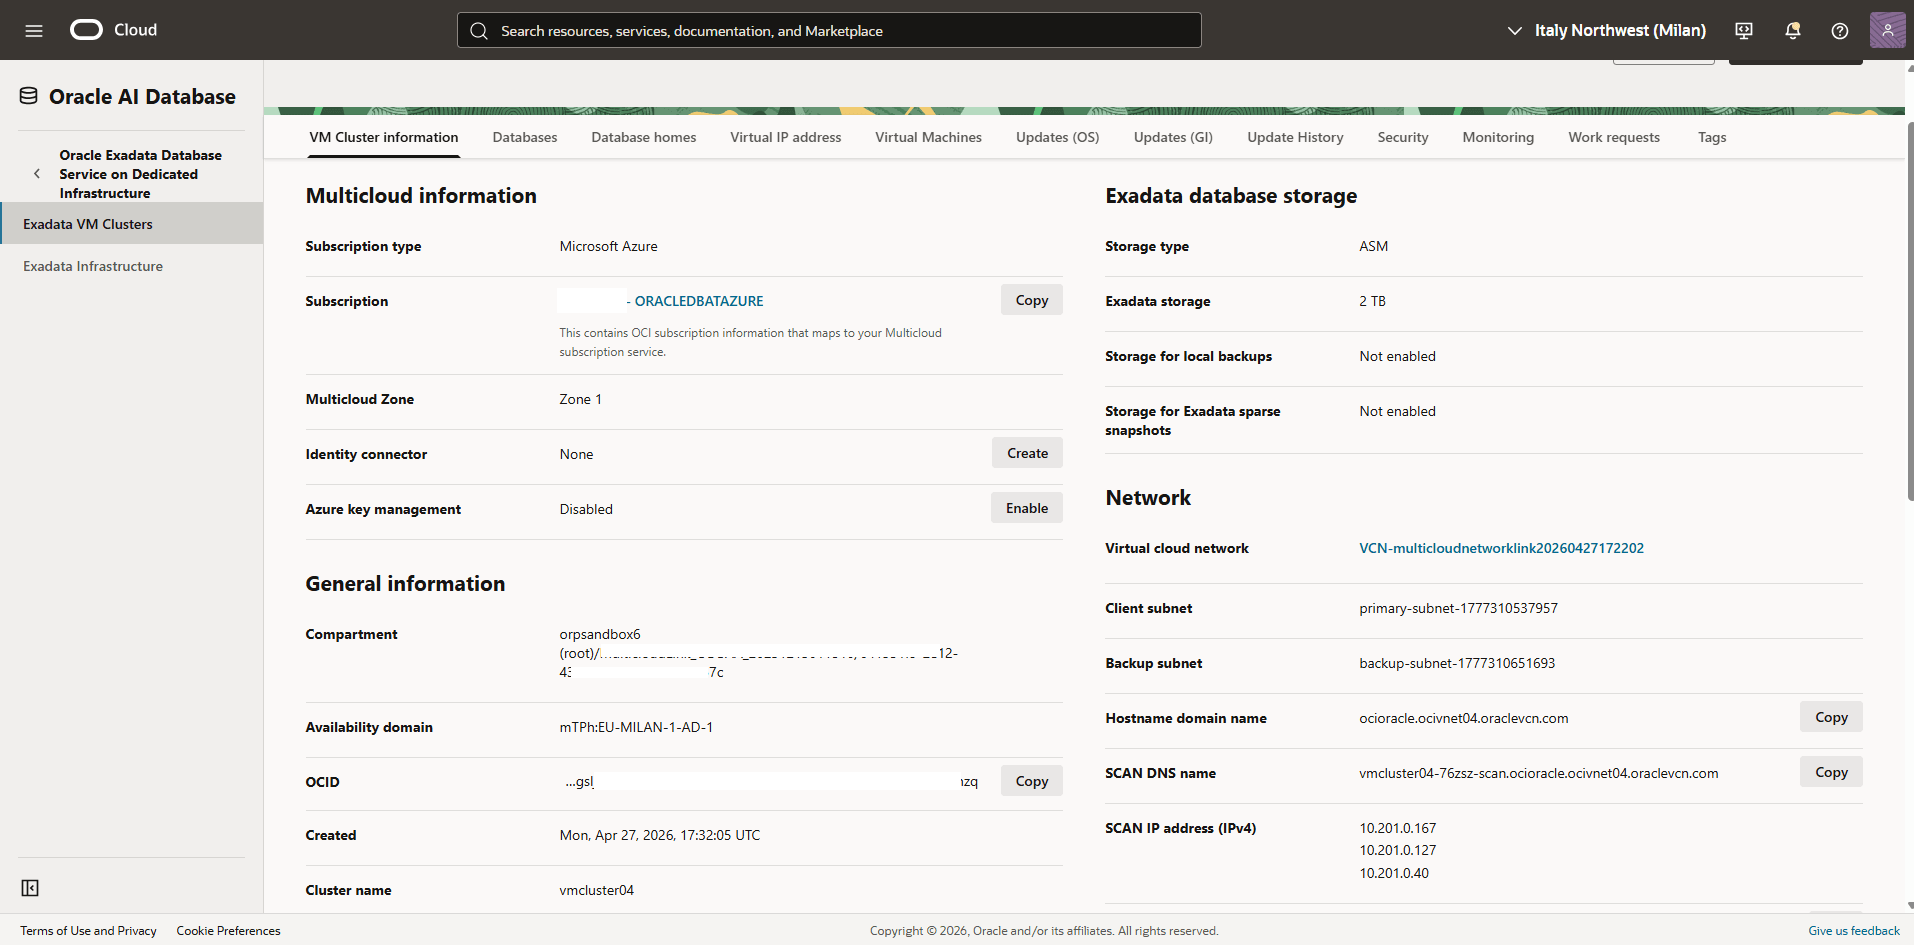
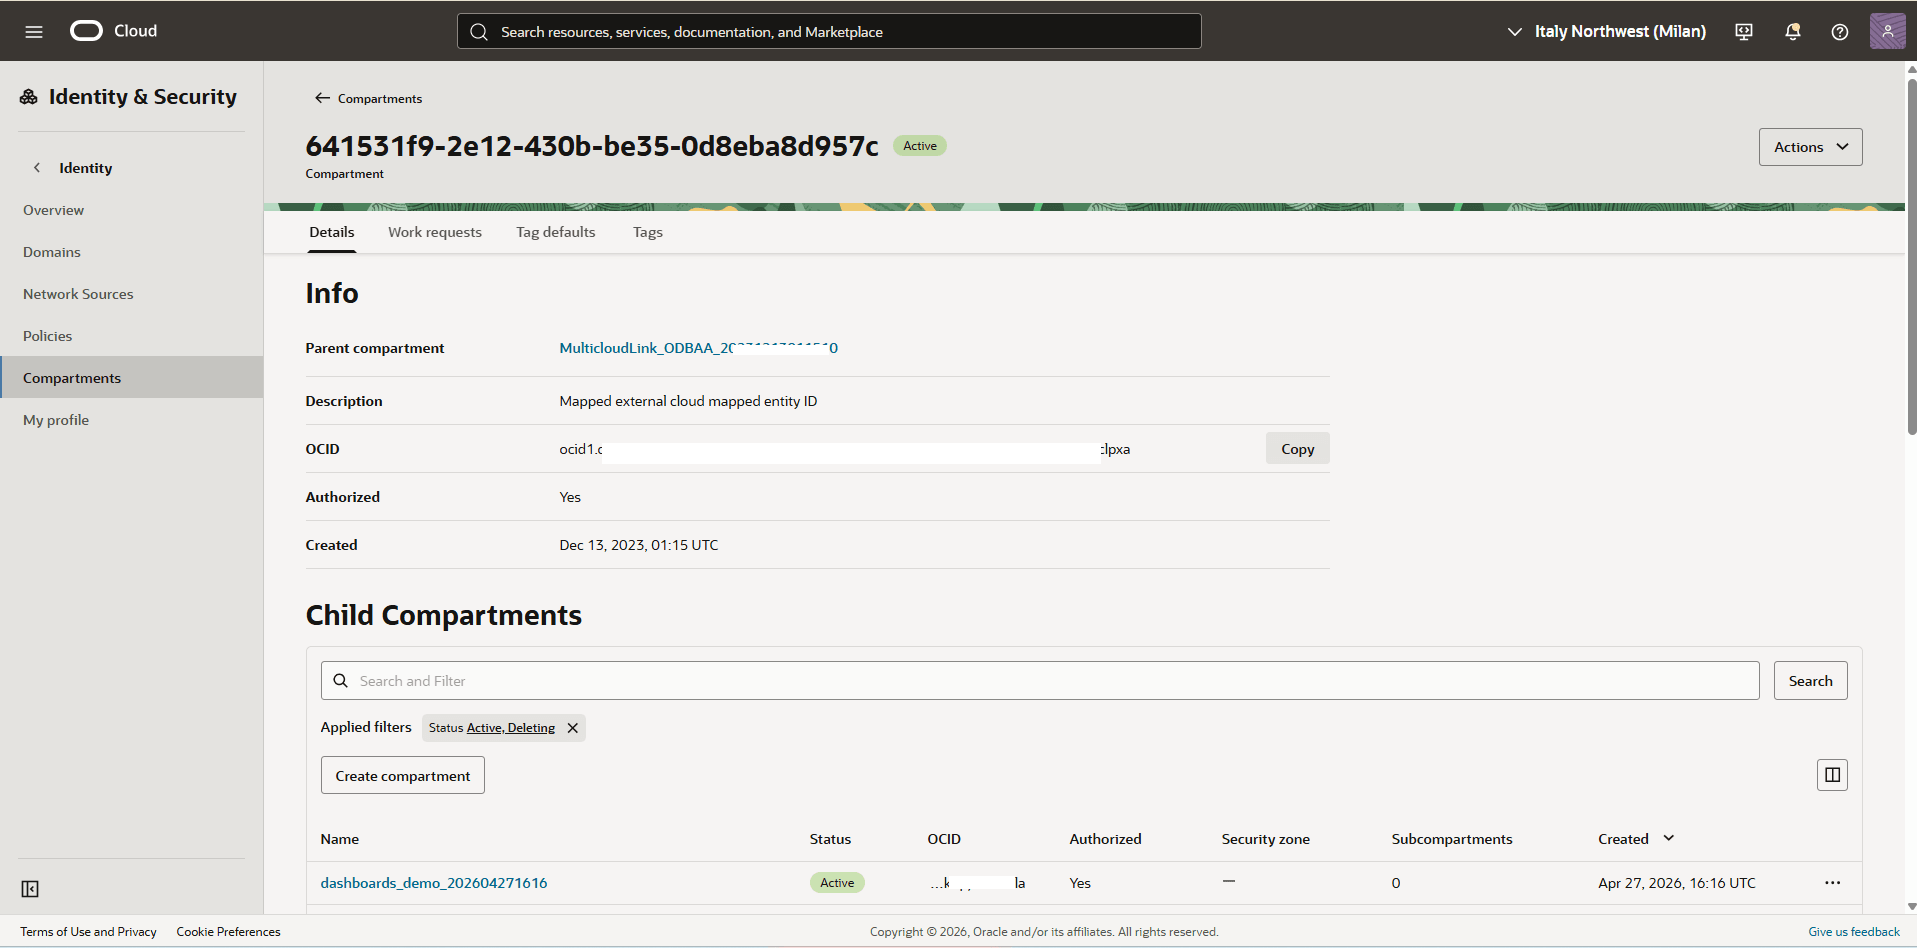
- From the navigation menu , select Identity & Security, and then select Compartments.
- From the Compartments list, navigate to the compartment validated in the previous step and take a note of the OCID information.
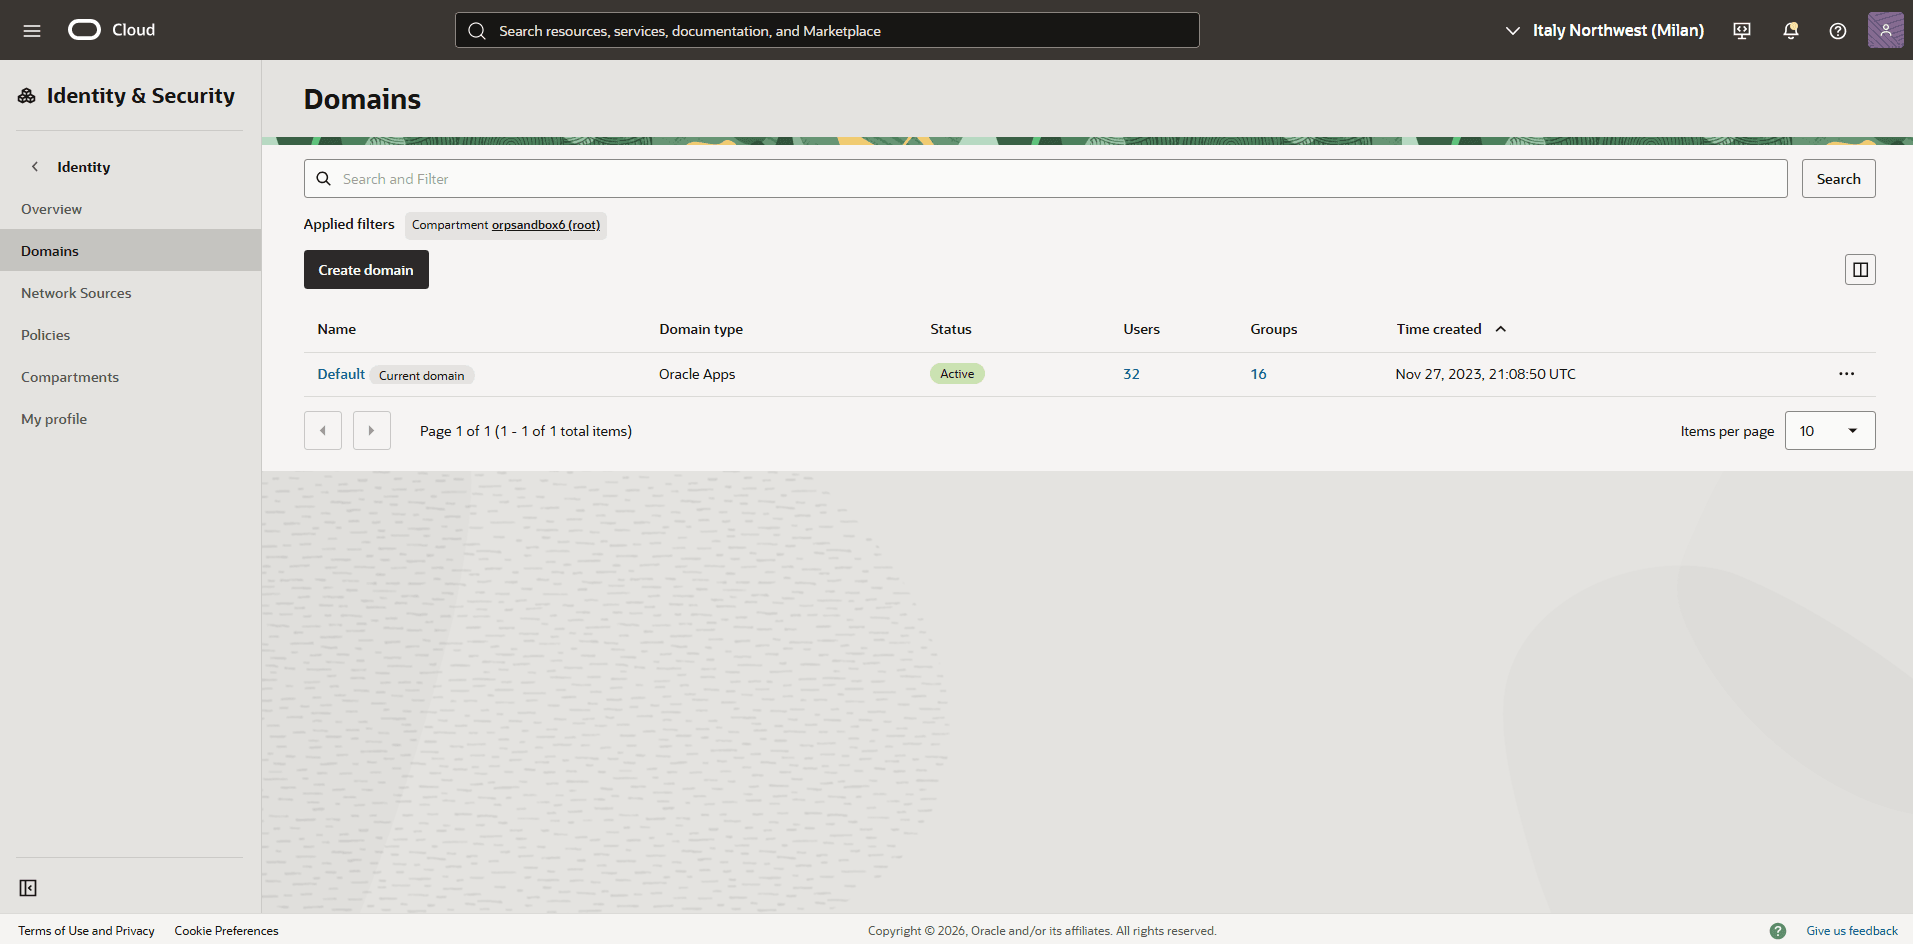
- From the navigation menu , select Identity & Security, and then select Domains.
- From the Applied filters section, select the Root Compartment and then choose the name of you domain.
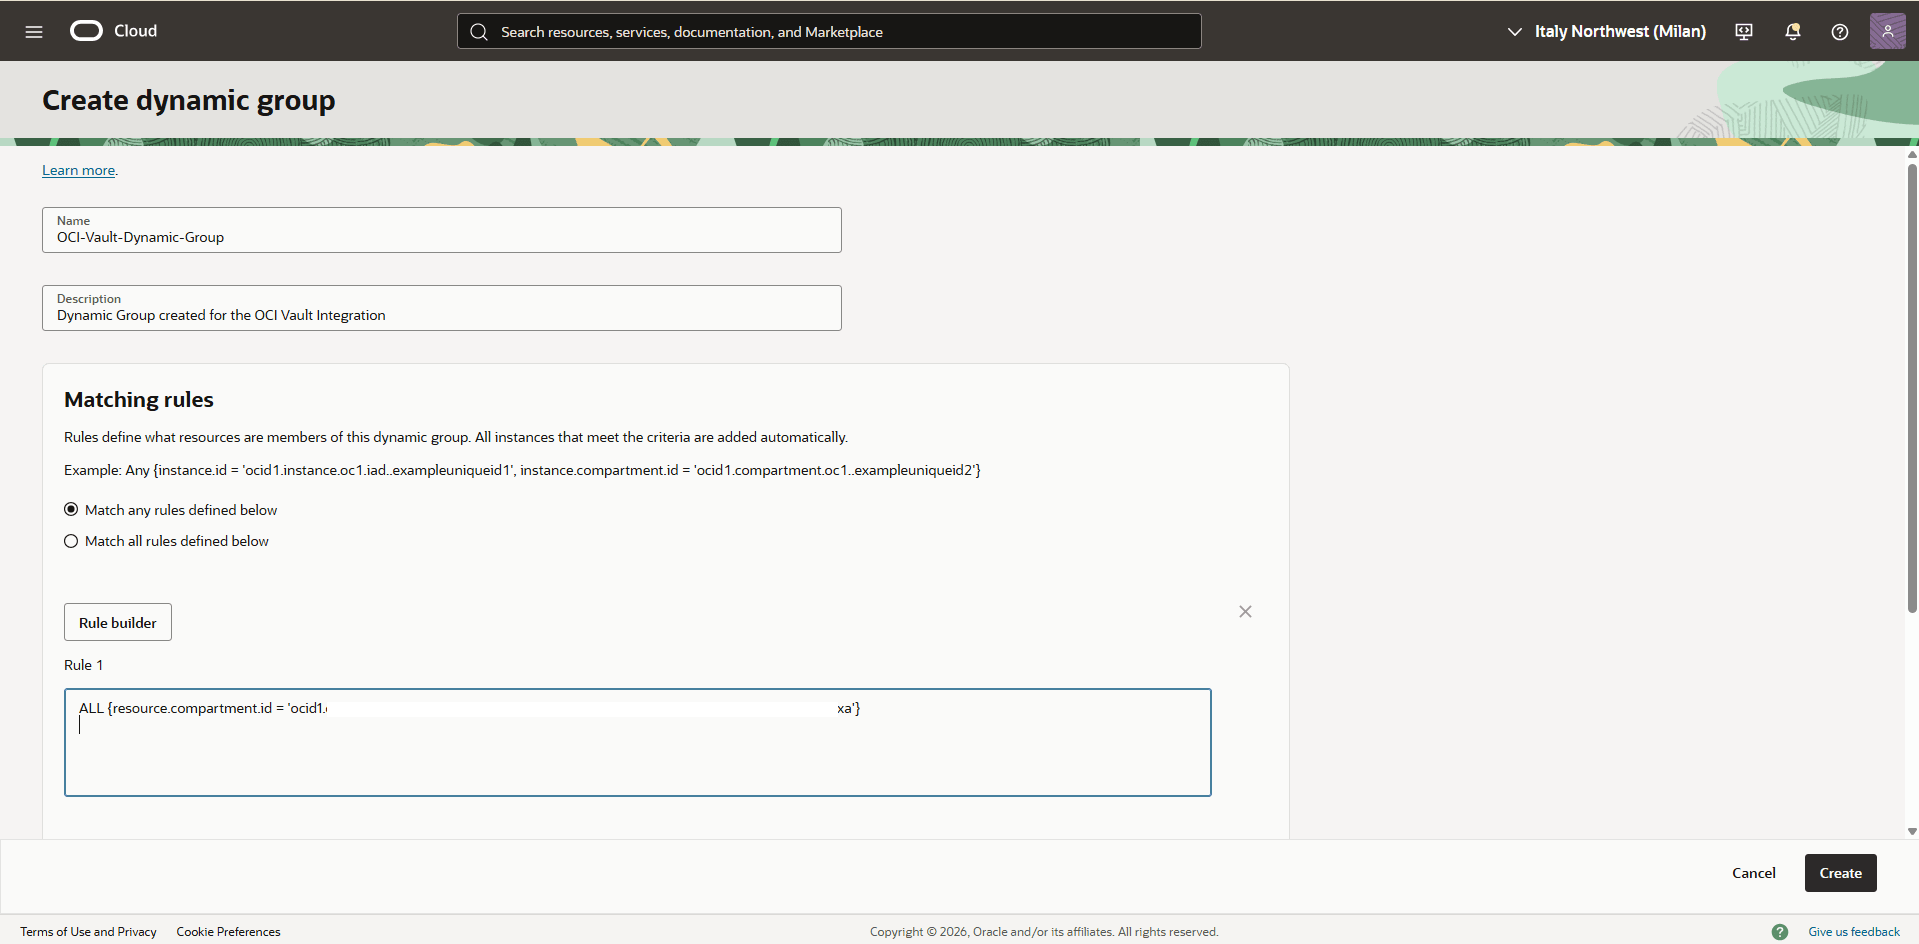
- Select the Dynamic groups tab, and then select the Create dynamic group button.
- Name: Enter a descriptive name for the group.
- Description: Provide a brief description of the dynamic group’s purpose.
- Matching Rules: Enter the following statement, replacing
<your_Compartment_OCID>with the compartment OCID you noted in the previous step:ALL {resource.compartment.id = '<your_Compartment_OCID>'} - Review your information, and then select the Create button.
- Create an OCI Policy
- From the navigation menu , select Identity & Security, and then select Policies.
- In the Applied Filter section, select the Root Compartment, and then select the Create Policy button.
- Name: Enter a descriptive name for the group.
- Description: Provide a brief description of the dynamic group’s purpose.
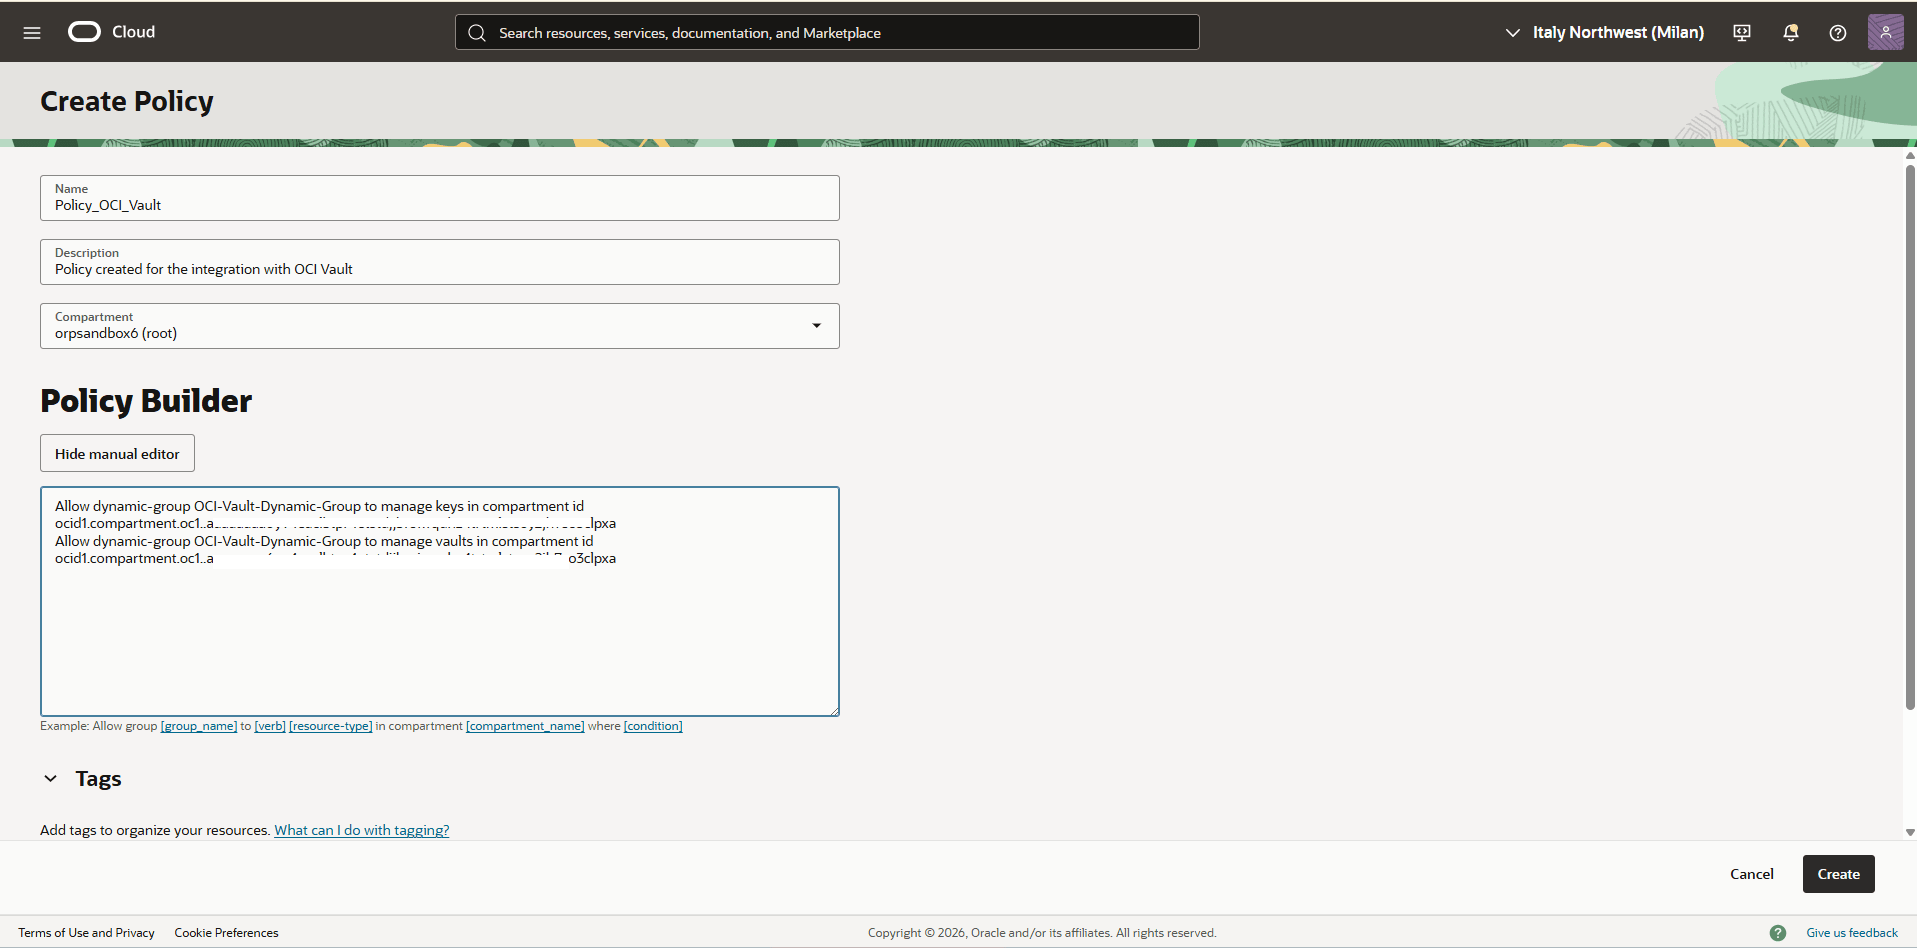
- Enable the Show manual editor button, and then enter the following statements. Replace
<dynamic-group-name>with the name of the dynamic group created in the previous step, and<your_Compartment_OCID>with your specific compartment OCID:Allow dynamic-group <dynamic-group-name> to manage vaults in compartment id <your_Compartment_OCID> Allow dynamic-group <dynamic-group-name> to manage keys in compartment id <your_Compartment_OCID> - Review your information and then select the Create button.
- Create a Database and Use OCI Vault as the Key Management Solution
- Create an Exadata VM Cluster and Exadata Database. See Exadata VM Cluster and Exadata Database for step-by-step instructions.
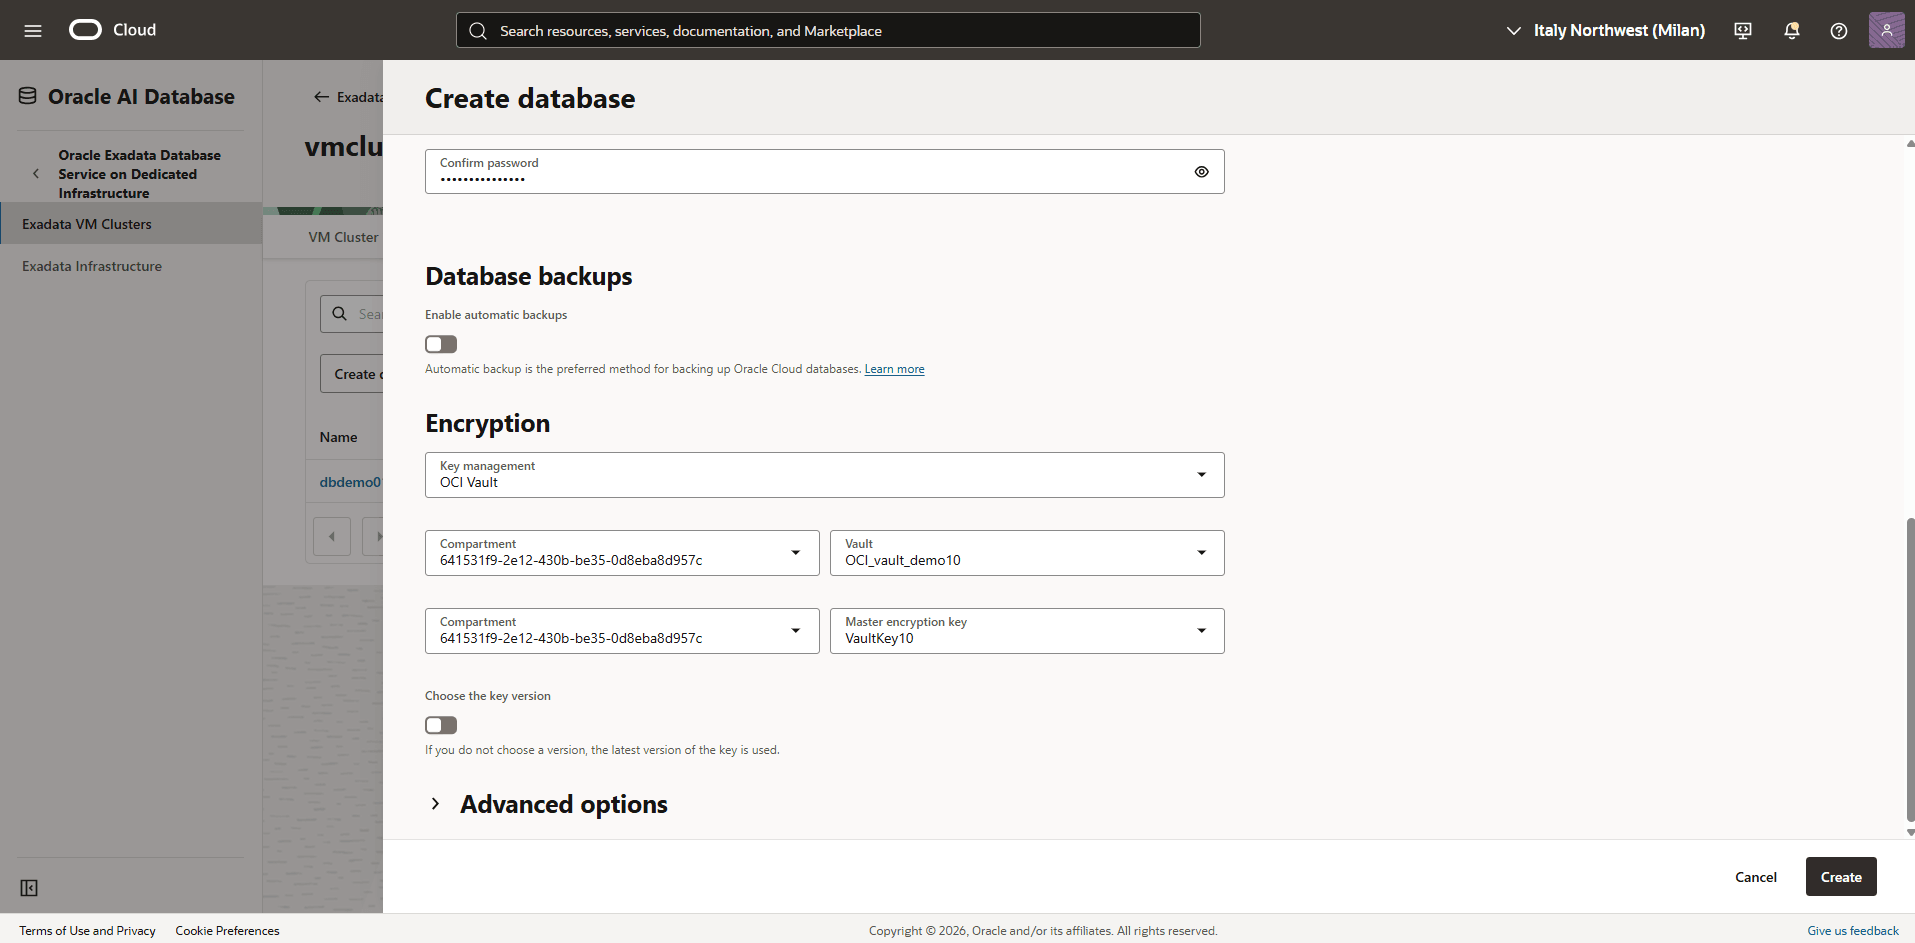
- Navigate to the Encryption section and then select OCI Vault.
- Select the Compartment where you created your OCI Vault, and then select OCI Vault from the dropdown list.
- Select the Compartment where you created the OCI key, then select the Key from the dropdown list.
- Review your information and then select the Create button.
- Modify the Key Management from Oracle Wallet to OCI Vault
To update key management from Oracle Wallet to OCI Vault, complete the following steps:
- From the OCI console, select Oracle AI Database, and then select Oracle Exadata Database Service on Dedicated Infrastructure.
- From the left menu, select Exadata VM Clusters, and then select your Exadata VM Cluster that you wish to modify.
- Navigate to Databases tab and then select the name field of the database you wish to modify.
- From the Encryption section, confirm that Key management is set to Oracle Wallet, and then select the Change button.
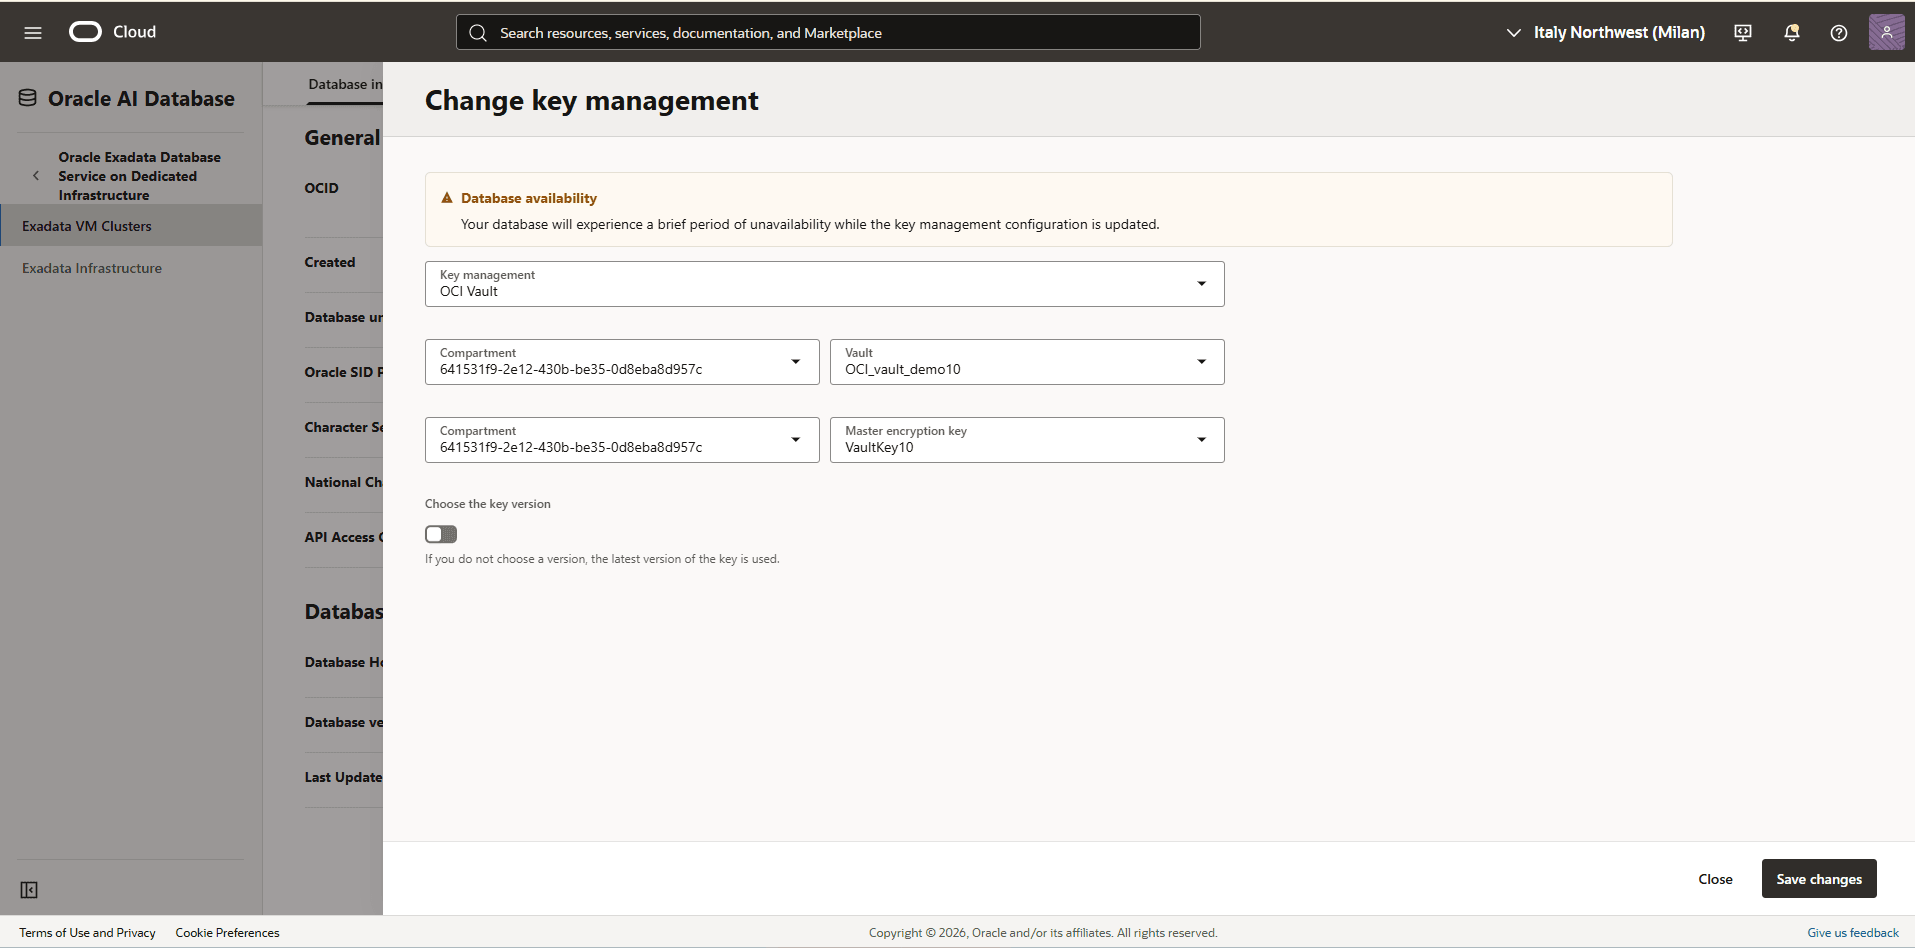
- From the Change key management page, enter the following information:
- Select your Key management as OCI Vault from the dropdown list.
- Select the Compartment where you created your OCI Vault, and then select the OCI Vault from the Vault dropdown list.
- Select the Compartment where you created your OCI key, and then select the OCI key from the Master encryption key dropdown list.
- Select the Save changes button.
- Verify the Database Encryption Method
- From the OCI console, select Oracle AI Database, and then select Oracle Exadata Database Service on Dedicated Infrastructure.
- From the left menu, select Exadata VM Clusters, and then select the name of the Exadata VM Cluster that you wish to verify.
- Select the Databases tab, and then select the name of the database that you wish to validate.
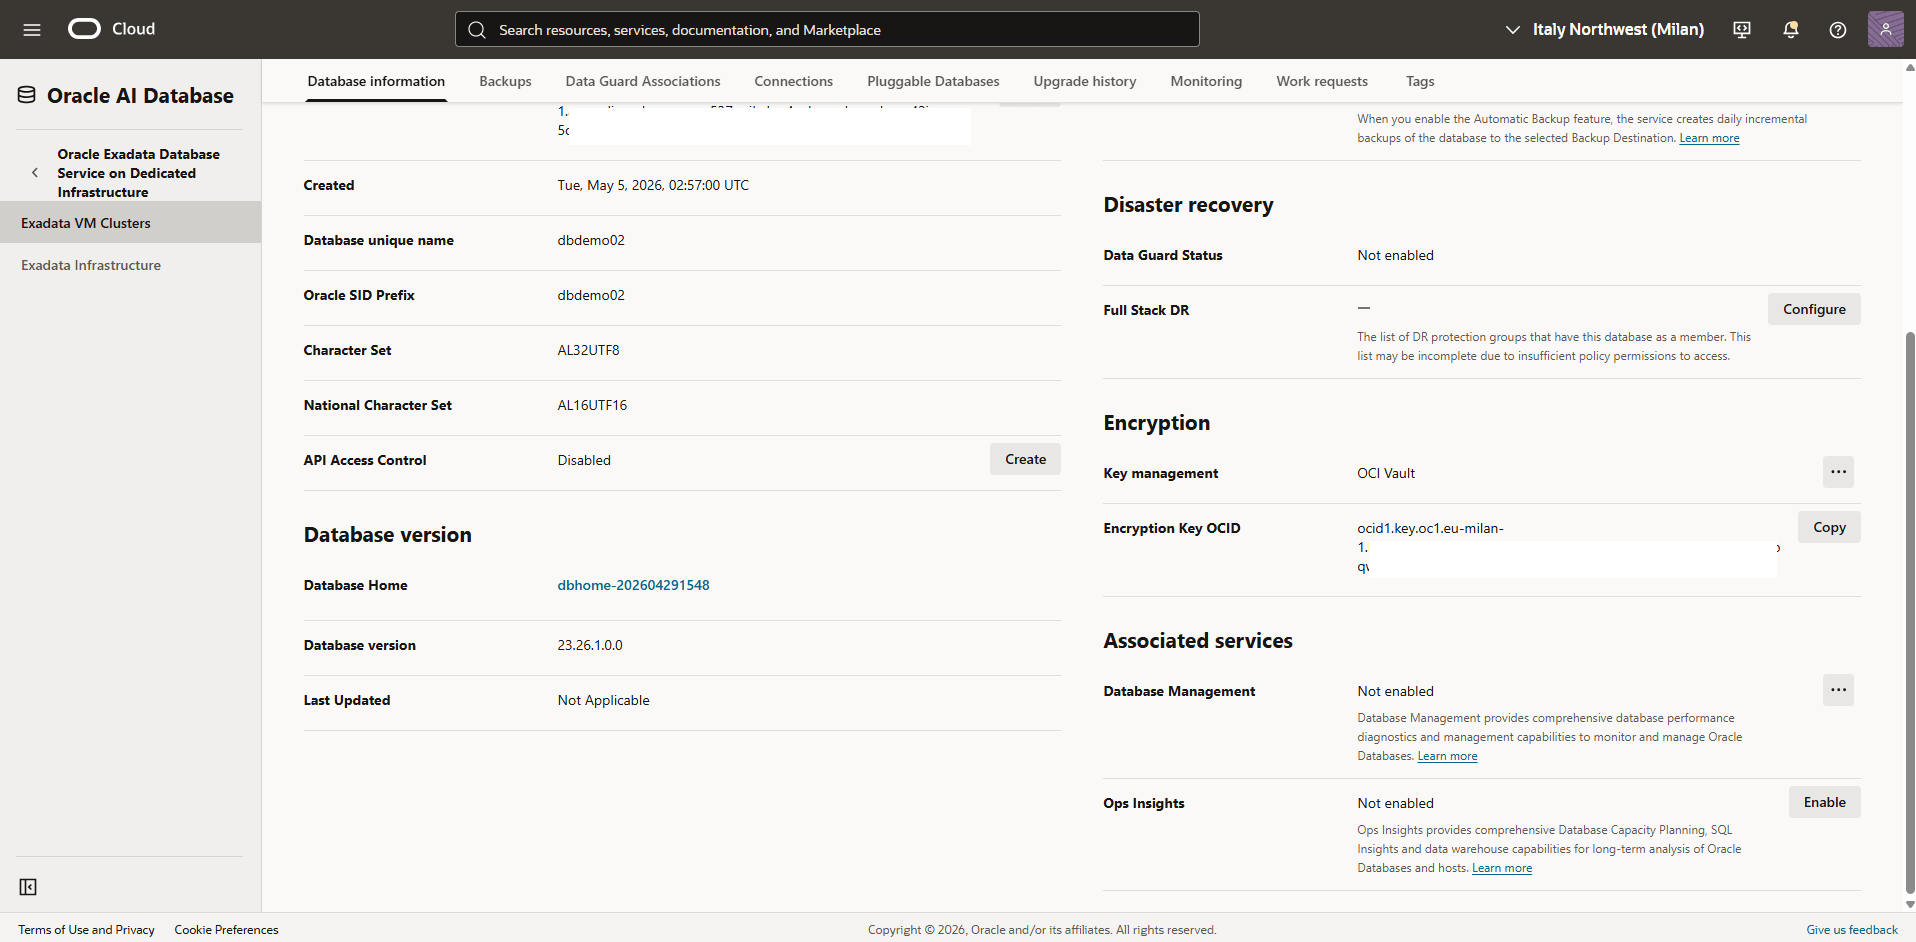
- Scroll down to the Encryption section. In this section, you can confirm that Key Management is set to OCI Vault and view the Encryption Key OCID of the OCI key in use.
Rotate the OCI Vault Key for a Container Database (CDB)
- From the OCI console, select Oracle AI Database, and then select Oracle Exadata Database Service on Dedicated Infrastructure.
- From the left menu, select Exadata VM Clusters, and then select your Exadata VM Cluster that you want to rotate encryption keys.
- Select the Databases tab, and then select the name of the database that you want to rotate encryption keys.
- From the Encryption section, verify that the Key Management is set to OCI Vault.
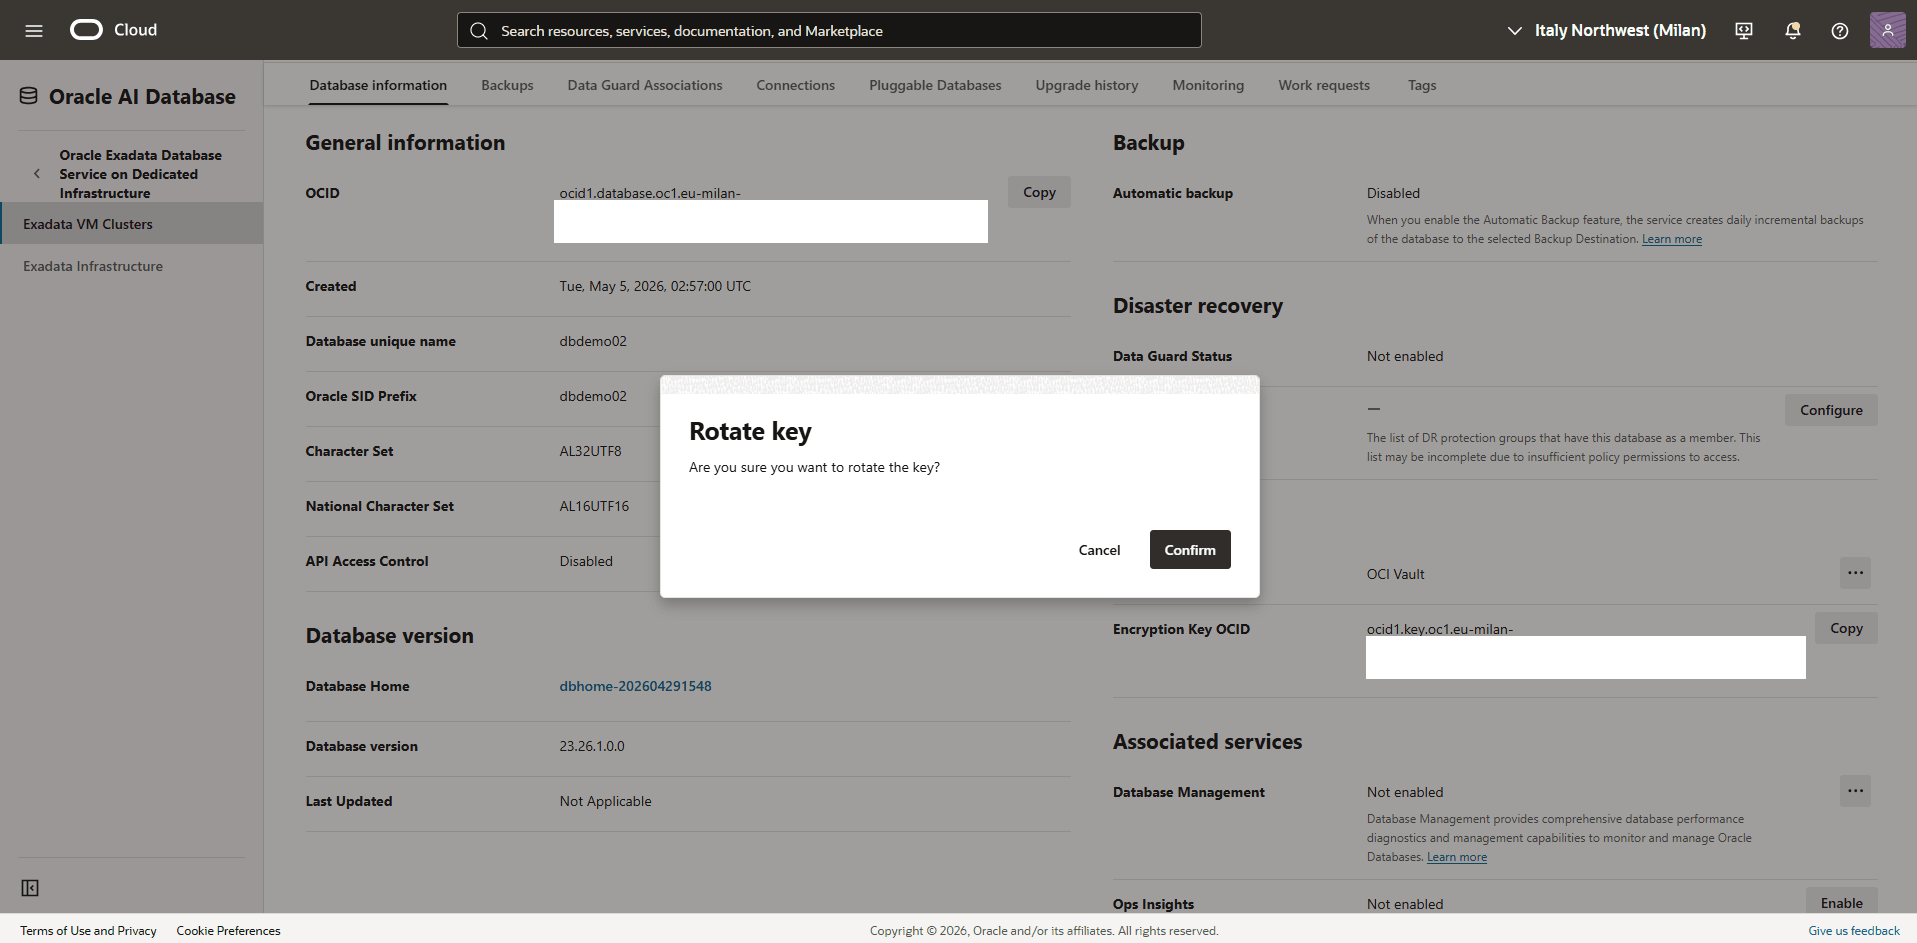
- Select the Action menu( three dots) and then select the Rotate option.
- Select the Confirm button to save the changes.
Rotate the OCI Vault Key for a Pluggable Database (PDB)
- From the OCI console, select Oracle AI Database, and then select Oracle Exadata Database Service on Dedicated Infrastructure.
- Select your Exadata VM Cluster, and then select Databases tab.
- Select the Name field of your database you are using, then select Pluggable Databases link under the Resources section.
- Select the Name field of the Pluggable Database you want to use.
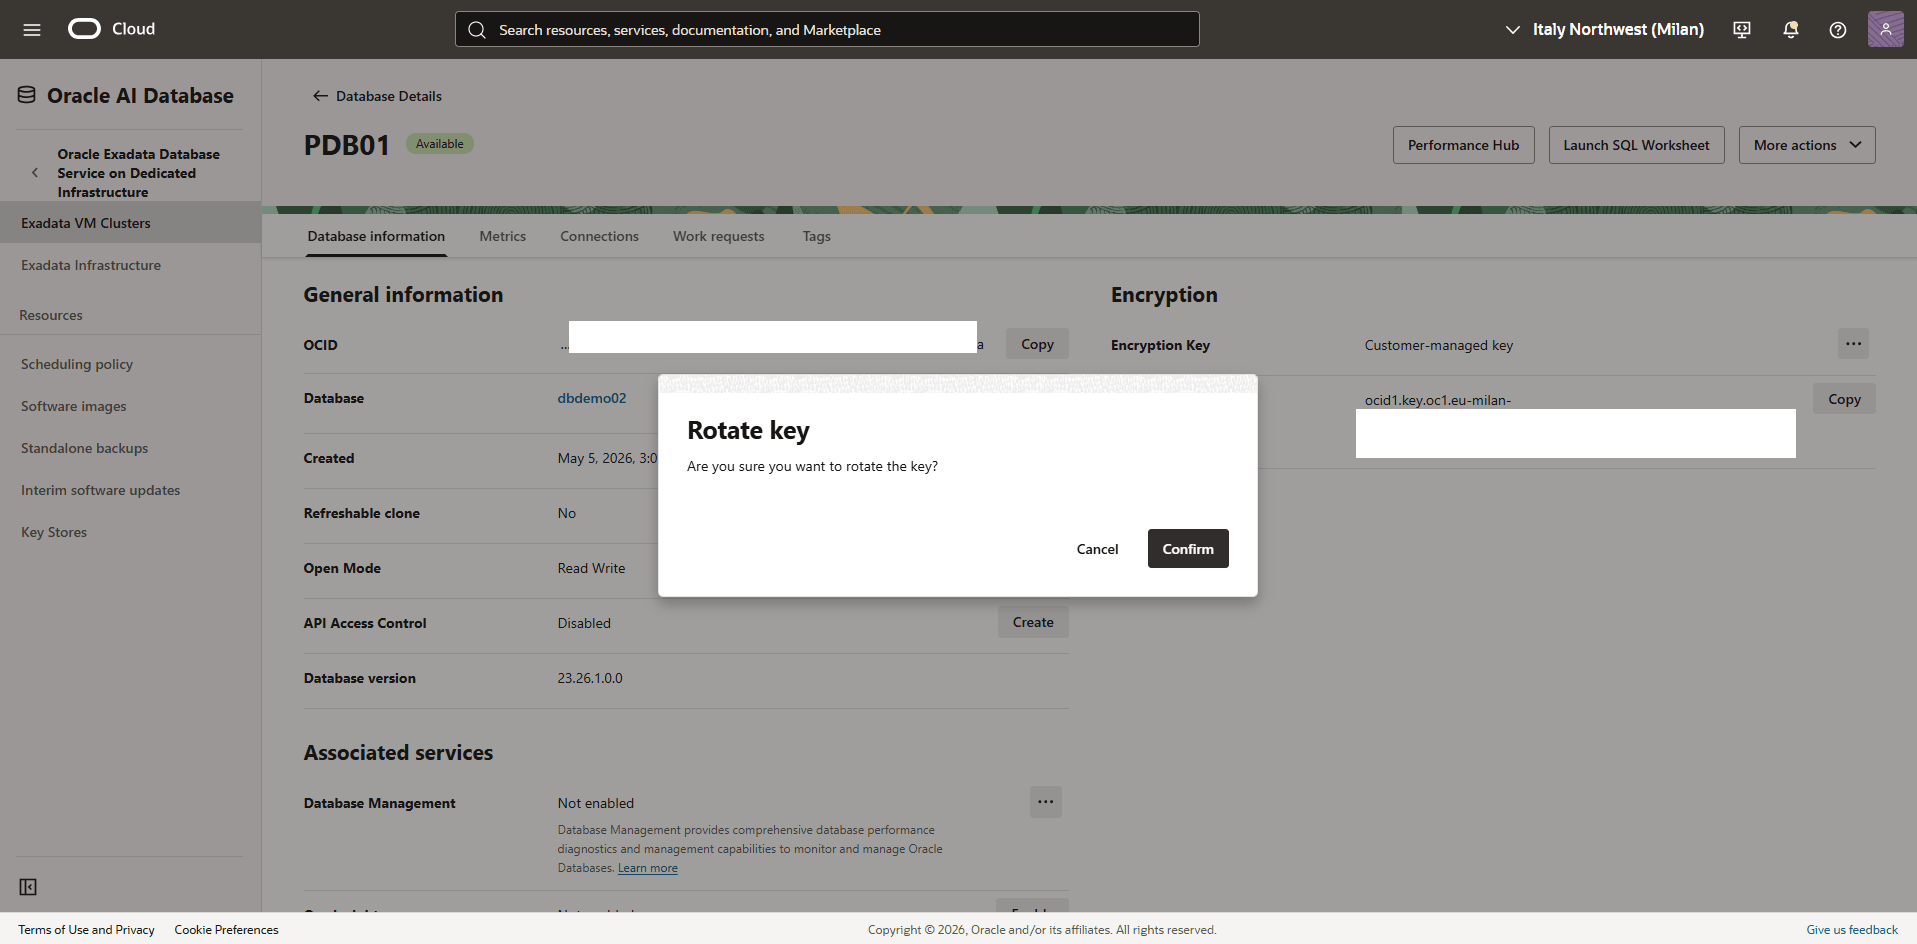
- The Encryption section displays that the Key Management is set as Customer-managed key.
- Select the Action menu( three dots) and then select the Rotate option.
- Select the Confirm button to save the changes.
- Create an OCI Vault
Oracle Exadata Database Service on Dedicated Infrastructure integration with OCI Vault is only available through OCI Console.
There is currently no content for this page. Oracle AI Database@Azure team intends to add content here, and this placeholder text is provided until that text is added. The Oracle AI Database@Azure team is excited about future new features, enhancements, and fixes to this product and this accompanying documentation. We strongly recommend you watch this page for those updates.
There is currently no content for this page. Oracle AI Database@Azure team intends to add content here, and this placeholder text is provided until that text is added. The Oracle AI Database@Azure team is excited about future new features, enhancements, and fixes to this product and this accompanying documentation. We strongly recommend you watch this page for those updates.