Exascale VM Cluster
To create an Exascale VM Cluster, follow these steps.
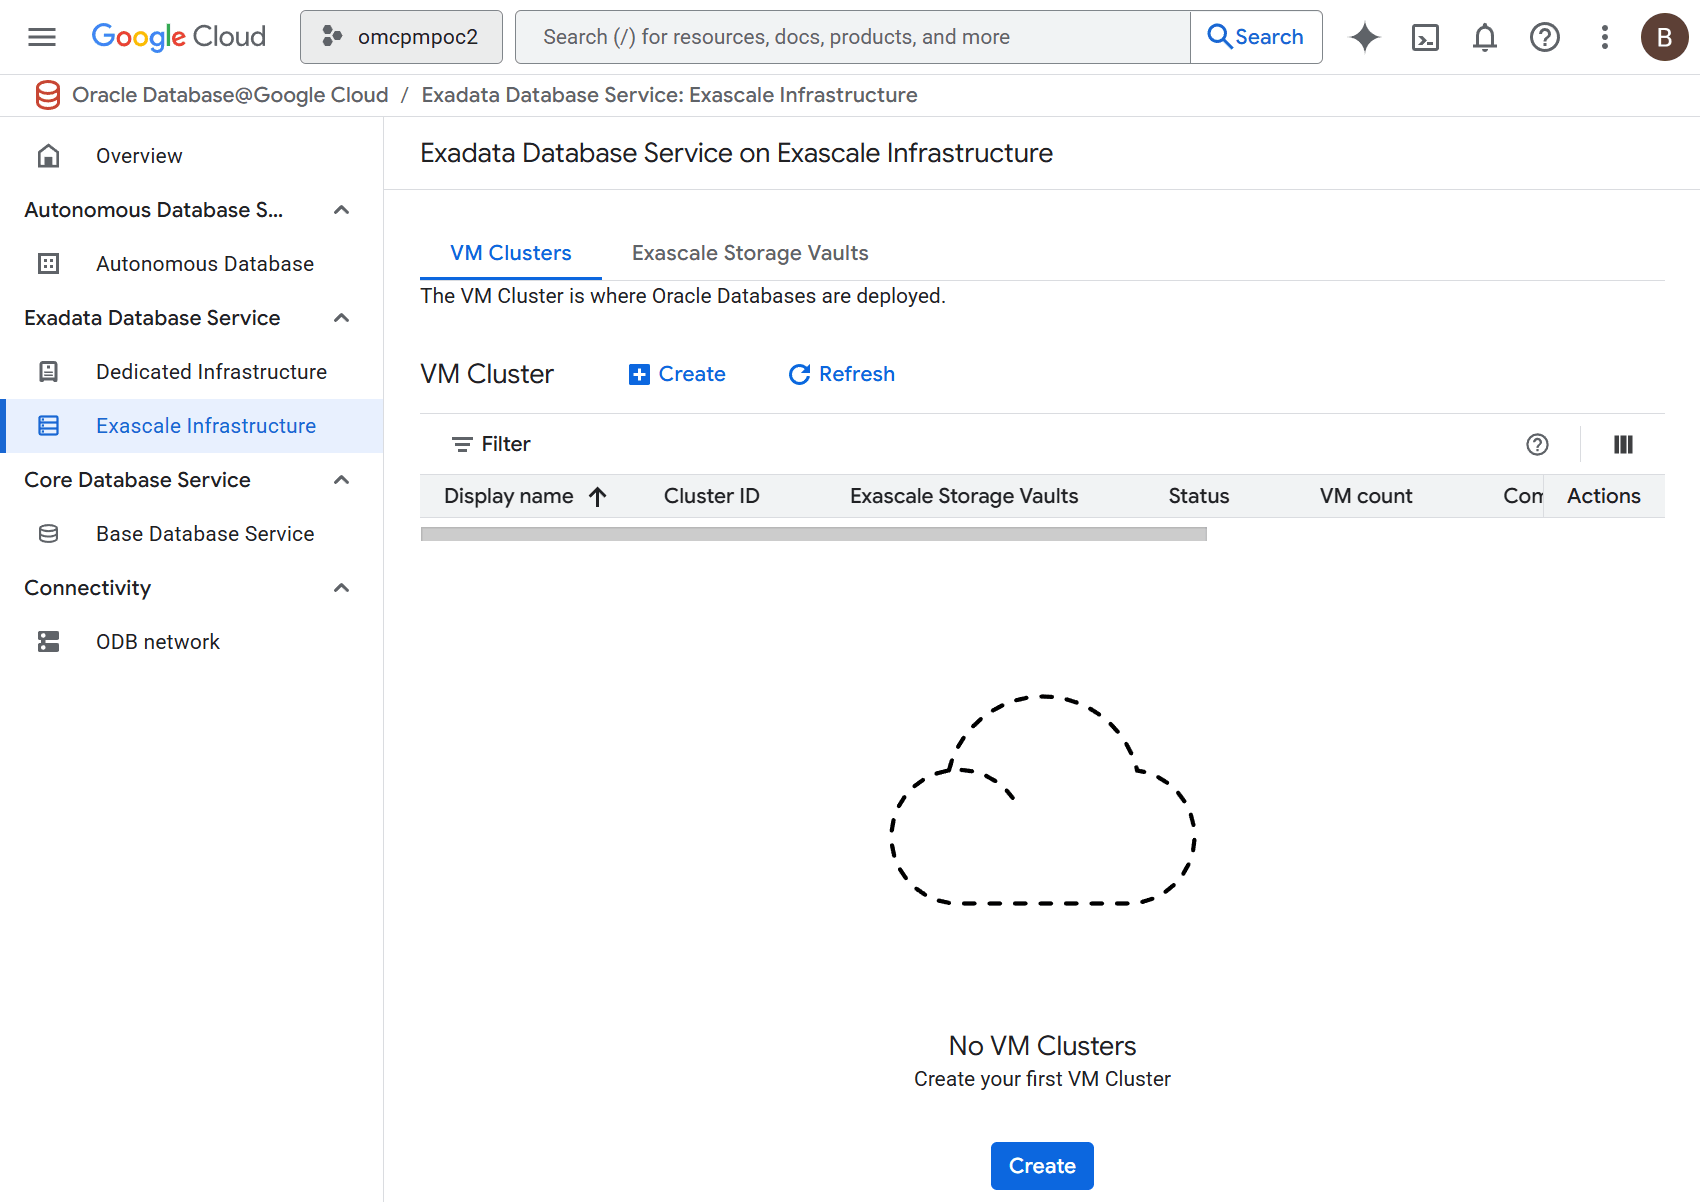
- From the Oracle Database@Google Cloud dashboard , select Exadata Database Service > Exascale infrastructure from the left-menu.
- Select the + Create button.

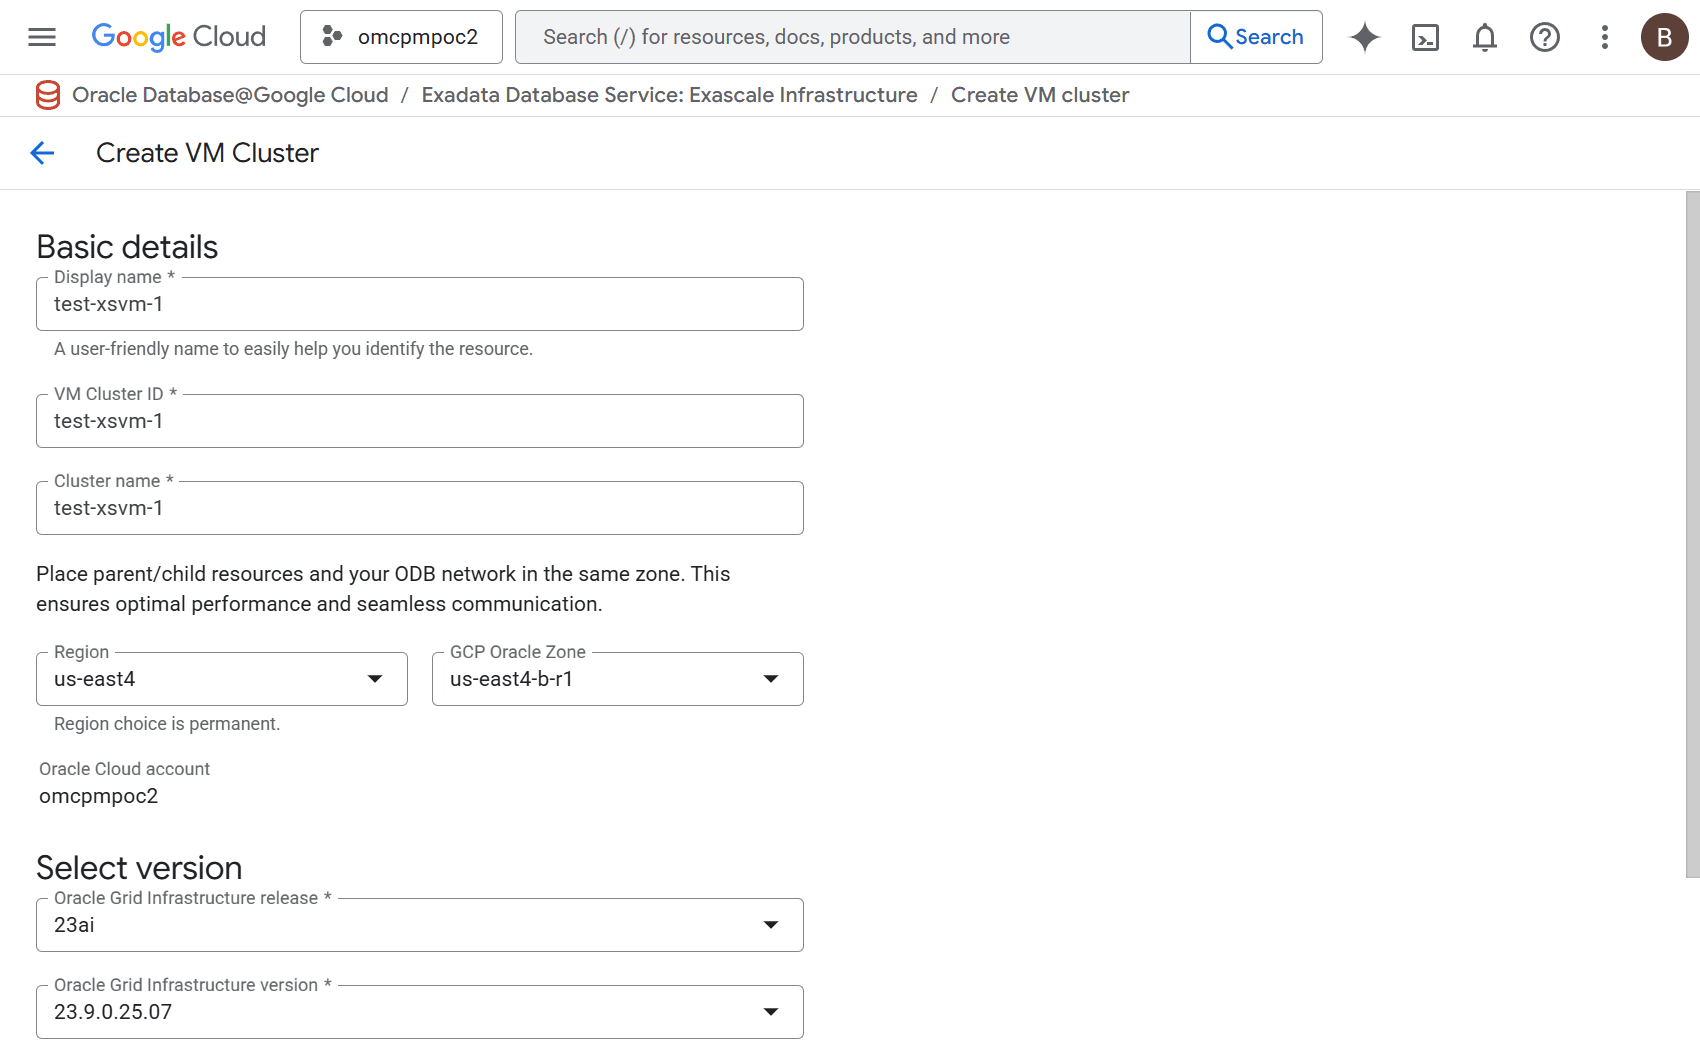
- In the Basic details section, enter the following information.
- In the Display name field, enter a value of your choice from 1-255 characters consisting of letters, numbers, underscores (_), and hyphens (-) that must start with a letter or underscore and cannot contain two consecutive hyphens.
- In the VM Cluster ID field, enter a value of your choice from 1-63 characters consisting of lowercase letters, numbers, and hyphens (-) that must start with a lowercase letter and end with a lowercase letter or number.
- The Cluster name field is optional. If you enter a value, it must be 1-11 characters consisting of letters, numbers, and hyphens (-) starting with a letter.
- In the Region drop-down, select the region for your instance. This cannot be change after creation.
- In the GCP Oracle Zone drop-down, select a value. This value cannot be changed after the Base Database is created.
- In the Select version section, enter the following information.
- In the Oracle Grid Infrastructure release drop-down, select the available release you wish to use.
- In the Oracle Grid Infrastructure version drop-down, select the available version you wish to use. The values available here are dependent upon your selection in the Oracle Grid Infrastructure release field

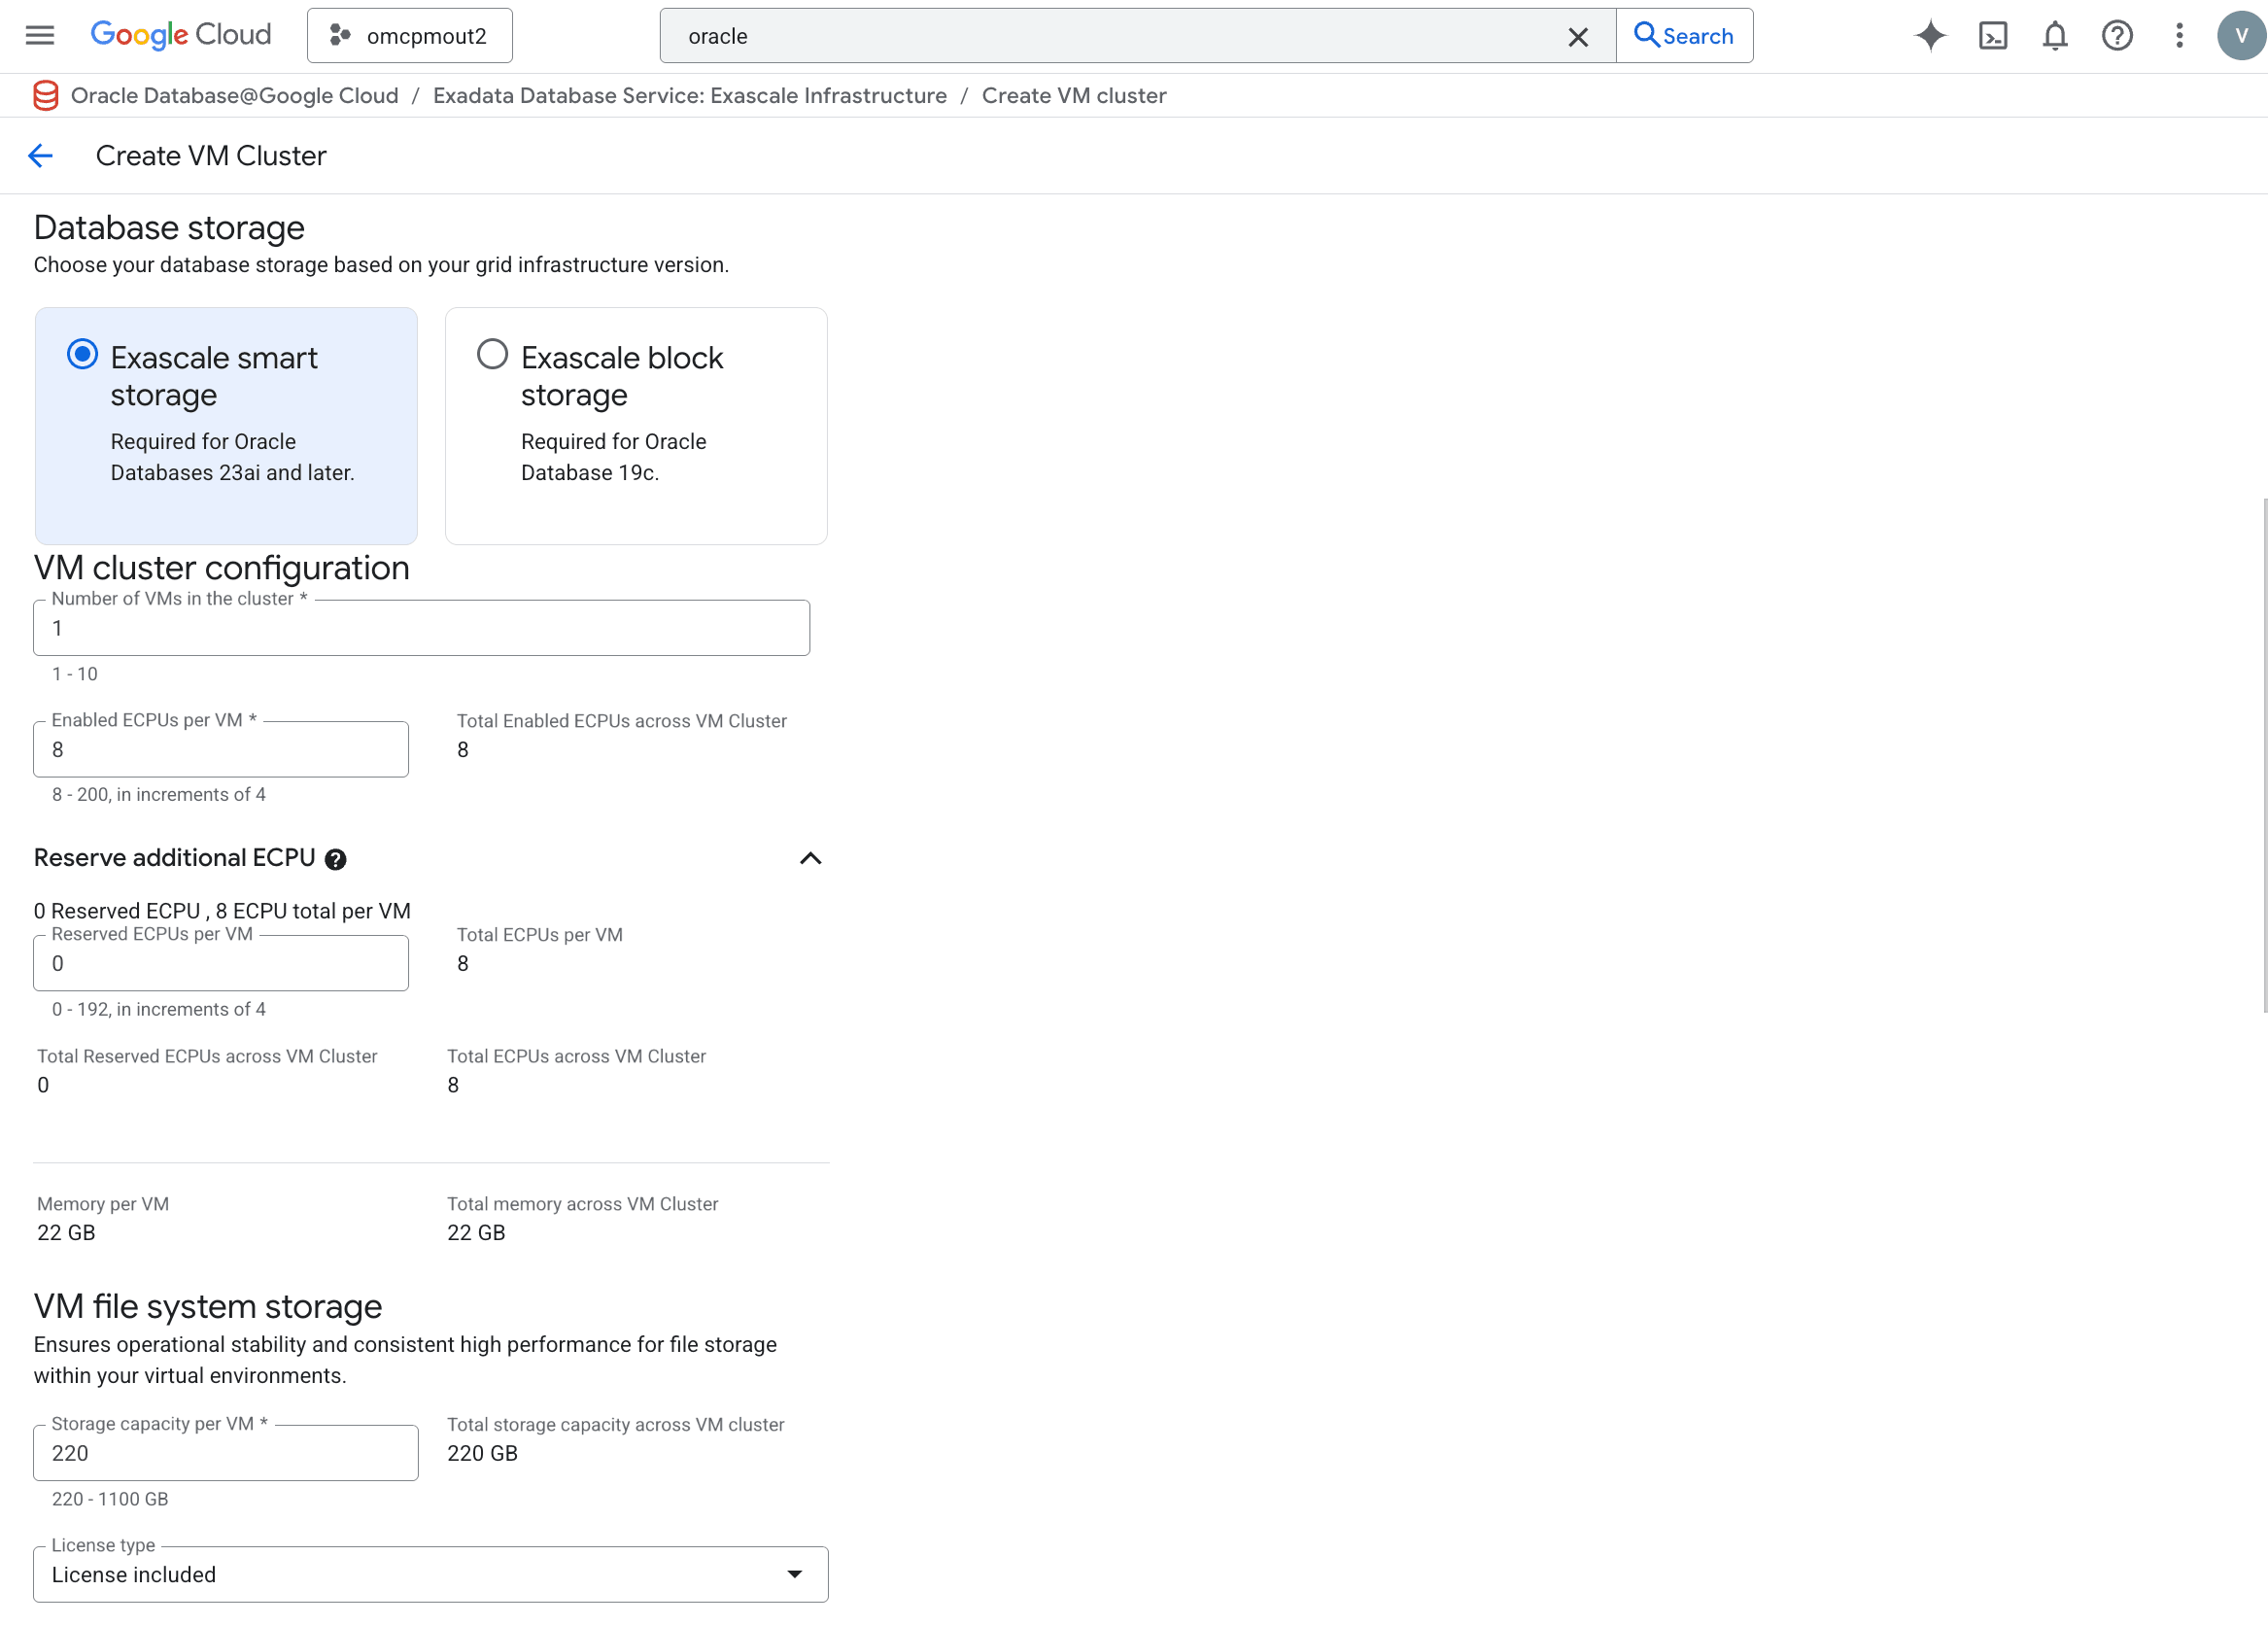
- In the Database storage section, select either Exascale smart storage or Exascale block storage. Exascale smart storage is required for Oracle Database 23ai and later. Exascale block storage is required for Oracle Database 19c.
- In the VM cluster configuration section, enter the following information.
- The Number of VMs in the cluster field, enter a value from 1 to 10.
- In the Enabled ECPUs per VM field, a value from 8 to 200 in increments of 4.
- In the Total Enabled ECPUs across VM Cluster is a calculated read-only field.
- The Reserve additional ECPUs per VM section is optional and collapsed by default. Reserving ECPUs allows for quick scaling and consistent performance by eliminating allocation delays. You can enter the following fields.
- In the Reserved ECPUs per VM field, enter a value from 0 to 192 in increments of 4.
- The Total ECPUs per VM, Total Reserved ECPUs across VM Cluster, and Total ECPUs across VM Cluster are calculated read-only fields.
- The Memory per VM and Total Memory across VM Cluster are calculated read-only fields.
- In the VM file system storage section, enter the following information.
- In the Storage capacity per VM field, enter a value in one (1) GB increments from 220 to 1100 GB.
- The Total storage capacity across VM cluster is a calculated read-only field.
- In the License type radio group, select either License included or Bring your own license (BYOL).
Note
License included means the cost of this resource will include the Oracle software license(s) and the service. Bring Your Own License (BYOL) means you use your organization's existing Oracle software licenses for this resource. For more information, see Bring Your Own License.

- In the Exascale Database Storage Vault section, you can either create a new vault or select an existing vault. Enter the following information.
- Select the Create new vault button to create a new vault, and enter the following information.
- In the Display name field, enter a value of your choice from 1-255 characters consisting of letters, numbers, underscores (_), and hyphens (-) that must start with a letter or underscore and cannot contain two consecutive hyphens.
- In the Vault ID field, enter a value of your choice from 1-63 characters consisting of lowercase letters, numbers, and hyphens (-) that must start with a lowercase letter and end with a lowercase letter or number.
- In the Storage capacity for databse field, enter a value from 300 to 100,000 GB.
- The Add smart flash and memory cache section is optional and collapsed by default. You can enter the following values.
- In the Smart flash and memory cache field, enter a value from 34% to 300%. This is the percent (%) of your Storage capacity for databse that will be created for Smart flash and memory cache.
- The Smart flash cache to be added is a calculated read-only field that shows the GB allocation to Smart flash and memory cache.
- Select the Create new vault button to create a new vault, and enter the following information.
- In the SSH keys section, enter the following information.
- In the SSH key 1 field, enter a valid public SSH key. You must define at least one (1) SSH key.
- If you wish to enter more that one (1) SSH key, select the + Add item button, and enter the additional key(s).
- If you wish to delete an SSH key, select the delete icon beside that SSH key value.

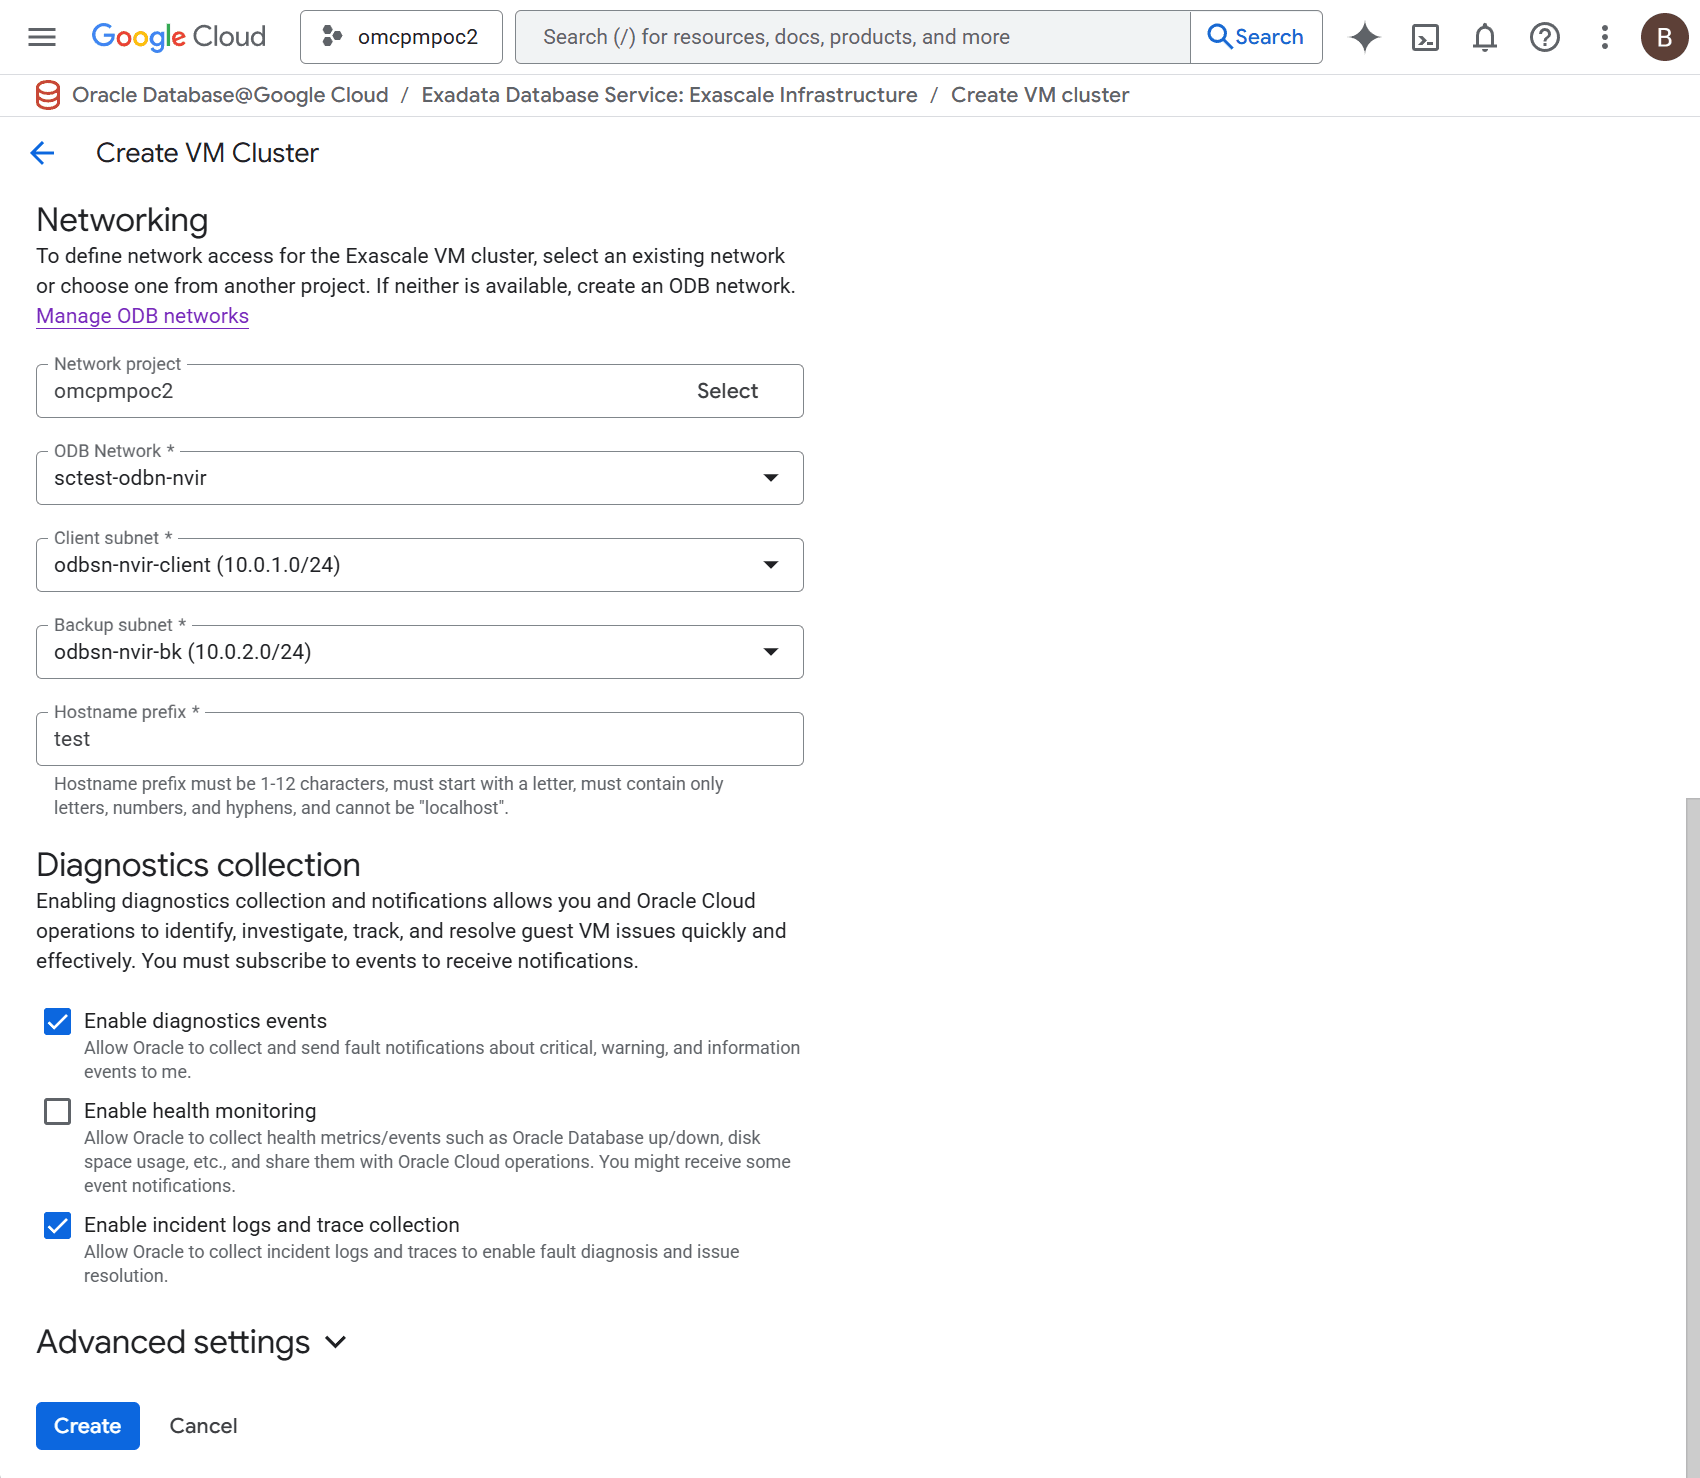
- In the Networking section, enter the following information.
- In the Network project drop-down, the default value is the current project. If you want to use a different Google Cloud project, select the Select button. You can then select from any project to which you have privileges.
- In the ODB Network drop-down, select from the available ODB networks in your project.
- In the Client subnet drop-down, select from the available client subnets in your project.
- In the Backup subnet drop-down, select from the available backup subnets in your project.
- In the Hostname prefix field, enter the prefix that will form the first portion of the Exadata VM Cluster host name.
- In the Diagnostics collection section, enter the following information.
- The Enable diagnostic events checkbox, allows Oracle to collect and send fault notifications about critical, warning, and information events to you.
- In the Enable health monitoring checkbox, allows Oracle to collect health metrics and events, such as Oracle Database up or down, disk space usage, and others, and share this data with OCIoperations. You might receive some event notifications.
- In the Enable incident logs and trace collection checkbox, allows Oracle to collect incident logs and traces to enable fault diagnosis and issue resolution.

- Select the Create button to finish creating your Exascale VM Cluster.
- You must wait for the Exascale VM Cluster creation to complete before deploying any Exascale Databases on that Exascale VM Cluster.
Exascale VM Cluster creation is only available through the gcloud Console and gcloud CLI.
There is currently no content for this page. Oracle Database@Google Cloud team intends to add content here, and this placeholder text is provided until that text is added. The Oracle Database@Google Cloud team is excited about future new features, enhancements, and fixes to this product and this accompanying documentation. We strongly recommend you watch this page for those updates.