Exadata Database
To modify an existing Exadata Database, follow these steps.
-
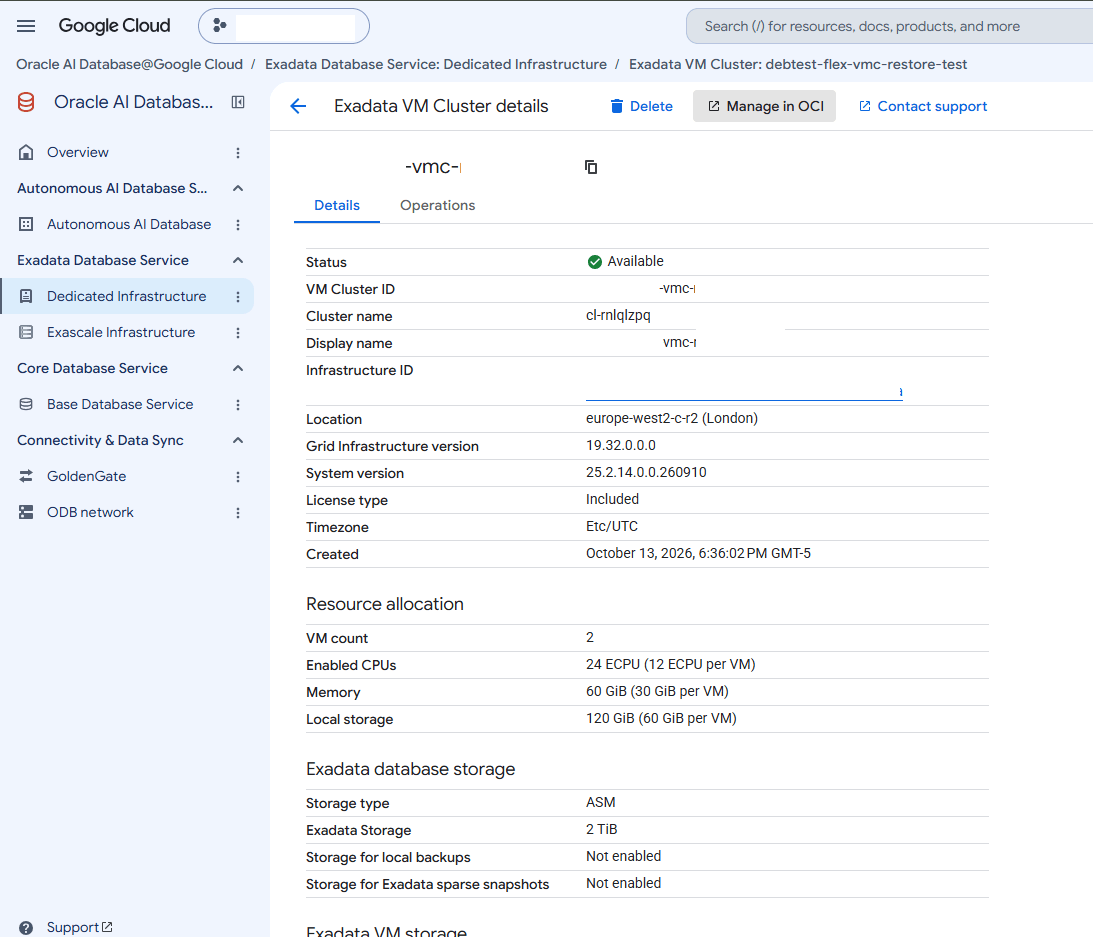
From the Oracle AI Database@Google Cloud dashboard, select Exadata Database Service > Dedicated infrastructure from the left-menu.
-
Select the Exadata VM Cluster tab from the Exadata Database Service list.
-
Select the Exadata VM Cluster from the list.
-
Select the Manage in OCI link.
-
-
From the OCI console, select Oracle AI Database, and then select Oracle Exadata Database Service on Dedicated Infrastructure.
-
From the left menu, select Exadata VM Clusters, and then select the Display name link of your Exadata VM Cluster that you are using.
-
Select the Databases tab and then select the database that you want to modify.
-
Select the More actions button, and then select the operation from the list.
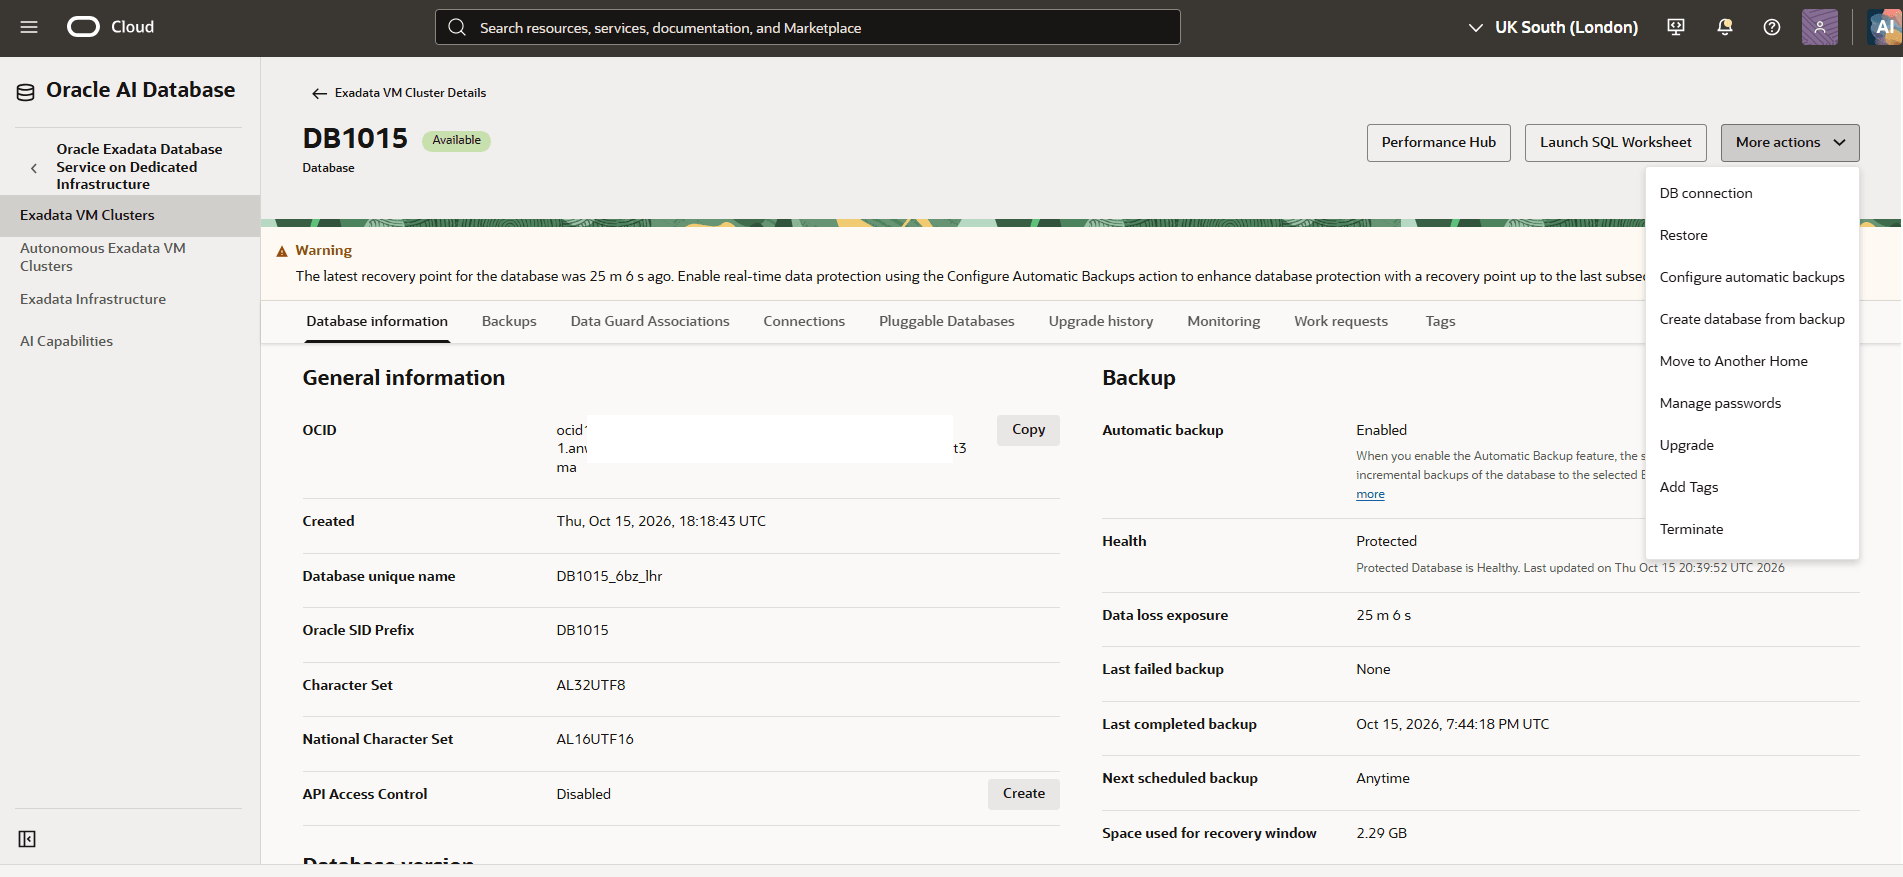
Operation Description Move Database to Another Home To move a database to another Database Home, see the step-by-step guide. Manage passwords Learn to manage administrator (SYS user) and TDE wallet passwords, see the step-by-step guide. Add Tags Add tags to organize your resources. For more information, see Resource Tags Learn more
-
For more information on how-to manage container databases (CDBs), see Provisioning and Managing Exadata Databases.
-
For more information on how-to manage pluggable databases (PDBs), see Create and Manage Exadata Pluggable Databases.
-
There is currently no content for this page. Oracle AI Database@Google Cloud team intends to add content here, and this placeholder text is provided until that text is added. The Oracle AI Database@Google Cloud team is excited about future new features, enhancements, and fixes to this product and this accompanying documentation. We strongly recommend you watch this page for those updates.
There is currently no content for this page. Oracle AI Database@Google Cloud team intends to add content here, and this placeholder text is provided until that text is added. The Oracle AI Database@Google Cloud team is excited about future new features, enhancements, and fixes to this product and this accompanying documentation. We strongly recommend you watch this page for those updates.
You can modify an Exadata Database in Google Cloud using OCI Terraform provider.
Prerequisites
-
Terraform or OpenTofu installed
-
HashiCorp OCI provider version >=7.0 (For more information, see the Create ODB Network Terraform page)
-
Exadata Database is created using Terraform
Sample Terraform Configuration using OCI Terraform Provider
# Modify Database Home resource "oci_database_db_home" "db_home" { vm_cluster_id = google_oracle_database_cloud_vm_cluster.exadata_vm_cluster.properties[0].ocid source = "VM_CLUSTER_NEW" display_name = "dbhome-26ai" db_version = "23.26.0.0.0" freeform_tags = { "env" = "dev" "lob" = "sales" } } # Modify Container and Pluggable Database resource "oci_database_database" "exa_database" { db_home_id = oci_database_db_home.db_home.id source = "NONE" database { db_name = "democdb" # db_unique_name = var.database_database_db_unique_name pdb_name = "demopdb" # database_software_image_id = oci_database_database_software_image.test_database_software_image.id admin_password = "********************" # Enter a strong password db_backup_config { auto_backup_enabled = true auto_backup_window = "SLOT_TWO" auto_full_backup_day = "TUESDAY" auto_full_backup_window = "SLOT_TWO" backup_deletion_policy = "DELETE_IMMEDIATELY" # Possible values: DELETE_IMMEDIATELY, DELETE_AFTER_RETENTION_PERIOD backup_destination_details { type = "OBJECT_STORE" # Possible values: OBJECT_STORE, RECOVERY_APPLIANCE } recovery_window_in_days = 7 run_immediate_full_backup = true } tde_wallet_password = "********************" # Enter a strong password # sid_prefix = var.database_database_sid_prefix character_set = "AL32UTF8" ncharacter_set = "AL16UTF16" freeform_tags = { "env" = "dev" } } }-