Exadata Infrastructure
To modify an existing Exadata Infrastructure, follow these steps.
-
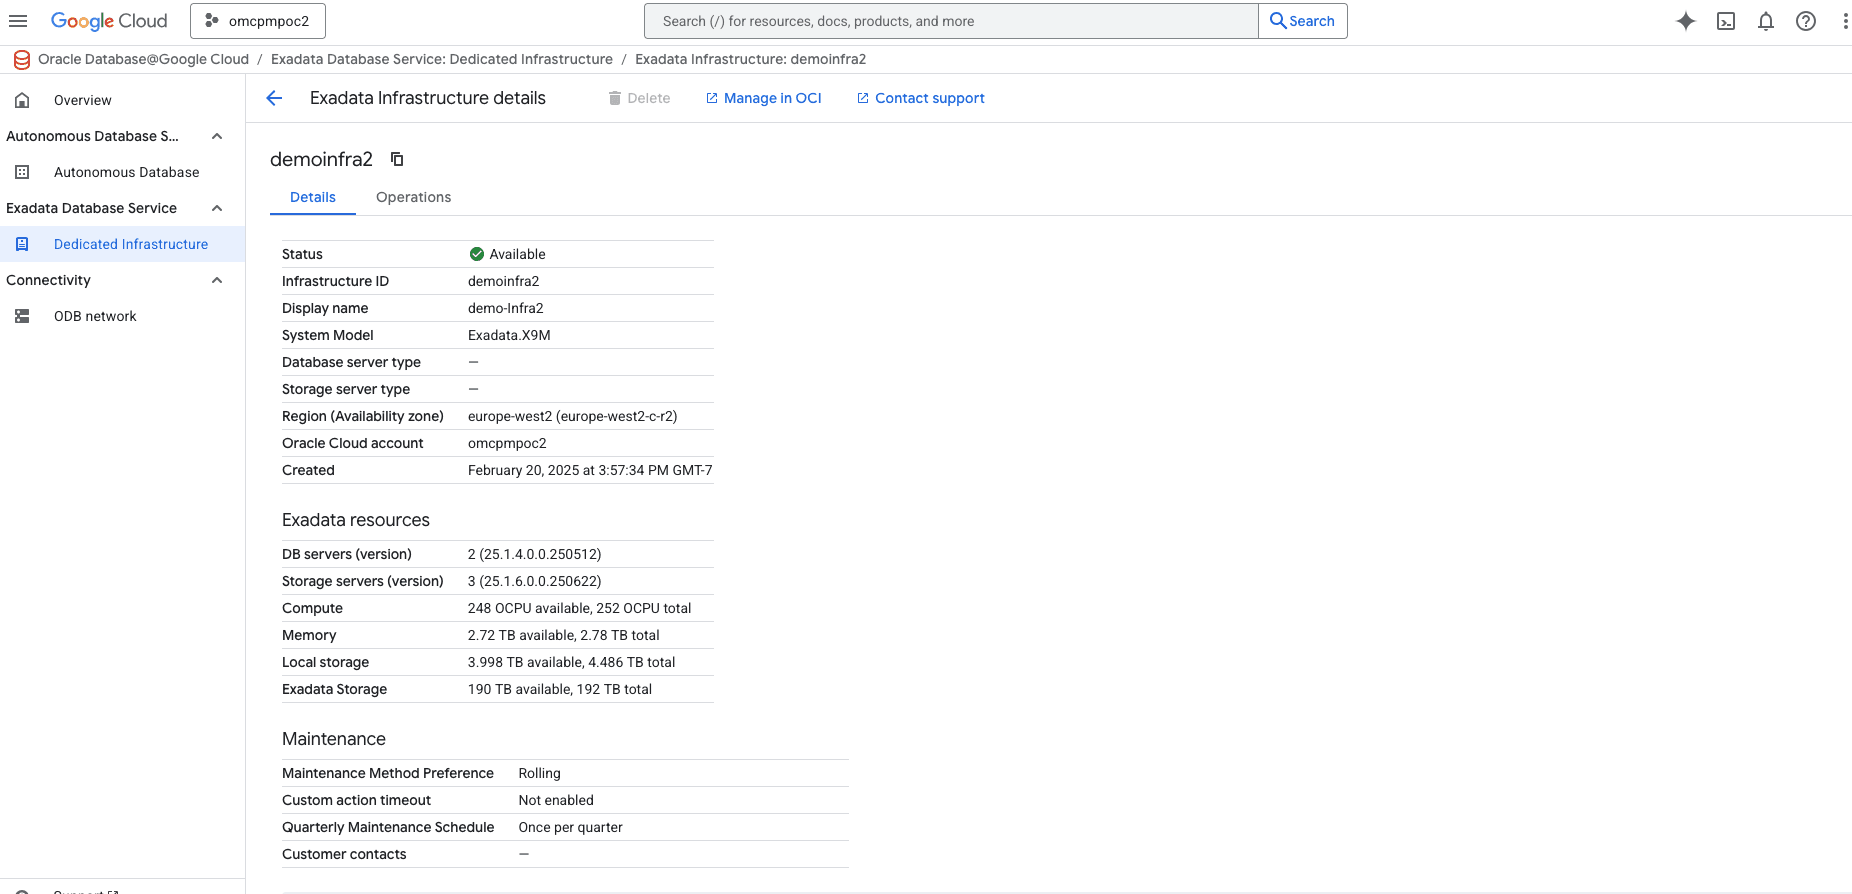
From the Oracle AI Database@Google Cloud dashboard, select Exadata Database Service > Dedicated infrastructure from the left-menu.
-
Select the Exadata Infrastructure tab from the Exadata Database Service list.
-
Select the Exadata Infrastructure from the list.
-
Select the Manage in OCI link.
-
-
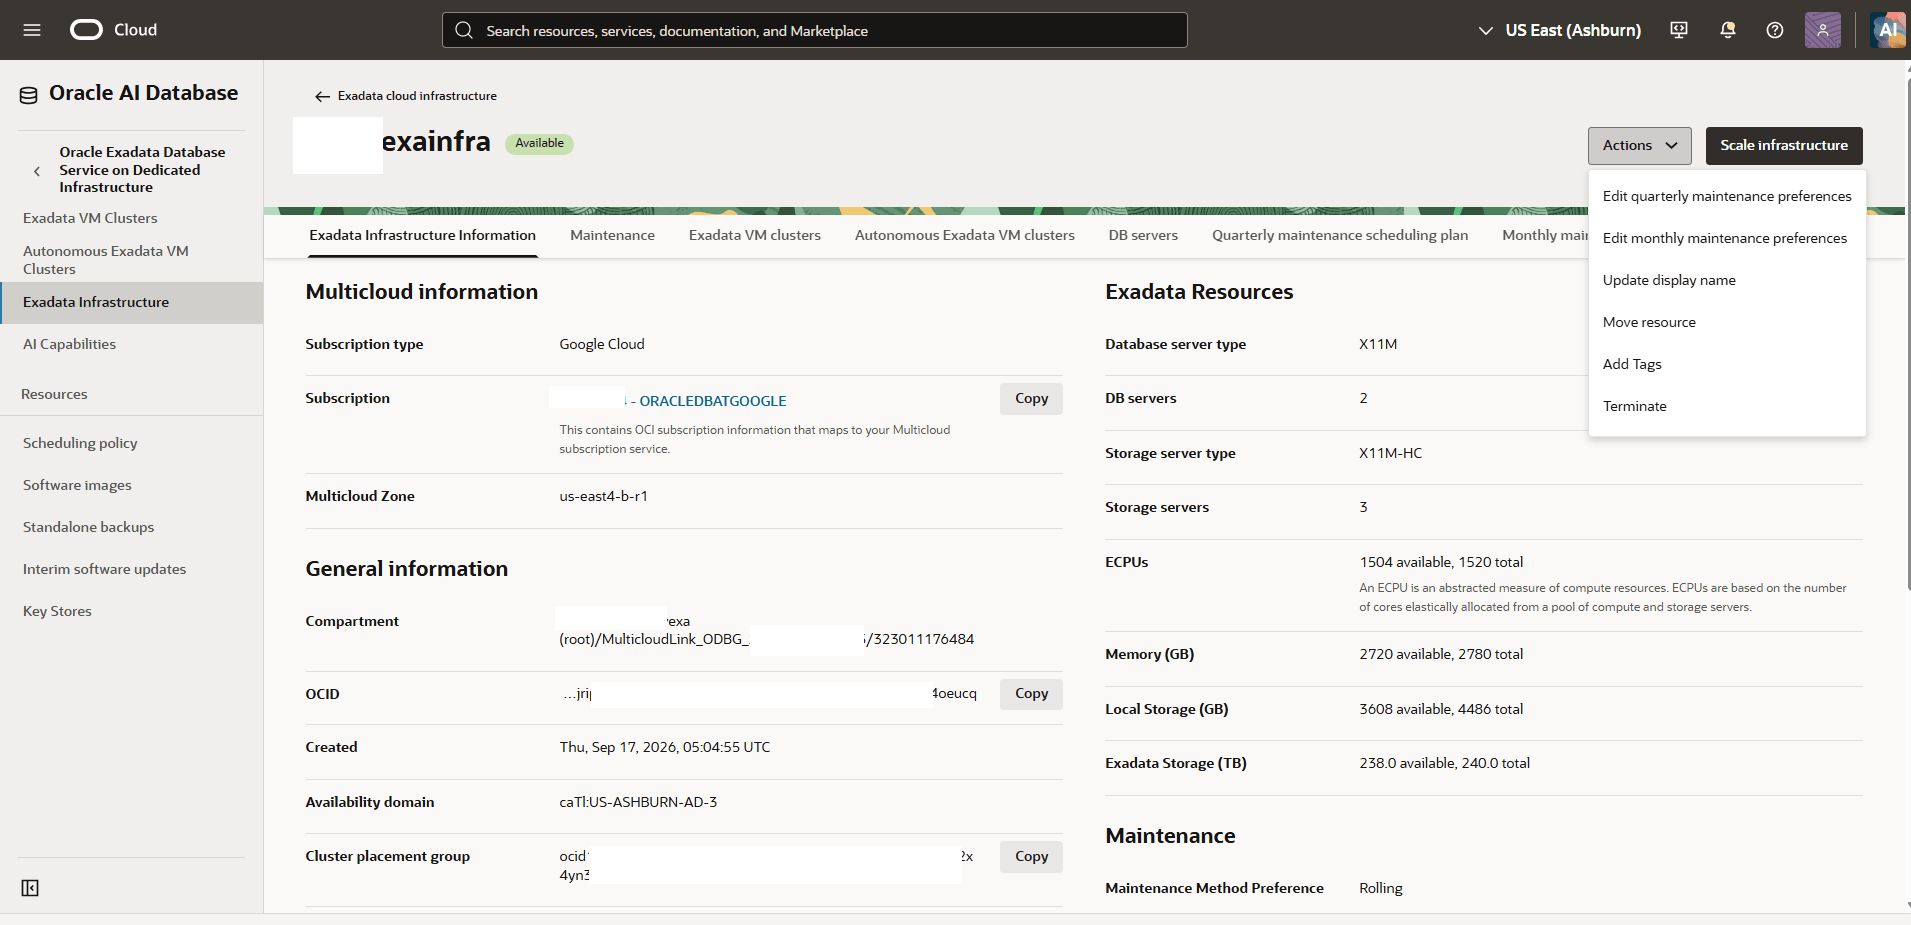
To perform a management operation, in the OCI console for the selected Exadata Infrastructure, select the Actions button, and then select the desired operation from the list.
-
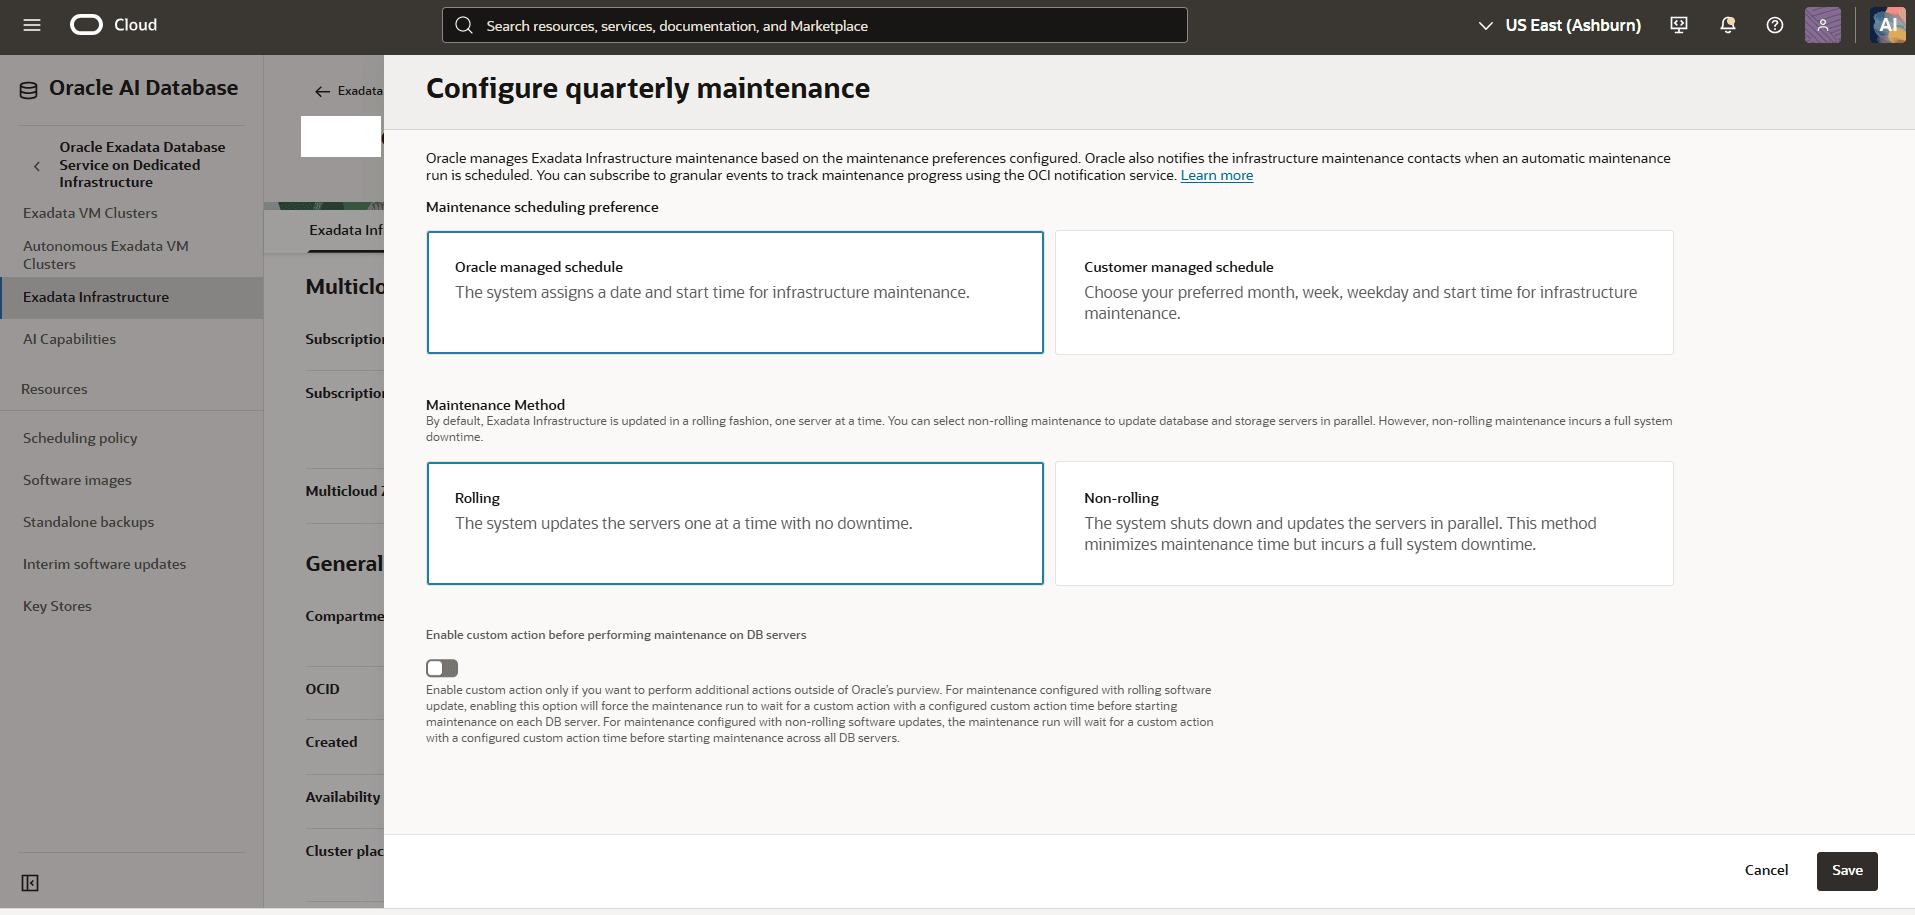
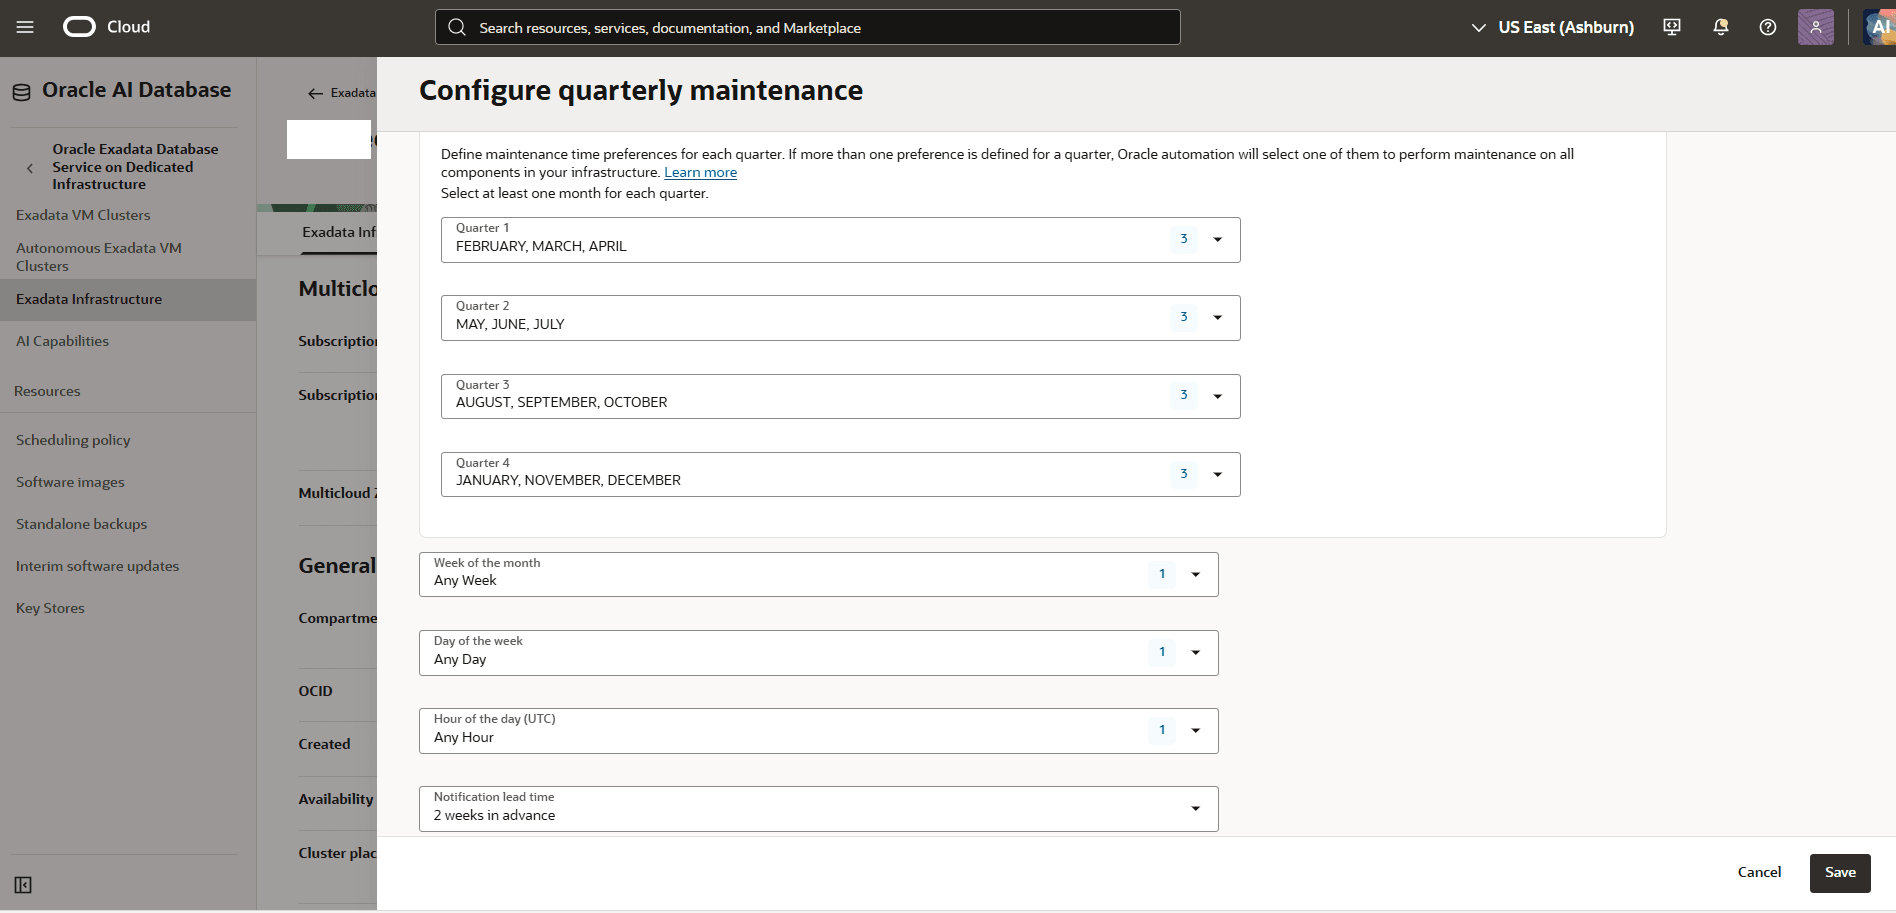
To change quarterly maintenance preferences, in the OCI console for the selected Exadata Infrastructure, select the Actions button and the Edit quarterly maintenance preferences option from the menu. From the Configure quarterly maintenance page, you can change the maintenance options.
-
The Maintenance scheduling preference allows you to select between an Oracle managed schedule and a Customer managed schedule.
-
Oracle managed schedule: The system assigns a date and start time for infrastructure maintenance.
-
Customer managed schedule: Select your preferred month, week, weekday and start time for infrastructure maintenance.
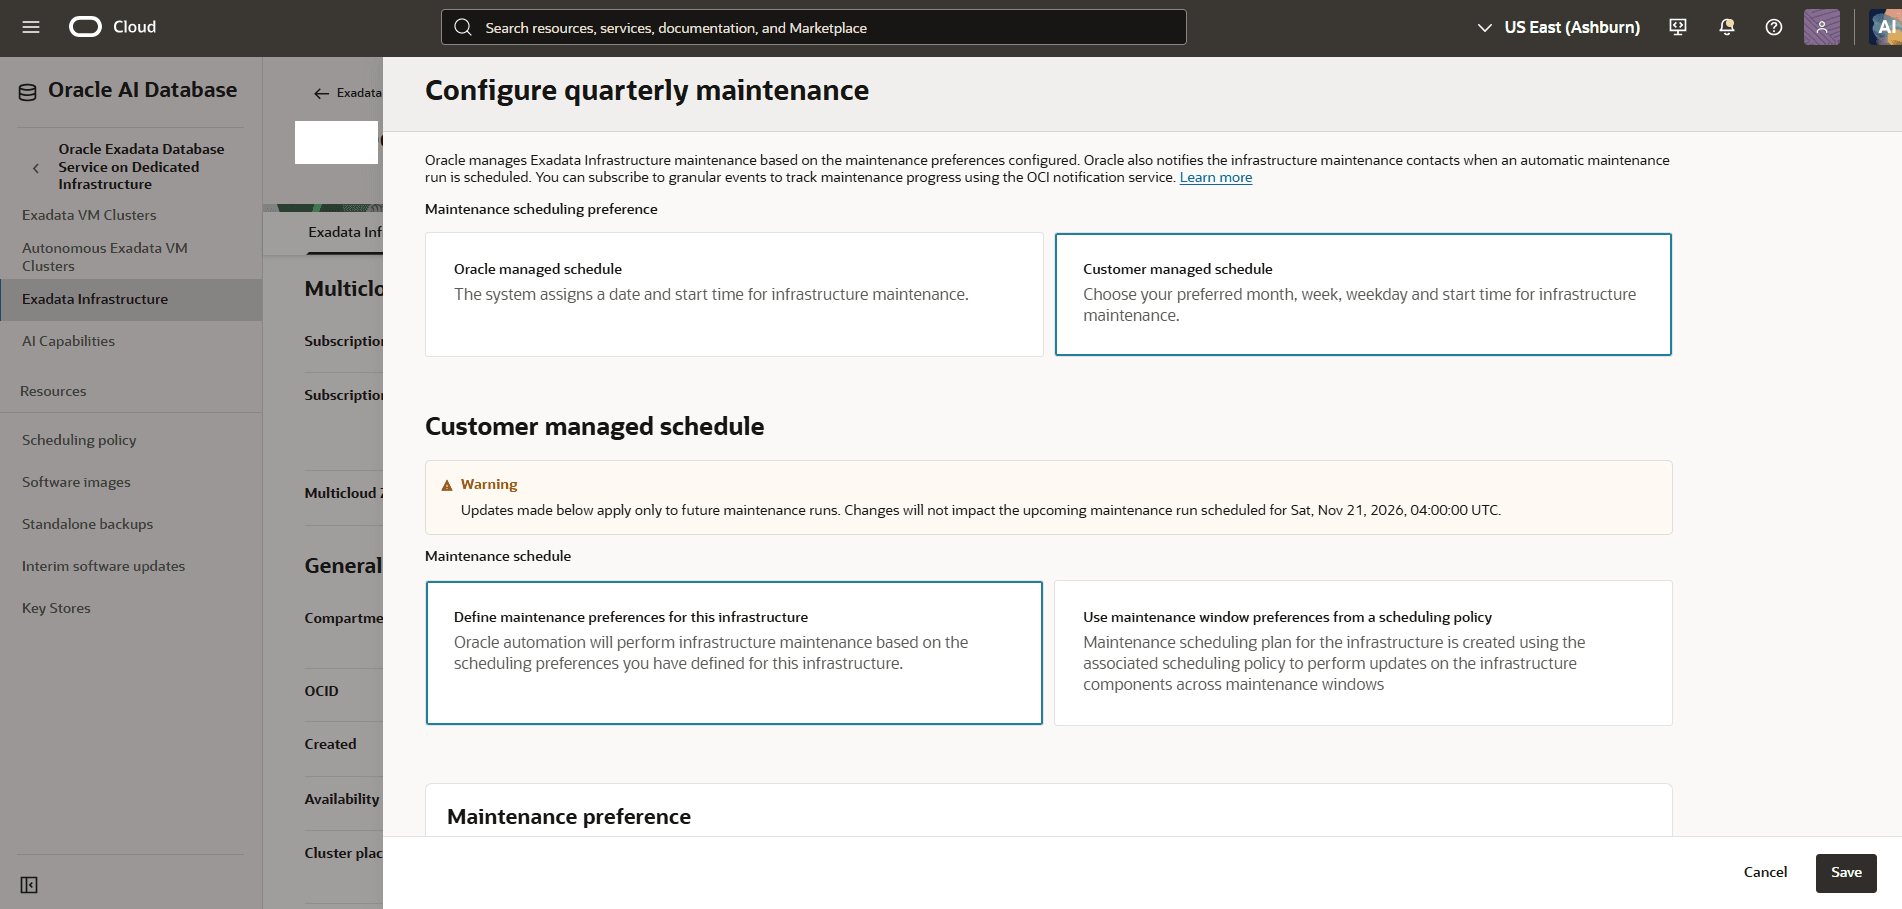
- From the Maintenance preference section, select maintenance time preferences for each quarter. If more than one preference is defined for a quarter, Oracle automation will select one of them to perform maintenance on all components in your infrastructure.
-
-
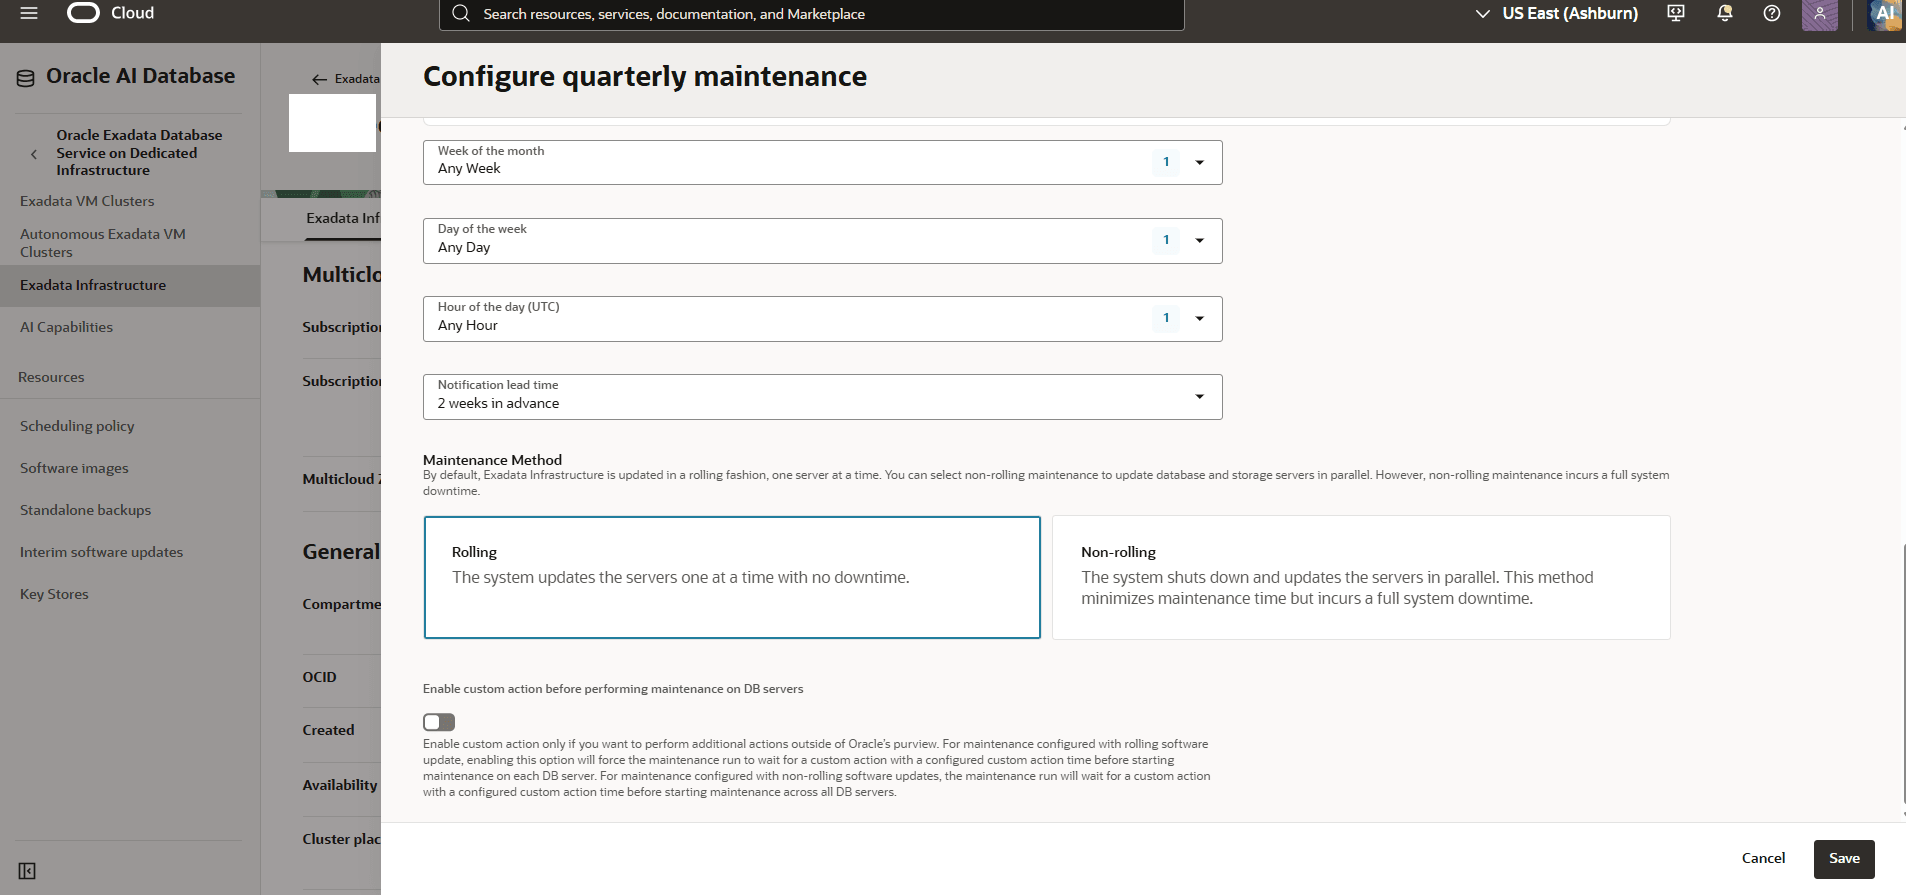
The Maintenance Method allows you to select Rolling or Non-rolling which controls where or not servers are shutdown sequentially in a rolling process or in parallel in a non-rolling process.
-
The Enable custom action before performing maintenance on DB servers selector allows you to define a delay time, up to 120 minutes, where you can perform custom actions on the servers before maintenance.
-
Select the Save button to save your configuration.
-
-
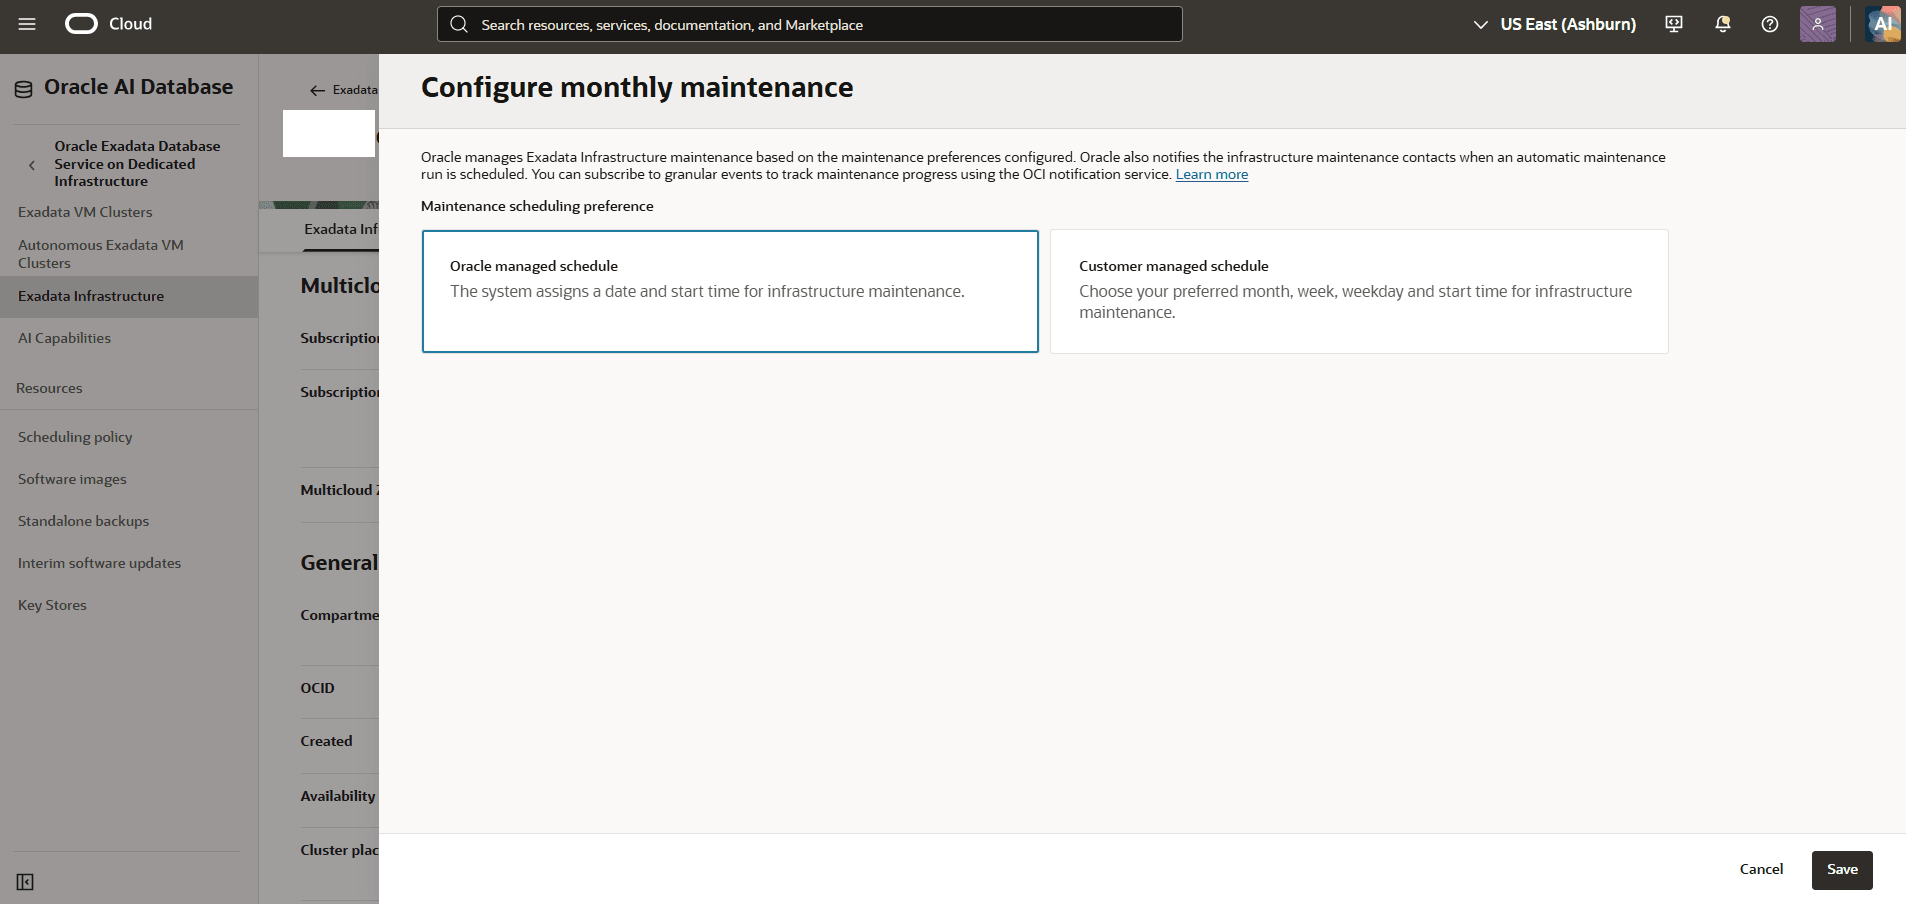
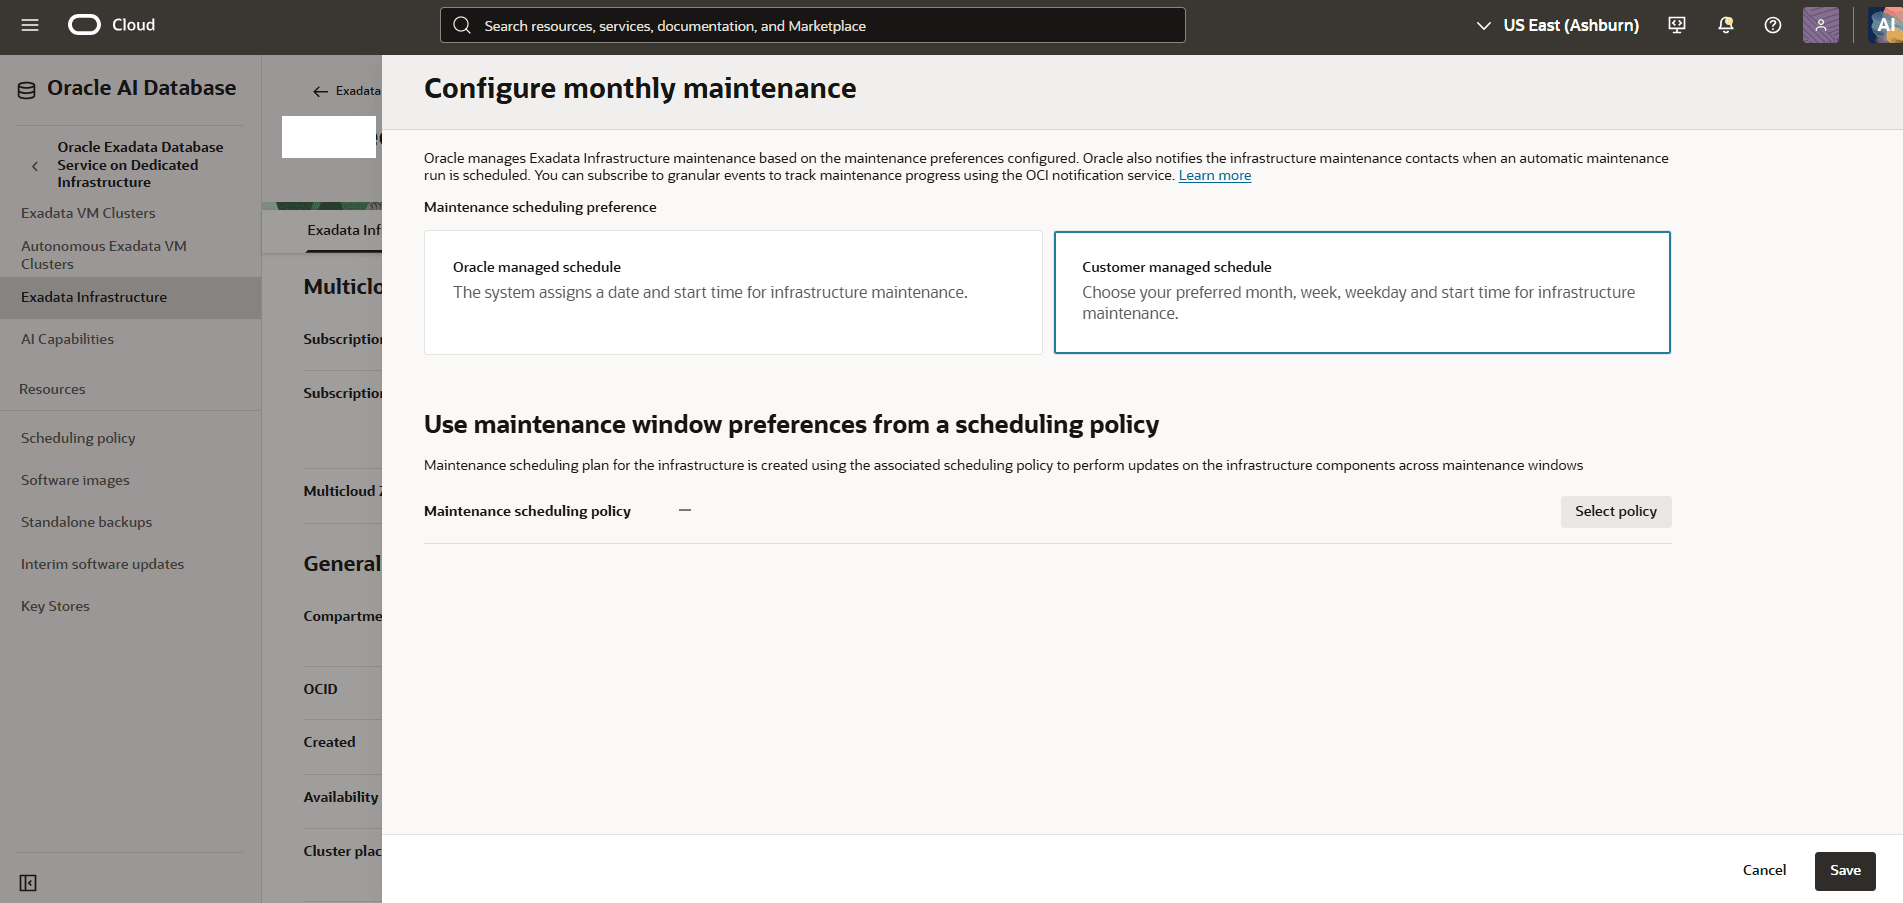
To change monthly maintenance preferences for the selected Exadata Infrastructure, select the Actions button and then select Edit monthly maintenance preferences option from the menu. From the Configure monthly maintenance page, you can change the maintenance options.
-
The Maintenance scheduling preference allows you to select between an Oracle managed schedule and a Customer managed schedule.
-
Oracle managed schedule: The system assigns a date and start time for infrastructure maintenance.
-
Customer managed schedule: Select your preferred month, week, weekday and start time for infrastructure maintenance.
-
Select the Save button to save your configuration.
-
-
-
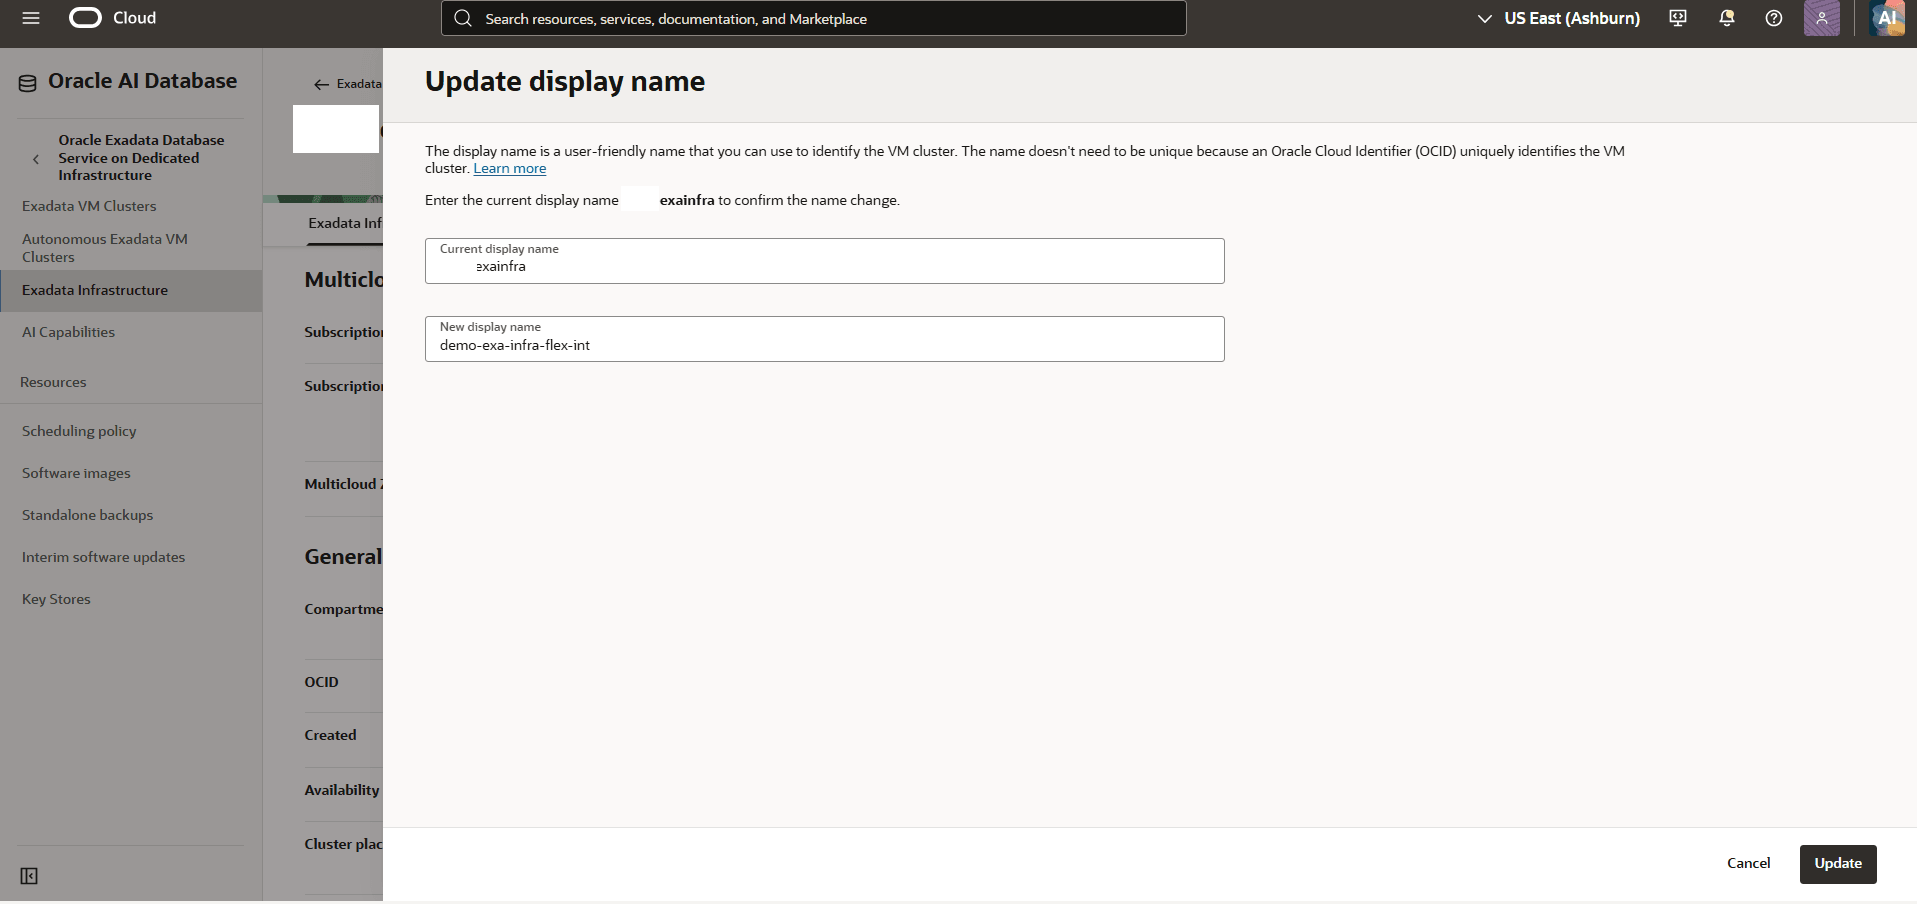
To update display name of your Exadata Infrastructure, select the Actions button, and then select the Update display name option from the menu.
-
Enter the Current display name and then enter the New display name. The Display name must be 1 to 255 characters, of letters, numbers, underscores () and hyphens (-). Display name must start with a letter or underscore() and cannot contain two successive hyphens(-).
-
Select the Update button to save your changes.
-
-
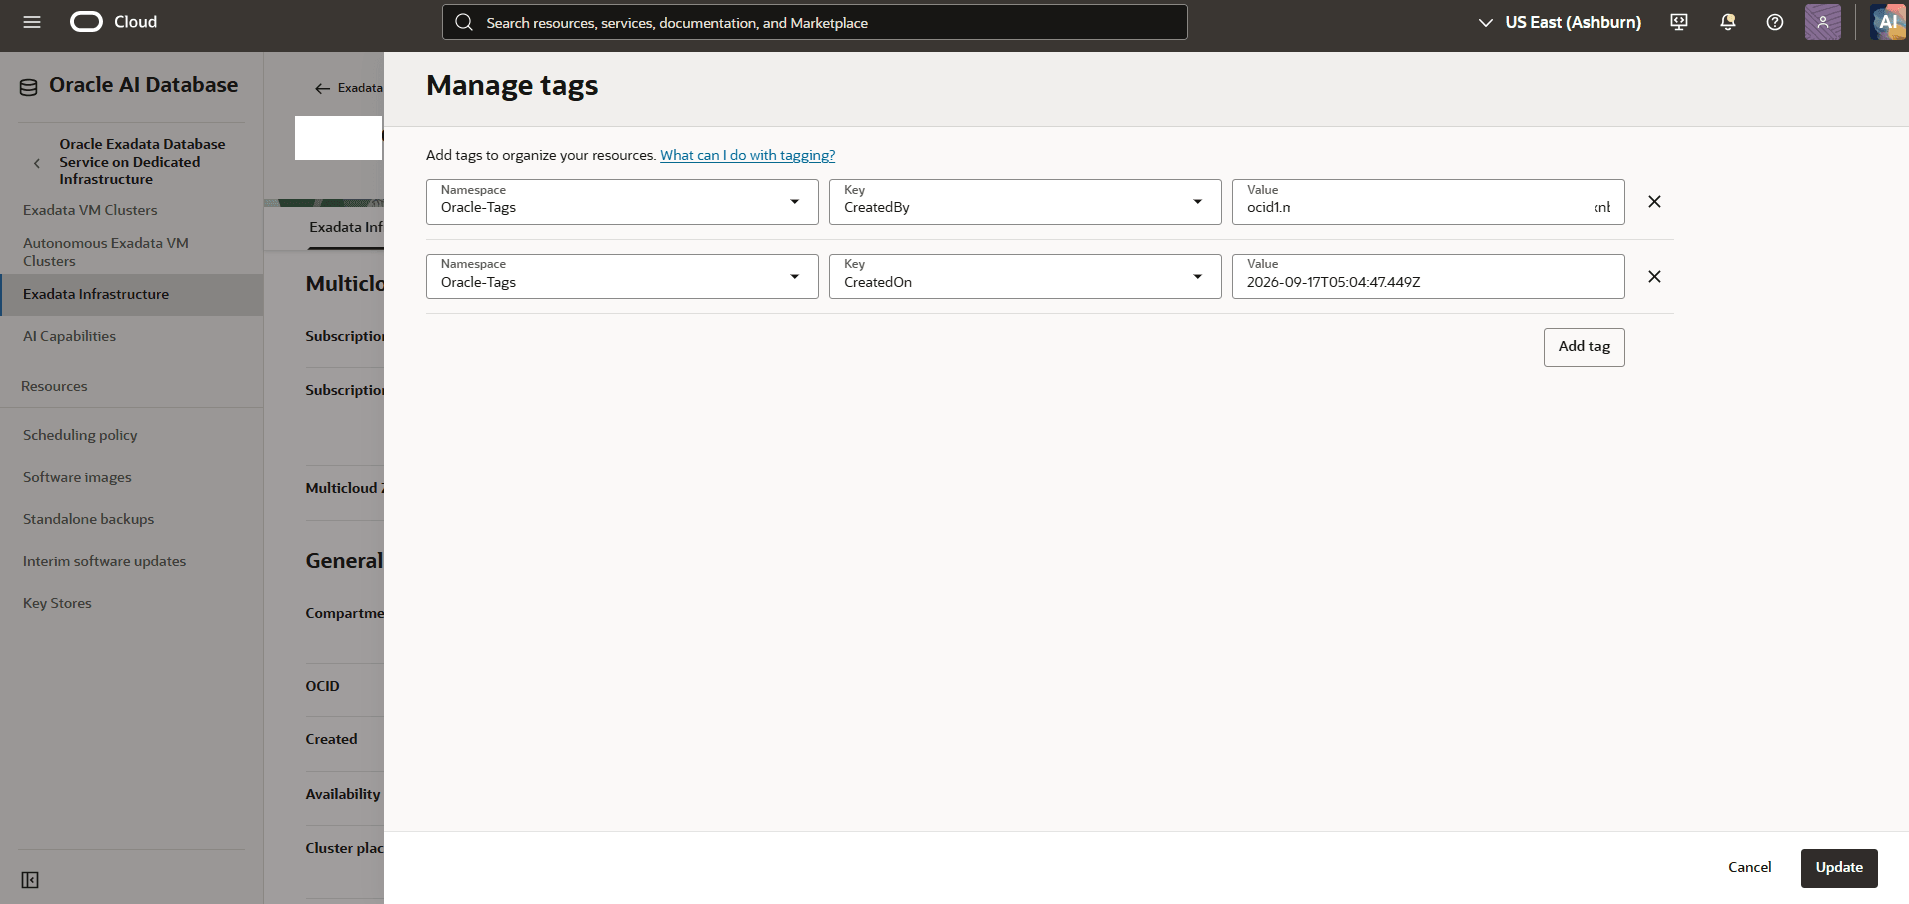
To add a tag to your Exadata Infrastructure, select the Actions button and then select Add Tags item from the menu. From the Add Tags page, you can change following.
-
Namespace: Select the appropriate tag namespace from the dropdown list.
-
Key: Enter the tag key.
-
Value: Enter the corresponding tag value.
-
Add tag: Select Add tag to add additional tags.
-
Remove tag: Select the X icon next to a tag to remove it.
-
Select the Update button to save your changes.
-
-
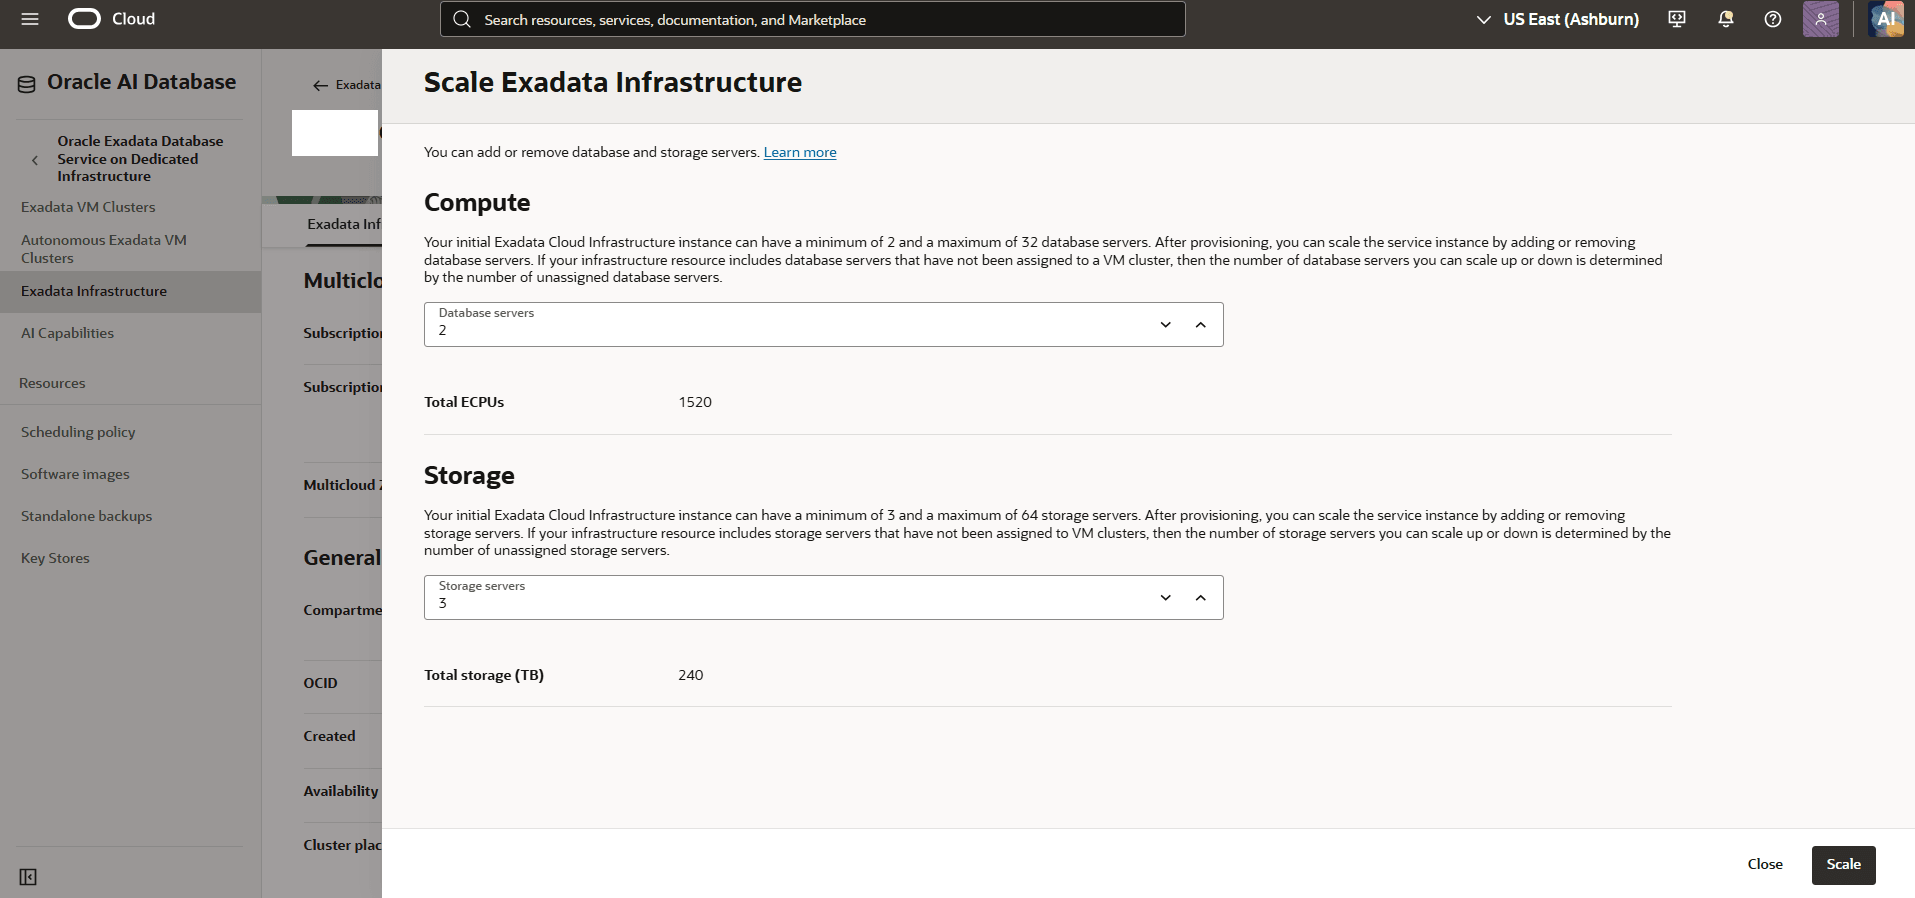
To change scaling options, in the OCI for the selected Exadata Infrastructure, select the Scale infrastructure button. From the Scale Exadata Infrastructure page, you can change Compute and Storage resources as follows.
-
Database servers can be changed to a value ranging from 2 to 32. The Total OCPUs field will calculate based in your selection.
-
Storage servers can be change to a value ranging from 3 to 64 storage servers.
-
Select the Scale button when finished.
-
-
There is currently no content for this page. Oracle AI Database@Google Cloud team intends to add content here, and this placeholder text is provided until that text is added. The Oracle AI Database@Google Cloud team is excited about future new features, enhancements, and fixes to this product and this accompanying documentation. We strongly recommend you watch this page for those updates.
There is currently no content for this page. Oracle AI Database@Google Cloud team intends to add content here, and this placeholder text is provided until that text is added. The Oracle AI Database@Google Cloud team is excited about future new features, enhancements, and fixes to this product and this accompanying documentation. We strongly recommend you watch this page for those updates.
You can modify an Exadata Infrastructure in Google Cloud using OCI Terraform provider.
Prerequisites
-
Terraform or OpenTofu installed
-
HashiCorp OCI provider version >= 7.0
-
Exadata Infrastructure is created using Terraform
To modify an Exadata Infrastructure, perform the following steps:
-
Create a Modify configuration file and add the import block with the Exadata Infrastructure id. The id value can be found at the Create Exadata Infrastructure output block.
Sample Terraform Configuration using OCI Terraform Provider
# Set OCI Provider source and version terraform { required_providers { # OCI Provider oci = { source = "oracle/oci" version = "7.29.0" } } } # Configure the OCI Provider provider "oci" { tenancy_ocid = "ocid1.tenancy.oc1..aaaaaaaa2pg53mzroh6r2ub72r5mxxxxxxxxxxxxxpylciiqdihofe3dq" user_ocid = "ocid1.user.oc1..aaaaaaaaa6wyl3kzbgogsqpsixxxxxxxxxxxxxxxxuwzkemcrgue5q" private_key_path = "C:\OCI-Terraform\private-key.pem" # This example is for Windows OS fingerprint = "6c:c7:a7:60:f2:99:62:b9:8e:01:fc:e8:9b:eb:61:61" region = "us-desmoines-1" } # Import Exadata Infrastructure Configuration import { to = oci_database_cloud_exadata_infrastructure.oci_exa_infra id = "ocid1.cloudexadatainfrastructure.oc1.us-desmoines-1.anrxkljrou6knayackcbpxxxxxxxj3q6mar563bmfgw6cdmw55ystti7a" # Replace the OCID value } -
Run the following commands in the Terminal window:
terraform initterraform validateterraform plan -generate-config-out="C:\GoogleCloud-Terraform\Working-Directory\generated_exa_infra.tf" # An example on Windows OS -
Open the
generated_exa_infra.tffile in a text editor and copy the content. -
Append the
generated_exa_infra.tfcontent in the Modify configuration file. Remove the import block. -
Run the following command in the Terminal window:
terraform import oci_database_cloud_exadata_infrastructure.oci_exa_infra "ocid1.cloudexadatainfrastructure.oc1.us-desmoines-1.anrxkljrou6knayackcbpxxxxxxxj3q6mar563bmfgw6cdmw55ystti7a" # Replace the OCID value -
Run the following command in the Terminal window to confirm the imported state file and the generated configuration file resources are in sync:
terraform plan -
Update the properties/values in the Modify configuration file as required.
Note
Note:
Modifying the configuration of Exadata Infrastructure using OCI Terraform provider will make the Create configuration file out of sync. To avoid out of sync Force replacement / Destroy issue, add the following lifecycle block in the Create configuration file.
lifecycle {
    ignore_changes = [
      properties[0].compute_count,
      properties[0].storage_count
    ]
  }
Sample Terraform Configuration using OCI Terraform Provider
# __generated__ by Terraform # Please review these resources and move them into your main configuration files. # __generated__ by Terraform from "ocid1.cloudexadatainfrastructure.oc1.us-desmoines-1.anrxkljrou6knayackcbpxxxxxxxj3q6mar563bmfgw6cdmw55ystti7a" resource "oci_database_cloud_exadata_infrastructure" "oci_exa_infra" { availability_domain = "HBfP:US-DESMOINES-1-AD-1" cluster_placement_group_id = "ocid1.clusterplacementgroup.oc1.us-desmoines-1.anrxkljrerkvpziaa57xxxxxxxxxxxx4j6uhf7ynl6473sn4tnra" compartment_id = "ocid1.compartment.oc1..aaaaaaaaqn5kip2ivclikxx5yoxxxxxxxxxxxhoovfswhzc5rykq3wfkrdoa" compute_count = 3 database_server_type = "X11M" defined_tags = { "Oracle-Tags.CreatedBy" = "ocid1.multicloudlink.oc1.iad.amaaaaaaou6knayafyn3zgqexxxxxxxxxxxlt6ygzgwiln3zdhyypbtq" "Oracle-Tags.CreatedOn" = "2026-01-01T23:38:24.292Z" } display_name = "demo-exa-infra-tf" freeform_tags = {} shape = "Exadata.X11M" storage_count = 3 storage_server_type = "X11M-HC" customer_contacts { email = "first.last@email.com" } maintenance_window { custom_action_timeout_in_mins = 15 hours_of_day = [11, 16] is_custom_action_timeout_enabled = true is_monthly_patching_enabled = false lead_time_in_weeks = 1 patching_mode = "ROLLING" preference = "CUSTOM_PREFERENCE" skip_ru = [] weeks_of_month = [4] days_of_week { name = "SUNDAY" } days_of_week { name = "MONDAY" } months { name = "JANUARY" } months { name = "APRIL" } months { name = "JULY" } months { name = "OCTOBER" } } } -
Run the following command in the Terminal window:
terraform apply
-