- User's Guide
- Smart View and EPM Cloud
- Monitoring Job Status
- Checking Job Status
Checking Job Status
Check the execution status of jobs in the Job Console.
To check the execution status of jobs:
-
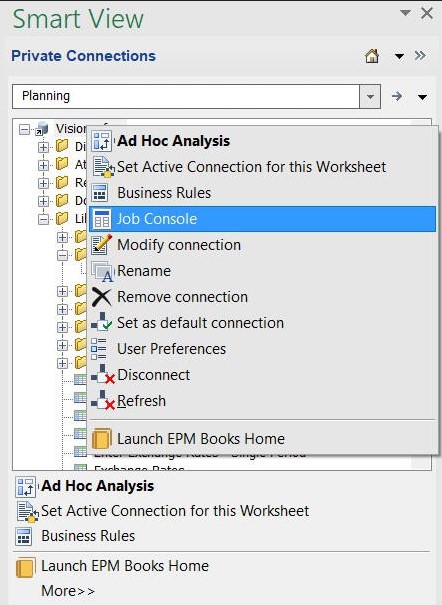
In the Smart View Panel, right-click the
application name and select Job Console from the context
menu.
Alternatively, select the application name, and in the Action Panel, select More, and then Job Console.

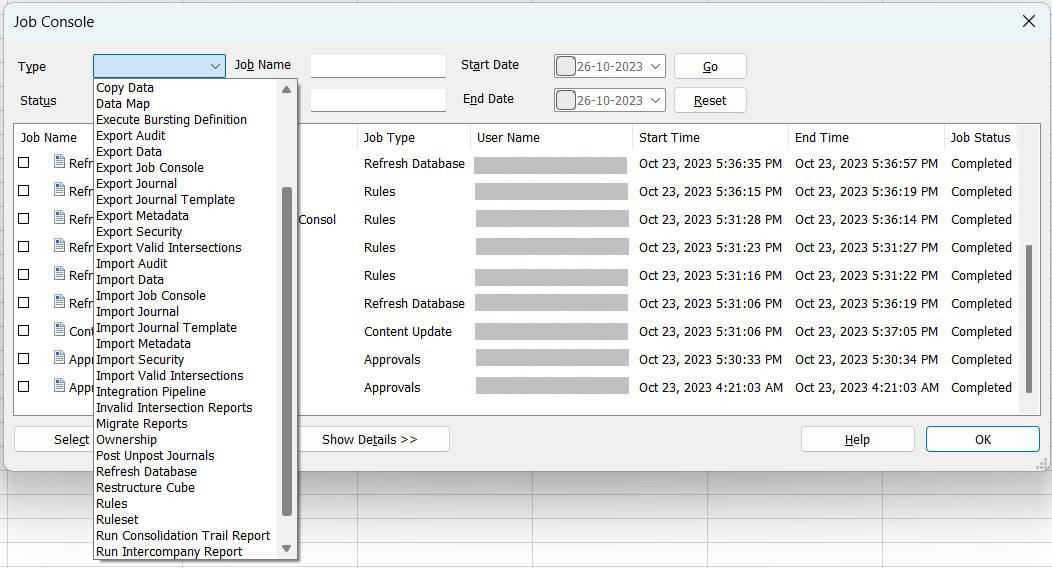
The Job Console is displayed.

By default, records of all job types and statuses are displayed in the Job Console for the previous day.
For ongoing jobs, the job status and substatus are displayed in the Job Status column.

-
To filter the list of jobs in the Job Console, from the
filter criteria area at the top of the dialog, use any of the following job
criteria:
-
Type—From the drop-down menu, select a job type. For example, some job types are:
-
Clear Cell Details
-
Copy Data
-
Refresh Database
-
Rules
-
Smart Push
This is a partial list of job types. Your administrator configures the job types available to you. Administrators can view all job types.
-
-
Status—From the drop-down menu, select a job status. For example, some job statuses are:
-
Completed
-
Completed with Errors
-
Error
-
Processing
This is a partial list of job statuses. Your administrator configures the job statuses available to you. Administrators can view all job statuses.
-
-
Job Name—Type a job name.
-
User Name—Type a user name.
-
Start Date and End Date—The dates are defaulted to yesterday and today to have only a one day difference. Click
 and enter a start date and end date range using the
calendar.
-
-
Click Go.
The Job Console displays the jobs matching your selection criteria.
Note:
If you have configured the Job Console window to autorefresh, then the jobs matching your selection criteria will display after the specified interval. Job Console autorefresh applies to Oracle Smart View for Office 20.200+. See Configuring Job Console Autorefresh for more information.
-
Optional: To get more detailed information on job execution, select the
job and click Show Details.
To see details for all jobs in the list, click Select All, and then click Show Details..
-
Optional: To delete a job, select the job and click
Delete.
To delete all jobs in the list, click Select All, and then click Delete.
Note:
Deleting a job only deletes it from the list in the Job Console. It does not cancel a job.