Identifying Custom Modifications Using the Customization Workbench
The Customization Workbench (P98UCUST) is an application that provides a customer a way of easily identifying and managing the merge of EnterpriseOne customized objects that have been changed in the most recent delivery.
To identify custom modifications using the Customization Workbench:
Fastpath to OMW.
Create an OMW project. Make sure that you are a developer on this project and that this project is at a development status of 21.
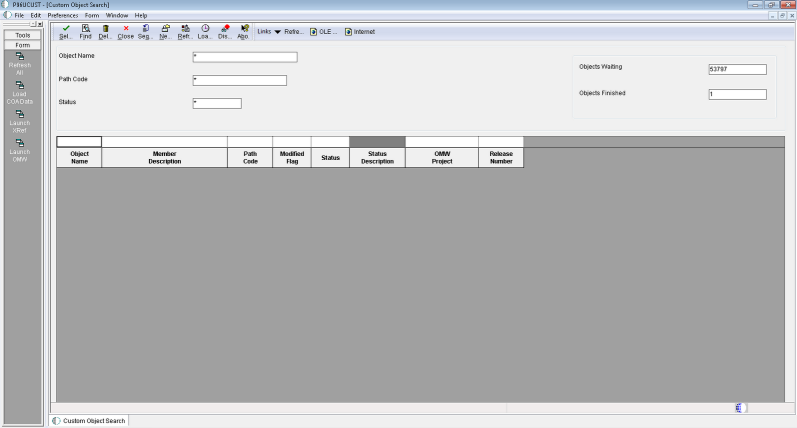
Use Fastpath to launch P96UCUST.
Available Form Exits:
Refresh All - calls BSFN to refresh the F96UCUST data based on the merge modification flag in the F9861 table.
Load COA Data - launches batch versions for the Report R9840DL - Object Customizations Data Load Report.
Launch XRef - will launch the entry point form of the cross reference application in order that the end user may gather more information about the currently checked in object.
Launch OMW - will Launch OMW (P98220) where more actions can be taken on the object and project as needed.
If the F96UCUST table has been loaded with customization objects information, then click "Find". Otherwise, click the form exit "Load COA Data". This will take a while for the table to load.
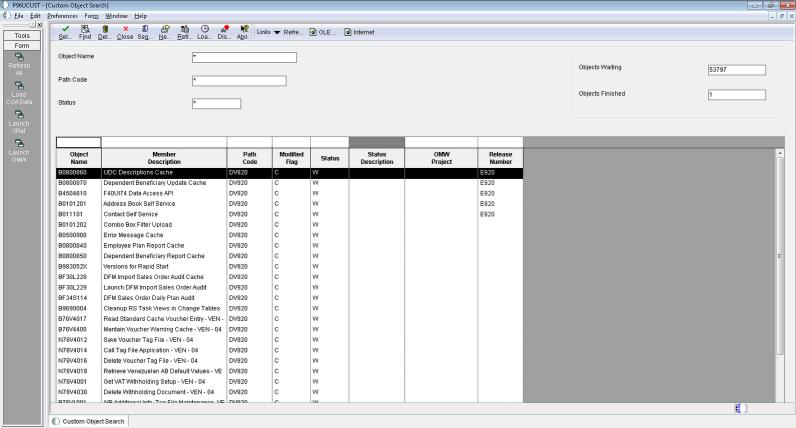
The grid will appear with the data. The counters in the form header will indicate how many objects are complete and how many are still in need of review. Select an object from this list.
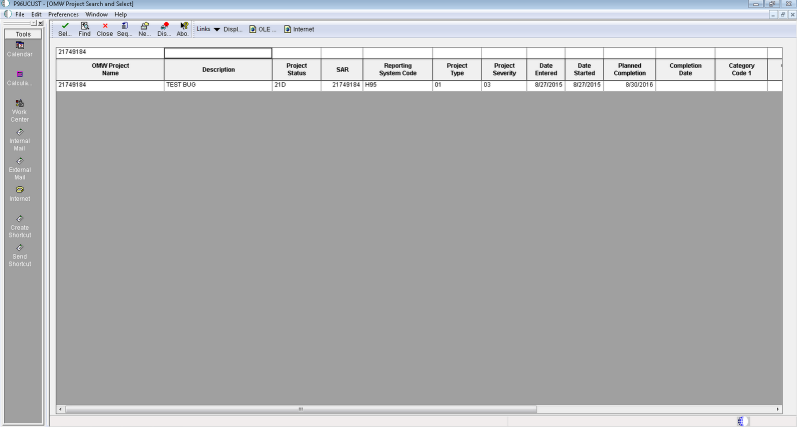
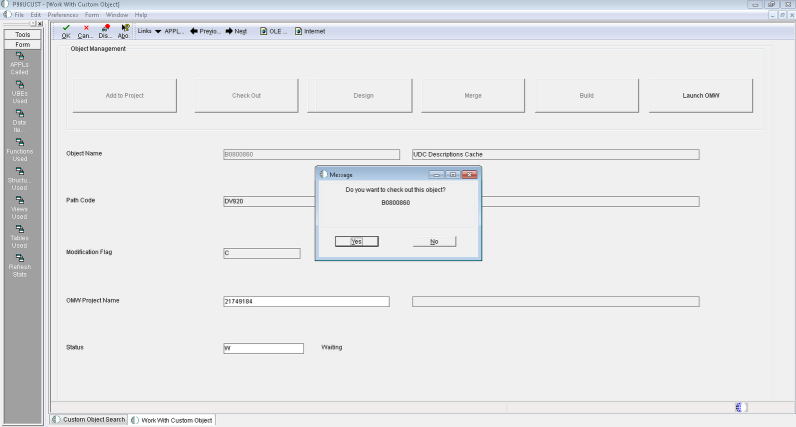
An OMW Project Search and Select form will appear. Select the project that you will add the objects to. A popup window will appear.
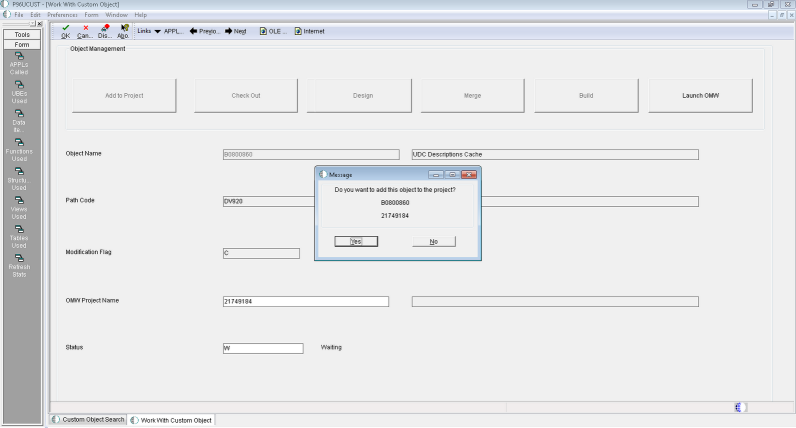
Confirm that you want to check out the object to the project. If you choose "No", you will have the option to check out the object later.
Once on the form, there are several options that will change based upon the specific object.
Is the object on the project or not?
Is the object checked out or not?
What is the object type?
Perform the tasks necessary to add the appropriate customized objects.
Button |
Function |
|---|---|
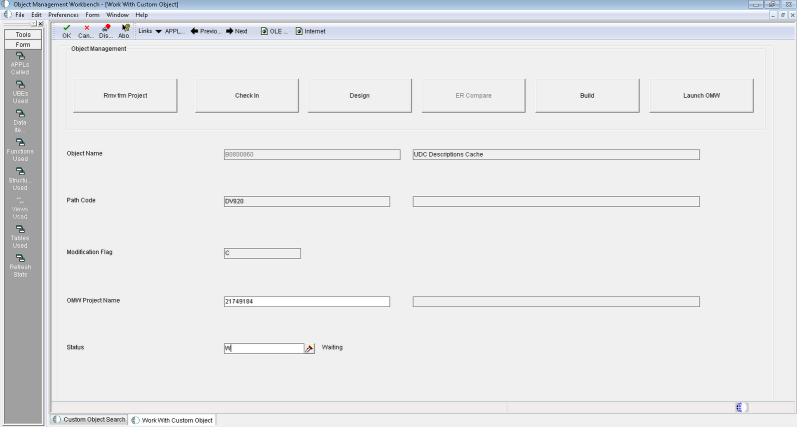
Rmv frm Project |
Removes the object from the current project. |
Add To Project |
Will launch the OMW Project Search and Select form to all for the end user to choose the project to which to add the object. |
Check In |
Will check the object in on the current project. |
Check Out |
Will check the object out to the current project. |
Design |
Will launch the appropriate design application for the object type (i.e. FDA for APPL type objects, RDA for UBE type objects, etc.). |
ER Compare |
Will launch the ER Compare tool for APPL, UBE and BSFN (NER) type objects. The default comparison will be between the local specs and the specs of the login pathcode (both can be modified in the tool once it is launched). |
Build |
Available for BSFN type objects. |
Launch OMW |
Will launch OMW (P98220) where more actions can be taken on the object and project as needed. |
OK |
When complete and a value of "D' is entered and the OK button clicked, the object will be checked (confirmation pending). |
Next/Previous |
Will scroll through the records on the previous screen for quick completion. |
Field |
Value |
|---|---|
Object Name |
The object name. |
Path Code |
The path code. |
Modification Flag |
The modification flag with a value of "C" indicates that the object has been customized. |
OMW Project Name |
Name of the OMW project. |
Status |
If the object is finished, it can be marked as D - Done. When the object is checked in the number of completed objects will change.
Available Form Exit:
Cross Reference - for reference purposes, will launch the appropriate cross reference form based on the object selected.