Entering Health and Safety Incidents Using a Mobile Tablet Application
To enter health and safety incidents:
Open the application by tapping the Add Incident icon on your device, and then log in.
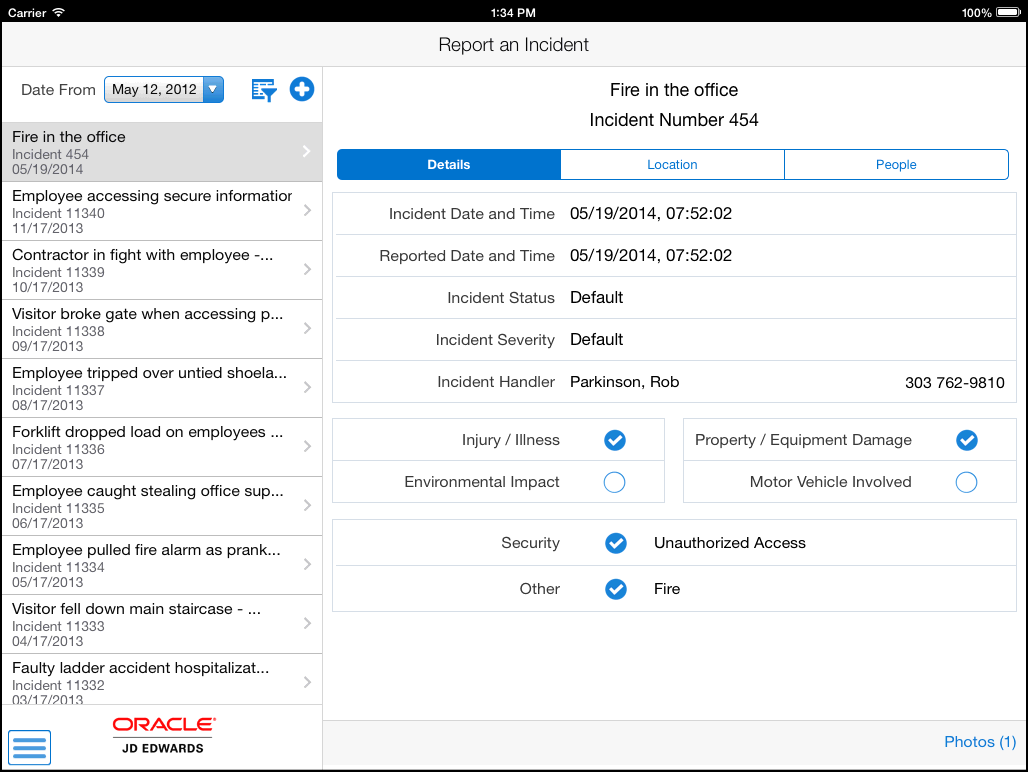
From the Report an Incident screen, review the incidents in the list. By default, the system displays incidents that occurred one week prior to the system date.
In the right pane, the system displays the details of the incident that appear first in the list.

- Date From
This field uses the default date of one week prior to the system date. After you open the tablet application, the system displays incidents based on this date. You can change the date by tapping the date dropdown menu and selecting a different date. When you select a different date, the system automatically updates the incidents in the list.
To filter work orders, tap the filter icon next to the Date From field.
- Establishment
To add an establishment to your search criteria, tap the Visual Assist icon to search for a value and return it to the Establishment field, or manually enter the establishment address book number in the field.
- Business Unit
To add a business unit to your search criteria, tap the Visual Assist icon to search for a value and return it to the Business Unit field, or manually enter the address book number of the business unit in the field.
- Incident Severity
To add incident severity to your search criteria, tap the Incident Severity dropdown menu and select a value that identifies the severity of the incident.
- Incident Status
To add incident status to your search criteria, tap the Incident Status dropdown menu and select a status.
- Incident Classification
Select the incident classification options (Injury/Illness, Environmental Impact, etc) that you want to add to your search criteria.
In the filters screen, to continue the search using the specified filter values, tap the Apply button. When you tap the Apply button, the system:
Takes you to the list of incidents that are displayed based on your filter values.
Saves the filter values that you entered.
To discontinue the use of filter values in your search, tap the Cancel button. When you tap the Cancel button, the system:
Takes you to the list of incidents associated with the last saved filter values, if applicable.
Ignores the filter values that you entered, and restores the last saved filter values to the filter fields.
To delete all of the filter values that you specified, and to enter new filter values, tap the Clear button.
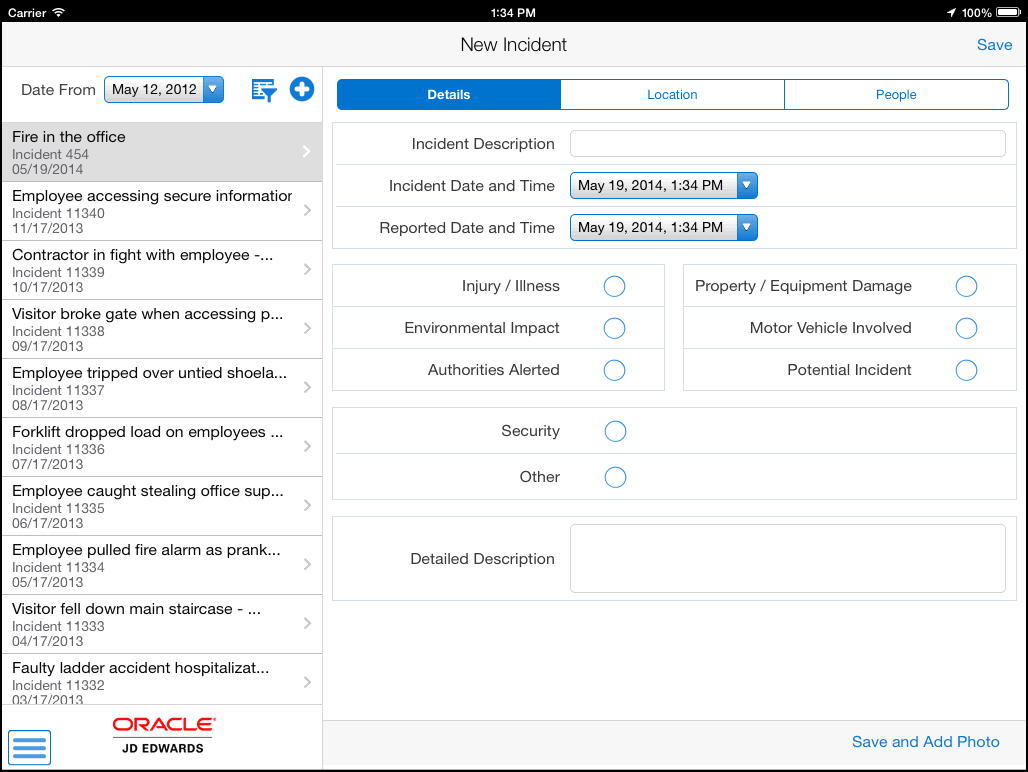
To enter a new incident, tap the add icon next to the filter icon. The system displays the New Incident screen that has three tabs: Details, Location, and People. The Details tab is open by default.

In the Details tab, you can:
Enter a maximum of 100 characters to describe the incident.
Tap the Incident Date and Time, and Reported Date and Time dropdown menus to select the date and time when the incident occurred, and the date and time when the incident was reported. The application uses the system date and time as the default date and time in these fields. You can change the date and time in these fields by tapping the date dropdown menus and selecting a different date and time.
Select the options to indicate whether the incident caused injury or illness, resulted in any damages, had an impact on the environment, whether vehicles were involved and authorities alerted, and whether it was a potential incident.
Select the Security option to indicate the incident was a security issue, such as a threat or assault. When you select this option, the system displays a dropdown menu next to the option. Tap the dropdown menu and select an option to categorize the security type.
Select the Other option to indicate whether the incident has other attributes, such as a fire, explosion, or perhaps is being used to indicate a safety inspection. When you select this option, the system displays a dropdown menu next to the option. Tap the dropdown menu and select an option to categorize the other type.
Enter a detailed description of the incident. The system passes the information that you enter here as media object text attachments in the base EnterpriseOne program.
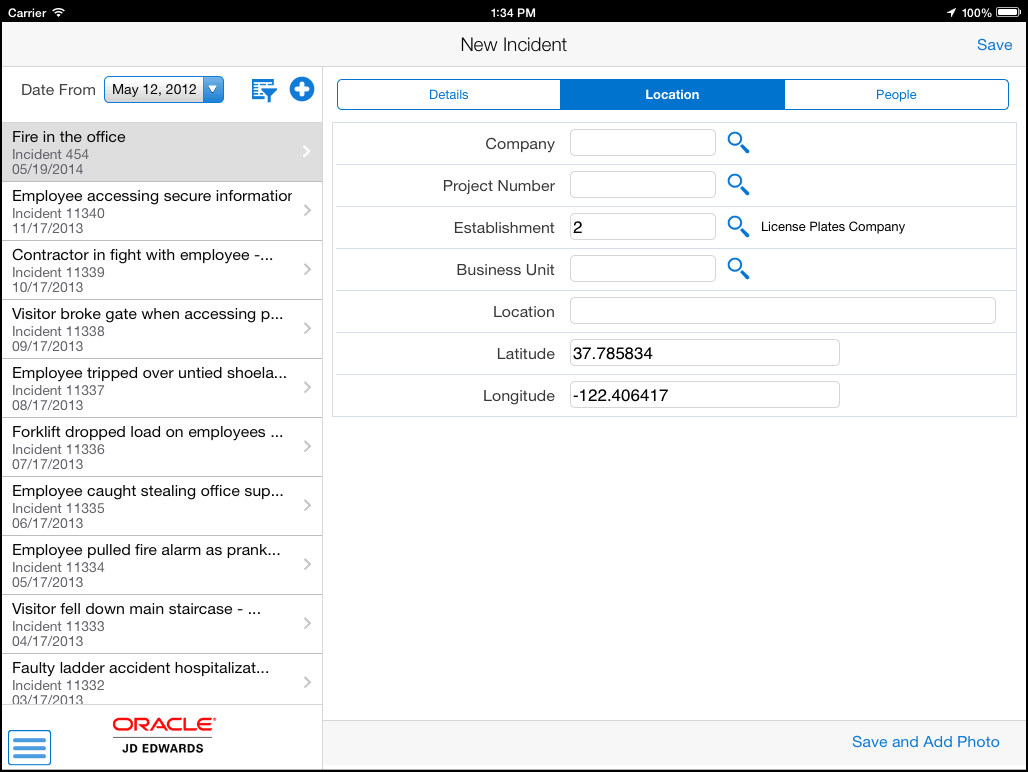
To add location details, tap the Location tab.

In the Location screen, you:
Enter the location information where the incident occurred: the company address book number, business unit, the establishment address book number, the project number, and a description of the location. You can tap the Visual Assist icon to search for and select values for fields that have the Visual Assist icon next to them, or you can manually enter the values. The system populates the values for the Company and Business Unit fields based on the logged in user, if the user is set up in the Employee Master.
The system populates the Establishment field with the value from the Establishment processing option of the Incident Master program (P54HS00), if the value is set up in the processing option. You can edit the Establishment field.
Review or enter the latitude and longitude values of the location. If you have enabled the location setting in the tablet, the system populates the Latitude and Longitude fields with the geo-coordinates from the device. You can edit the values in these fields.
If you have not enabled the location setting in the tablet, the system does not populate the Latitude and Longitude fields. You can enter the Latitude and Longitude values manually.
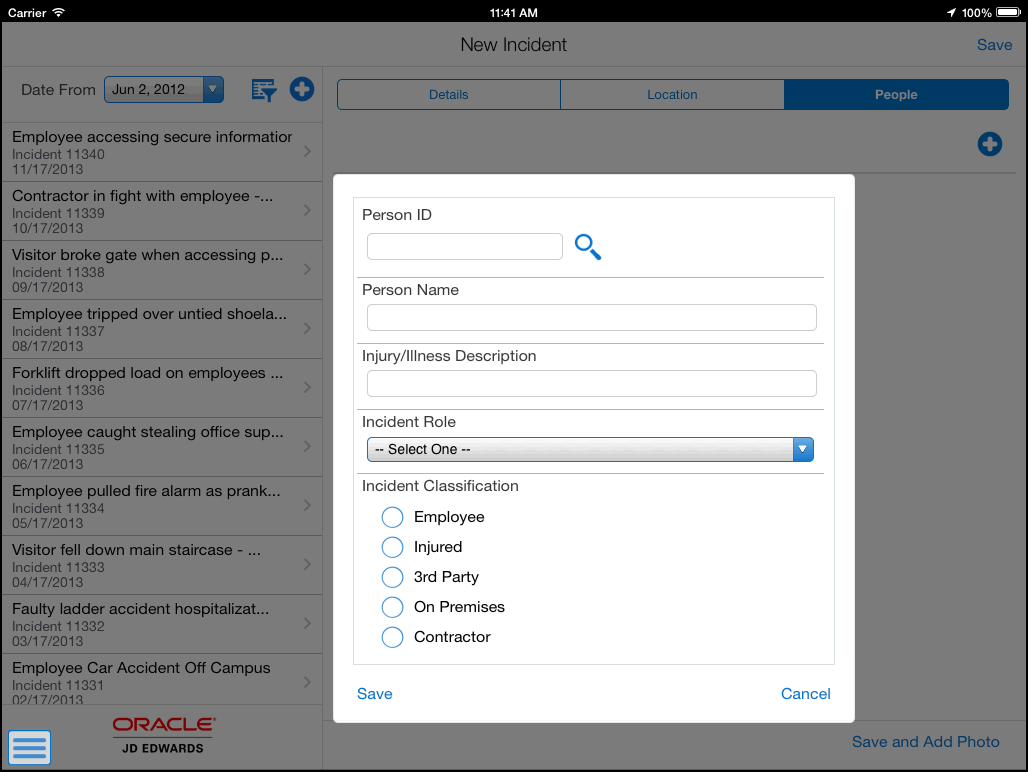
To add details of the people involved in the incident, tap the People tab. In the People screen, tap the add icon to add a person to the incident. When you tap the add icon, the system displays the screen where you can add person information.

In the person screen, you:
Enter the address book number or the name of the person. To attach a person to the incident record, you must complete either the Person ID or the Person Name field; otherwise, the system displays an error message that neither of the fields are complete and you cannot save the person record. Complete the Person ID field only if the person you are attaching to the incident has a valid address book number in the JD Edwards EnterpriseOne system.
If you enter a valid address book number in the Person ID field, the system populates the associated person's name in the Person Name field. If you enter an invalid address book number, the system displays an error message, and disables the Person Name field. To correct the error, you must tap the OK button in the error message. The system automatically clears the value in the Person ID field, and then you can either enter a valid address book number or leave the field blank, and complete the Person Name field instead.
Enter a description of the injury and illness.
Tap the Incident Role dropdown menu and select a value that identifies the role of the person in the incident.
Select the options to indicate that the person is an employee, is injured, is a third party, was on the premises when the incident happened, or is a contractor.
To save the person detail that you entered, tap the Save button. To close the person screen without saving your entry, tap the Cancel button.
The system returns you to the New Incident People screen that has the name of the person you attached to the incident.
To add more people to the incident, tap the add icon and enter their details. To edit the person details you entered, tap the edit icon on the left of the person line. To delete the person record from the incident, tap the delete icon on the right of the person line.
Note:The tablet application handles privacy case, and replaces the person name with 99999999 for a person marked as a privacy case in the base EnterpriseOne system.
See "Entering and Updating Incidents Using the Incident Master Program (P54HS00)" in the JD Edwards EnterpriseOne Applications Health and Safety Incident
Management Implemenation GuideTo save the incident, tap the Save button. When you tap the Save button, the system takes you to the home screen, and you can view the new incident that you entered at the top of the incident list.
If you do not save your incident record, you will lose unsaved changes, including the people entries that you saved.
To save the incident and to also add a photo to the incident, tap the Save and Add Photo button. The system takes you to the Photo screen. To access the Album and Camera feature of your device, tap the Add button. Tap the Album option to add a new photo to the incident from the device's photo gallery. Tap the Camera option to take a new photo by using the camera feature of your device and attach it to the incident. You can add a description of the photo.
The system saves the photos in a list.
To log out of the application, tap the menu button at the bottom left of the screen, and then tap Logout.