Managing Service Orders Using a Mobile Smartphone Application (M17030)
To manage service orders:
Open the application by tapping the My Serv Ord icon on your device, and then log in.
See Logging In to Mobile Enterprise Applications.

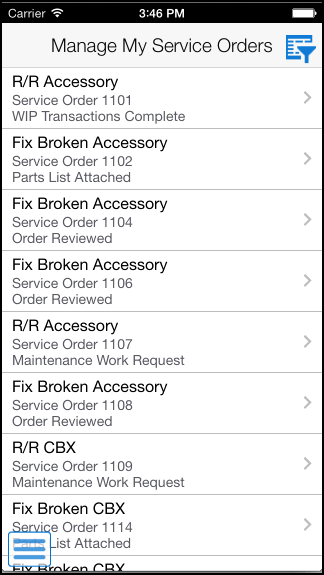
On the Manage My Service Orders screen, review the service orders. To refresh the data on the screen, swipe down on the screen.
To filter service orders, tap the filter icon at the top of the service order list.
- Start Date
Tap the From and To dropdown menus and specify the service order start date range that the system uses to search for service orders.
- Customer
To add a customer to your search criteria, you can use the search icon to search for a value and return it to the Customer field, or you can manually enter the address book number of a customer in the field.
To search for a customer, tap the search icon. In the Address Book search screen, you can use a combination of the customer name and search type to search for a customer. After you specify values for your search, tap the Search button. The system pulls up all records that satisfy the search criteria.
To discontinue the search and to go back to the Filters screen, tap the Cancel button.
To return a value back to the Customer field, tap the customer record from the search result.
- Status
Tap the From and To dropdown menus and specify the status range that the system uses to search for service orders.
- Priority
Tap the Priority dropdown and specify the priority that the system uses to search for service orders.
- Service Order Number
Tap the Service Order Number field and enter the service order number that the system uses to search for service orders.
In the Filters screen, to continue the search using the specified filter values, tap the Apply button. When you tap the Apply button, the system:
Takes you to the list of service orders that are displayed based on your filter values.
Saves the filter values that you entered. The system displays the saved filter values the next time you open the filter screen.
To discontinue the use of filter values in your search, tap the Cancel button. When you tap the Cancel button, the system:
Takes you to the list of service orders associated with the last saved filter values, if applicable.
Ignores the filter values that you entered, and restores the last saved filter values to the filter fields.
To delete all filter values you specified, and to enter new filter values, tap the Clear button.
To review a service order, tap the service order from the list of service orders.

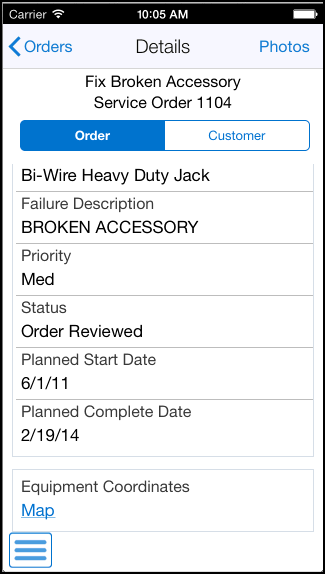
The system displays service order header information and two tabs: Order and Customer. The Order tab is open by default. To use the device's map feature, tap the Equipment Coordinates Map button.
Note: The system displays the Map link only if the latitude and longitude values are available for the location in the Equipment Master Address Locations program (P1704).
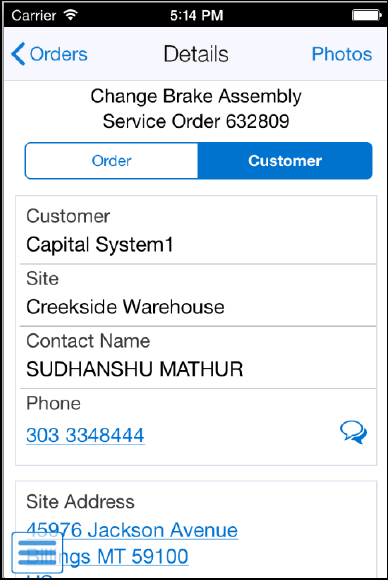
To view customer details, tap the Customer tab. To use the device's navigational feature, tap the Site Address and Customer Address sections of the screen.
To call the customer, tap the phone number. To text the customer, tap the icon on the right.
To view photos of the service order, or the equipment associated with the service order, tap the Photos button. The system displays two options: Service Order Photos and Equipment Photos. The number displayed on the each option represents the total number of photos related to the service order or the associated equipment.
To view service order photos, tap the Service Order Photos option. The system displays the photos of the service order as thumbnails.
To view photos of the associated equipment, tap the Back button and select the Equipment Photos option.
To view a photo, tap the photo thumbnail.
Note: The system displays service order photos from the media object in the Field Service Revisions program (P17100), and equipment photos from the media object in the Work with Equipment Master program (P1701).You can zoom in and zoom out photos for display. To zoom in, pinch and drag the part of the photo that you want to zoom in. To zoom out, drag and pinch the photo.
You can add new photos to the service order. Tap the Add button in the Service Order Photos screen. The system displays two options: Album and Camera.
To attach an existing photo from your device's photo gallery to the service order, tap the Album option.
To take a new photo, tap the Camera option to use the device's camera feature.
After you tap the Save button, the system adds the photo to the list of photos and increments the number of photos available by 1 (One).
Note: You cannot add or delete photos when you select the Equipment Photos option. The photos that you see when you select in the Equipment Photos screen are retrieved from the EnterpriseOne system.To go back to the Details screen, tap the Back button.
To go back to the list of service orders, tap the Orders button.
To log out of the application, tap the menu button at the bottom left of the screen, and then tap Logout.