To create temporary tables for data migration
From menu GH9011, select Report Management, Batch Versions.
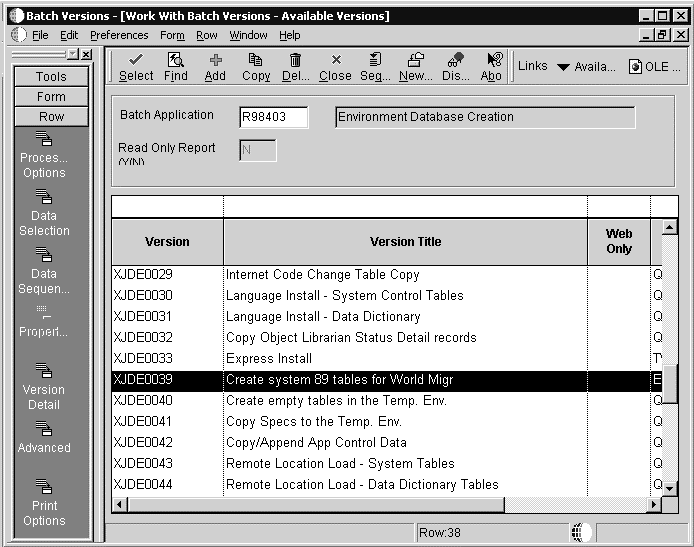
On the Work With Batch Versions form, enter R98403 as the Batch Application, and click Find.
Highlight version XJDE0039 (“Create system 89 tables for World Migr"), and then click Copy.
On the Batch Version - [Version Copy] form, enter CRTTEMPTBL for the New Version field and Create Temporary Migration Tables for the Version Title field.

Change the Security field to 1 (Medium security), and then click OK.
On the General tab of the Batch Versions - [Batch Version Design] form, select Processing Options.

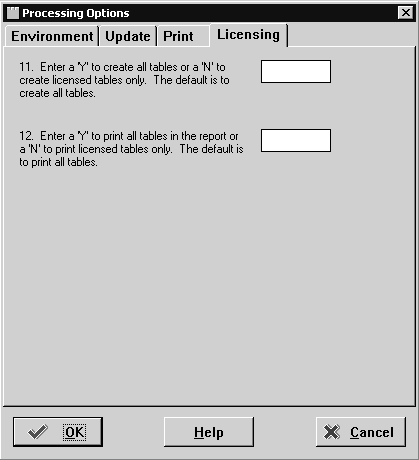
Set processing options 1-12 as follows:
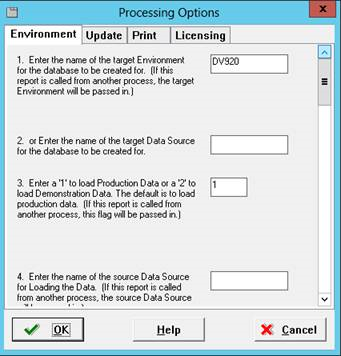
For the name of the Target Environment, enter DV920.
Leave blank.
Enter 1 to load production data.
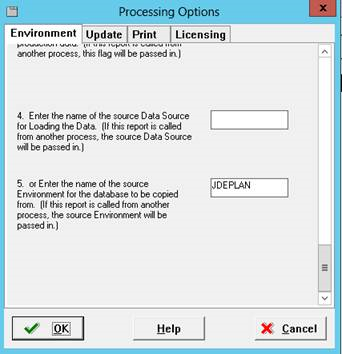
Leave blank.
Enter JDEPLAN for the name of the source environment for the database to be copied from.
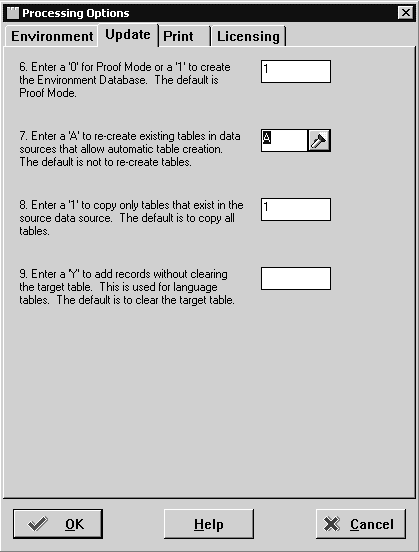
Enter 1 to create the environment database.
Enter A to re-create existing tables in data sources that allow automatic table creation.
Enter 1 to copy only tables that exist in the source data source.
Leave blank.
Leave blank (Print tab).
Leave blank.
Leave blank.
Click OK to exit the Processing Options window.
On the General tab of the Batch Versions - [Batch Version Design] form, click Run to submit the version.
Select Advanced from the Form Exit.
In the Batch Versions - [Advanced Version Prompting] form, select the Override Location.
Click OK to return the Batch Versions - [Version Prompting] form.
Select Submit from the Form Exit.
From the Batch Versions - [JD Edwards Data Sources] select the LOCAL data source.
When the Processing Options window reappears, review options 1-12 and ensure that they are correct.
Click OK to exit the Processing Options window.
Select desired Report Destination option and click OK.
Review the PDF carefully to ensure all tables copied over successfully.
If errors are encountered, review the JDE.LOG. Contact the Global Support Center for further assistance.