Register an Oracle WebLogic Server 11g
Only Oracle WebLogic Servers that are registered with the Management Console can be managed by the Management Console. The Oracle WebLogic Server must be installed outside of Server Manager. You should always verify that your Oracle WebLogic Server versions are fix-current per Oracle directives. You should also verify that your version of Oracle WebLogic Server is compatible with JD Edwards EnterpriseOne servers (for details refer to Accessing the Certifications (Minimum Technical Requirements) in this guide).
Registration of an Oracle WebLogic Server requires that a Management Agent first be installed on the Oracle WebLogic Server. This server must be installed with the correct user and also started with the correct user. Refer to Installing the Server Manager Management Console and Agent.
To register an existing Oracle WebLogic Server:
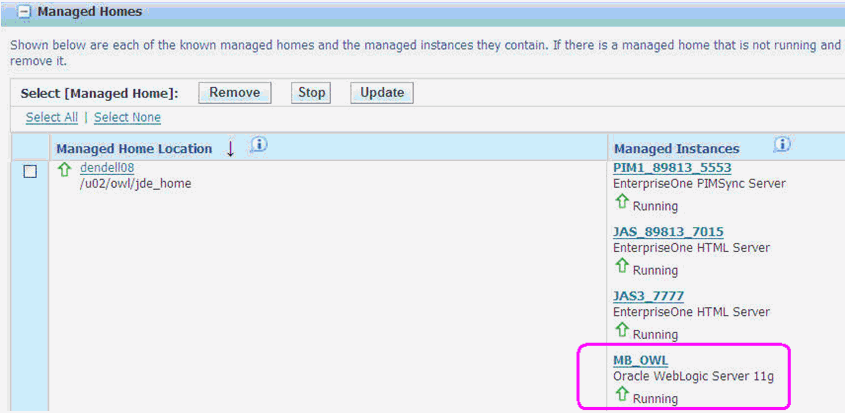
Select the Managed Home with which you wish to register an Oracle WebLogic Server.

On Managed Instances, click the Create New Managed Instance button.
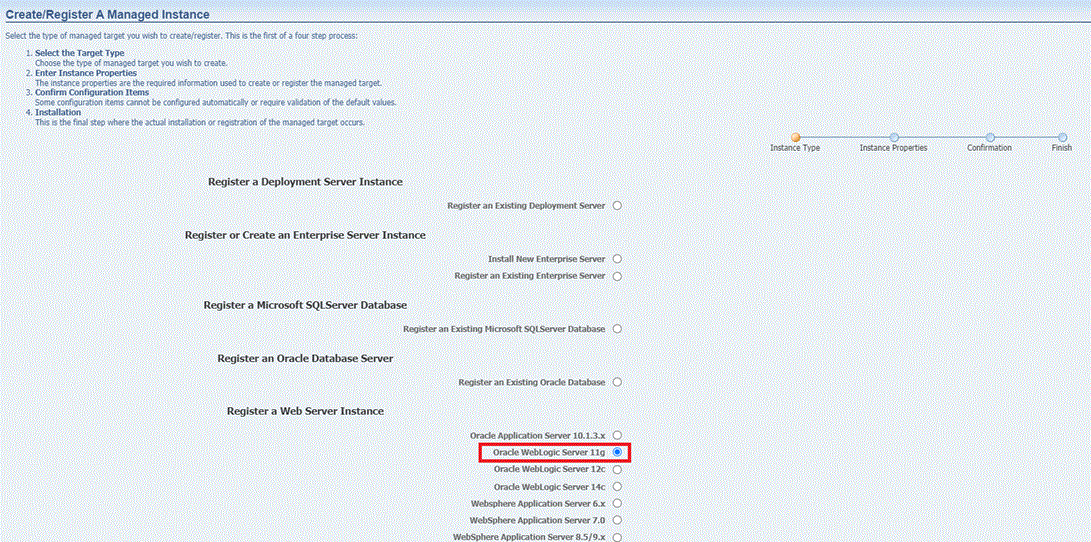
On Create/Register a Managed Instance, Instance Type, select this radio button:
Oracle WebLogic Server 11g
Click the Continue button.
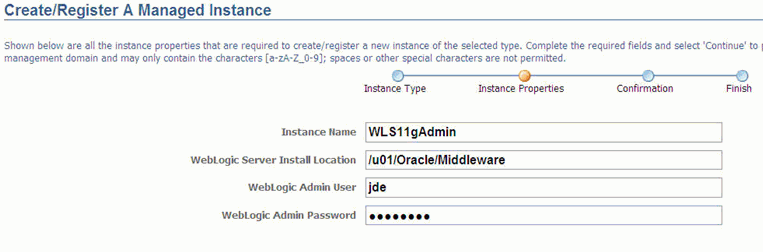
On Create/Register a Managed Instance, Instance Properties, complete these fields:
Instance Name
Enter a name for the instance.
Oracle WebLogic Server Install Location
Enter the installation location for the existing Oracle WebLogic Server. This is the Oracle WebLogic Home, where the default value is:
/u01/Oracle/MiddlewareOracle WebLogic Admin User
Enter the administrative user for the Oracle WebLogic Administrative Console on which this Managed Instance will be created. The default admin user is:
Oracle WebLogicOracle WebLogic Admin Password
Enter the administrative user for the Oracle WebLogic Administrative Console on which this Managed Instance will be created. For the default password refer to the
/u01/Oracle/Middleware/utils/quickstart/quickstart.shprogram. Access the Start Administration Console option.
Click the Continue button.

On Create/Register a Managed Instance, Confirmation, there are no configuration items to confirm.
Click the Continue button.

On Create/Register a Managed Instance, Finish, click the Create Instance button to complete the registration of the Oracle WebLogic Server.
After you have completed the installation, the browser is redirected to the Management Console page for the newly registered Oracle WebLogic Server. This server also appears as a Managed Instance within the corresponding Managed Home.
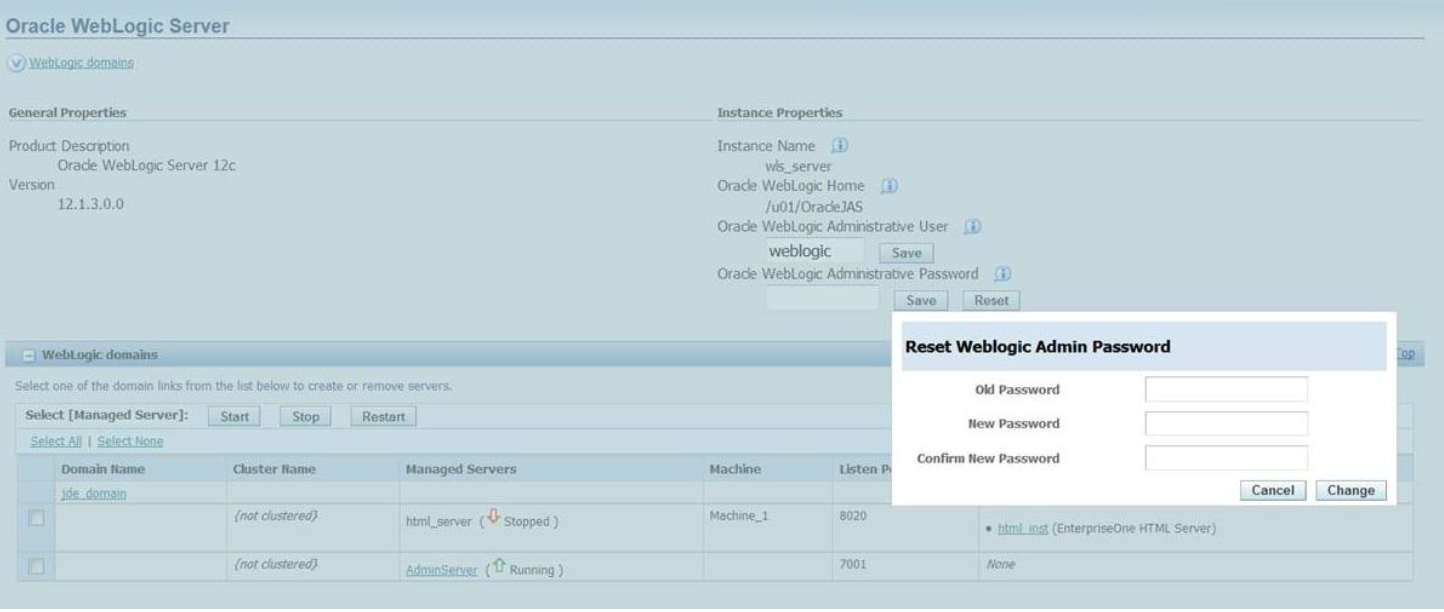
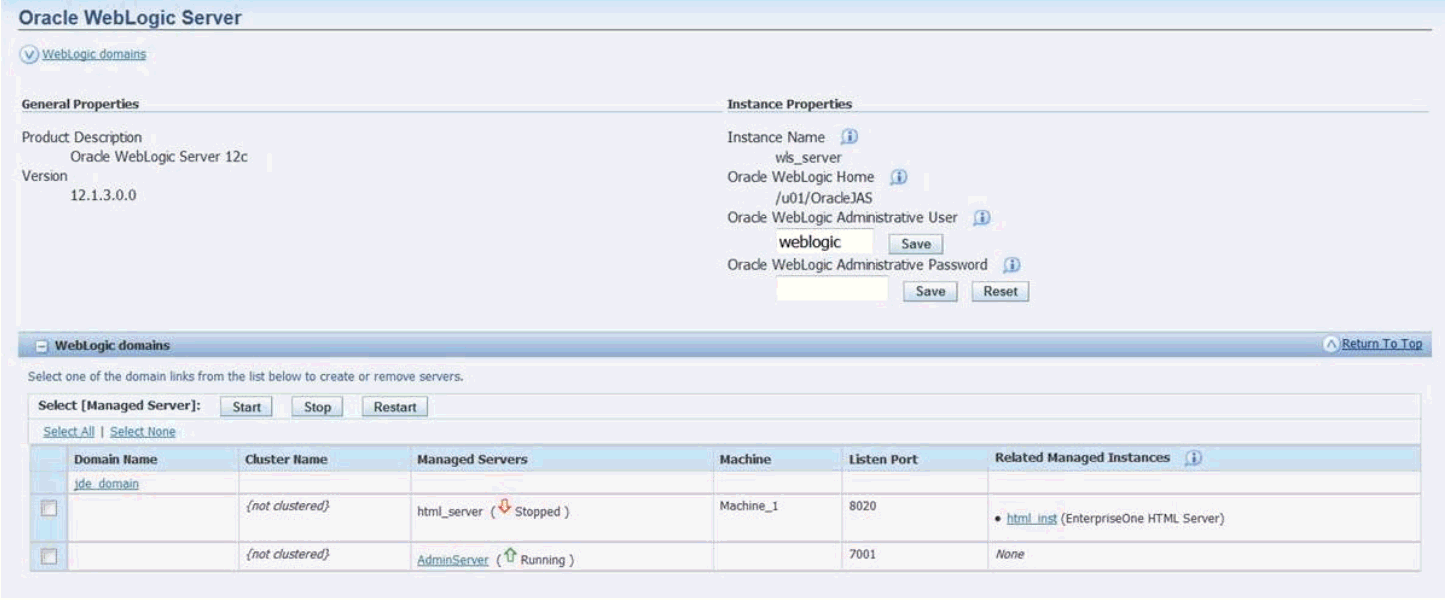
For each registered Oracle WebLogic Server Managed Instance, the Management Console displays appropriate information at the top of the web page:
General Properties
Product Description
Oracle WebLogic Server 11g
Version
10.3.6.0
Instance Properties
Instance Name
Displays a clickable link for the name assigned to the Oracle WebLogic Server Managed Instance at the time is was created or registered.
Oracle WebLogic Home
Displays the complete path to the Oracle WebLogic Server Home where this Oracle WebLogic Server instance was installed.
Oracle WebLogic Administrative User
Displays the administrative user credential that is used by Server Manager to perform administrative tasks on the Oracle WebLogic Server instance.
Oracle WebLogic Administrative Password
Displays the administrative password credential that is used by Server Manager to perform administrative tasks on the Oracle WebLogic Server instance.
You can reset the administrative password using the Reset button. The following window is displayed when you click the Reset button.
Enter the passwords in the fields, and click Change to confirm the new password.