Upload JDBC Drivers to the Management Console
To upload JDBC drivers to the Management Console:
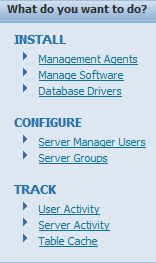
Navigate to the JDBC driver management page using this quick link in the What do you want to do? section:
Database Drivers
Locate the section corresponding to the type of driver you wish to install.
The Management Console displays this JDBC Driver Upload form only if you have not previously uploaded the JDBC driver.
For example, if you have not previously uploaded the Oracle driver, the form looks like this:

For each of the required files use the
Browsebutton to select the corresponding file previously obtained.For example, if you were uploading the driver for Oracle, you would browse to the location of the
classes12.jar file.Click the Upload button.
The selected driver file(s) are uploaded to this directory, which contains the Management Console software repository.
x:\JDE_HOME\componentswhere x: is the drive on which you installed the Management Console, and
where
JDE_HOMEis the name that you defined as the home for the Management Console.
External to the Management Console, the functional equivalent of using this form to upload the driver is to place it in the specified directory by other means. Once you have placed the driver files in the appropriate directory, refreshing the JDBC Drivers page displays the available application servers on which the drivers are not already installed, but on which they can be installed. Server Manager will not display bundled JDBC drivers that come already installed with Oracle WebLogic Server. The bundled JDBC driver does not need to be uploaded or installed through Server Manager.