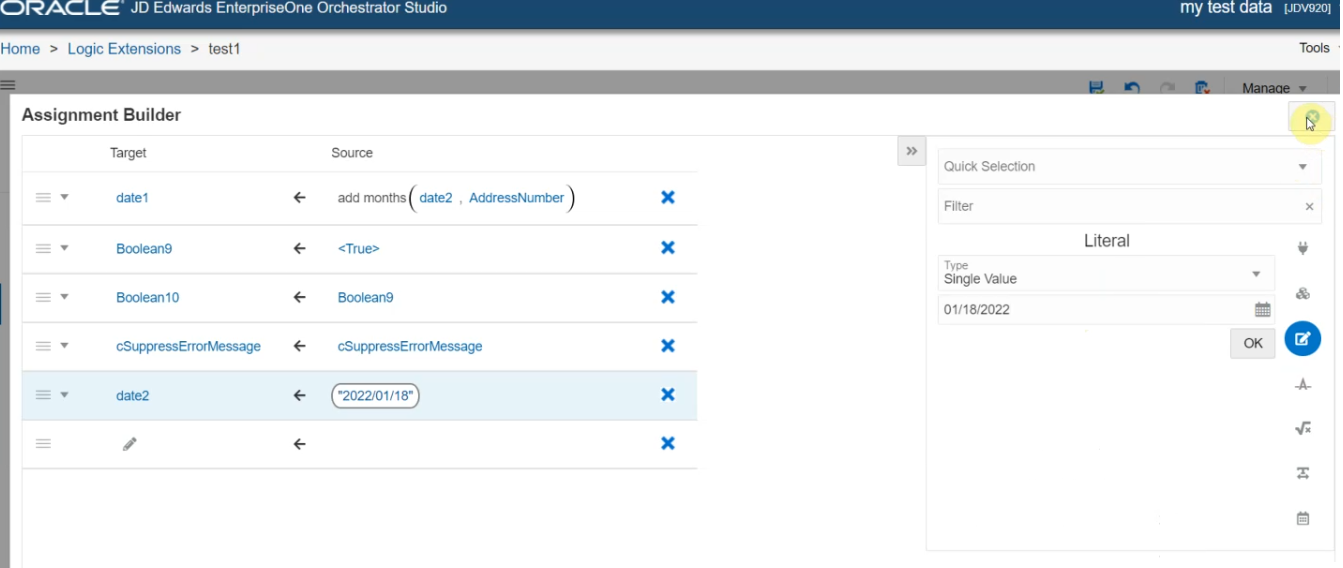
Adding an Assignment Block
You can access and modify the available objects in the assignment block to implement business logic. When you select or add an assignment block in the logic extension design page, the Assignment Block panel is displayed at the right hand side. You can click the Launch Assignment Mapping Wizard icon next to Assignments to open the Assignment Builder window and using this window you can map the target to the source. The target can be a data structure item, a variable, or a Boolean. The source can be a Boolean data type data structure or a variable, or a literal (if the target is Boolean).
To add an assignment block:
- On the design panel, hover over the location where you want to add an assignment block and then click the + icon.
- Select Assignment from the Action menu. The system displays the Assignment Block panel on the right.
- In the Assignment Block panel, edit the label and enter the description for your assignment block.
- Click the Assignment Mapping Wizard icon next to Assignments. The Assignment
Builder window is displayed.
The Assignment Builder window contains two panels:
- Assignment Panel (left panel): Displays an assignment table with the target and source information.
- Object Selector Panel (right panel): Filter and select the target and source values using this panel. You can click the Close or Open icons to hide or view this panel.
- In the Assignment Builder window, in the left panel, click the Target icon
and select a value from the right panel using the Quick Selection drop-down menu or
click the Data Stucture, Variables, or Literal icons to select the required
value.
Once you select the Target, the system automatically highlights the Source icon in the right pane.
- Select the required values or functions for the Source using the right panel. You
can select values using the Quick Selection drop-down menu or click the Data
Stucture, Variables, or Literal icons to select the required value.
A new entry row is automatically added at the end of the assignment table if the table is empty or if the last row is completely defined.
Note: Repeat Steps 5 and 6 to add more mappings. If you want to delete a mapping, click the X icon in the left panel. - Click the Close icon to close the Assignment Builder window. Your mappings are displayed in the Assignment Block panel.
- Click Save.
(Release 9.2.6.3) You can cut and copy an individual assignment from one assignment block and paste the assignment on another assignment block. In the Assignment Builder window, click the drop-down icon, and select the Cut Assignment or Copy Assignment option. Open the Assignment Builder window of another assignment block and then click the drop-down icon in the last assignment line and select the Paste Assignment option. You can then change the order of this assignment by dragging and dropping it on the required position.
