Creating an Orchestration
To create an orchestration:
On the Orchestrator Studio Home page, click the Orchestrations icon.
On the Orchestrations side panel, click the New button.
On the Orchestrations design page, enter a unique name for the orchestration in the Name field. Do not include special characters in the name.
All orchestrations that are created in Orchestrator Studio 9.2.4 or later are saved as version 3 orchestrations. You cannot change this value. If you want to update a version 3 orchestration that was created in a previous version of the Orchestrator Studio, see Updating to Version 3 Orchestrations.
Note:When you save an orchestration, the orchestration name is used to define an endpoint on the AIS Server. The endpoint URL is:
http://<server>:<port>/jderest/orchestrator/<orchestrationname>To invoke this orchestration, third-party applications or devices use a post operation to this url, where
<orchestrationname>is the name of the orchestration.Click the Product Code drop-down list to select a product code to associate with the orchestration.
This enables an administrator to manage UDO security for orchestration components by product code.
In the Description field, enter a short description with a maximum of 200 characters. This description appears along with the orchestration name in the component list.
Click the Long Description button to provide more detail about the component.
Use this field to describe the purpose of the orchestration and any details that differentiate the orchestration from other orchestrations that you create.
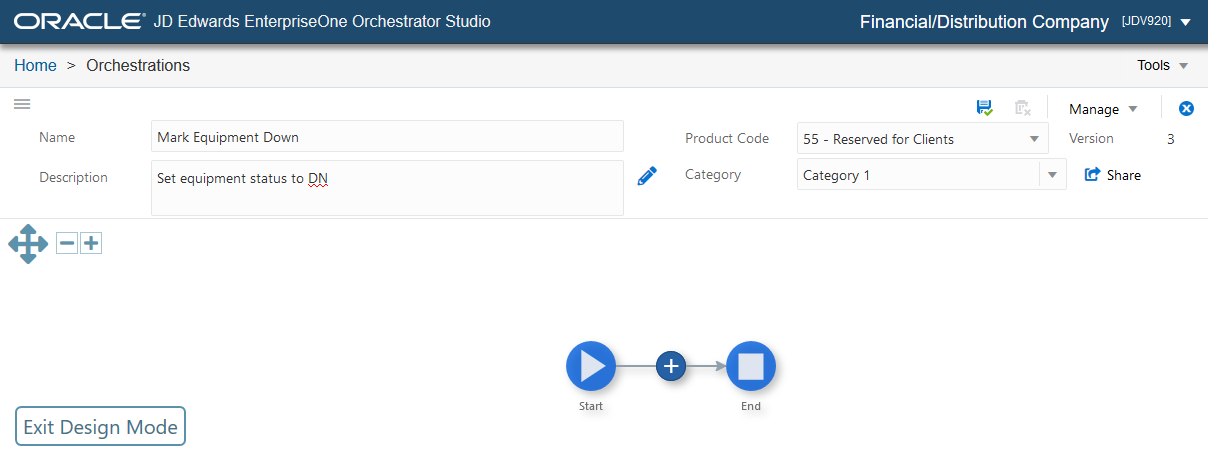
At this point, the design mode is enabled for the orchestration and the canvas displays the Start and End nodes of the orchestration as shown in the following figure:
Enter a Category for the orchestrations or the orchestration components. The Category drop-down list displays the orchestrator categories if any exist. You can choose from the available categories or enter a new value in the Category field.
Click Save before defining inputs or adding steps for the orchestration.
The Orchestrator Studio saves the orchestration as a "Personal" UDO. Next, add inputs to the orchestration as described in Adding Inputs to an Orchestration.
You can also use the Save As button and rename an existing orchestration to create a new one.
If you use Save As to create a copy of an orchestration, only the orchestration is copied. The Orchestrator Studio does not create a copy of the components that are associated with the steps of the orchestration. That is, both the original orchestration and the new orchestration use the same components that are included in the orchestration. Therefore, in the new orchestration, do not modify the components in any way that would break other orchestrations that use the same components.