Using the Classpath Method
- Save the Jython Jar file on the machine where WebSphere Application Server is installed. Make sure that the path is accessible.
- Navigate to Servers, click Server Types , click WebSphere application servers and select the server instance to configure.
- Click Java and Process Management and then click Process definition.
- Click Java Virtual Machine.
- In the Configuration tab, enter the path to the library in the Classpath
field. For example, enter:
/QIBM/UserData/WebSphere/AppServer/V9/ND/profiles/AppSrv01/mylibs/jython.jar - Enter the generic JVM argument in the Generic JVM arguments field. For example,
enter:
-Dpython.path=
                    /QIBM/UserData/WebSphere/AppServer/V9/ND/profiles/AppSrv01/mylibs/jython.jar/Lib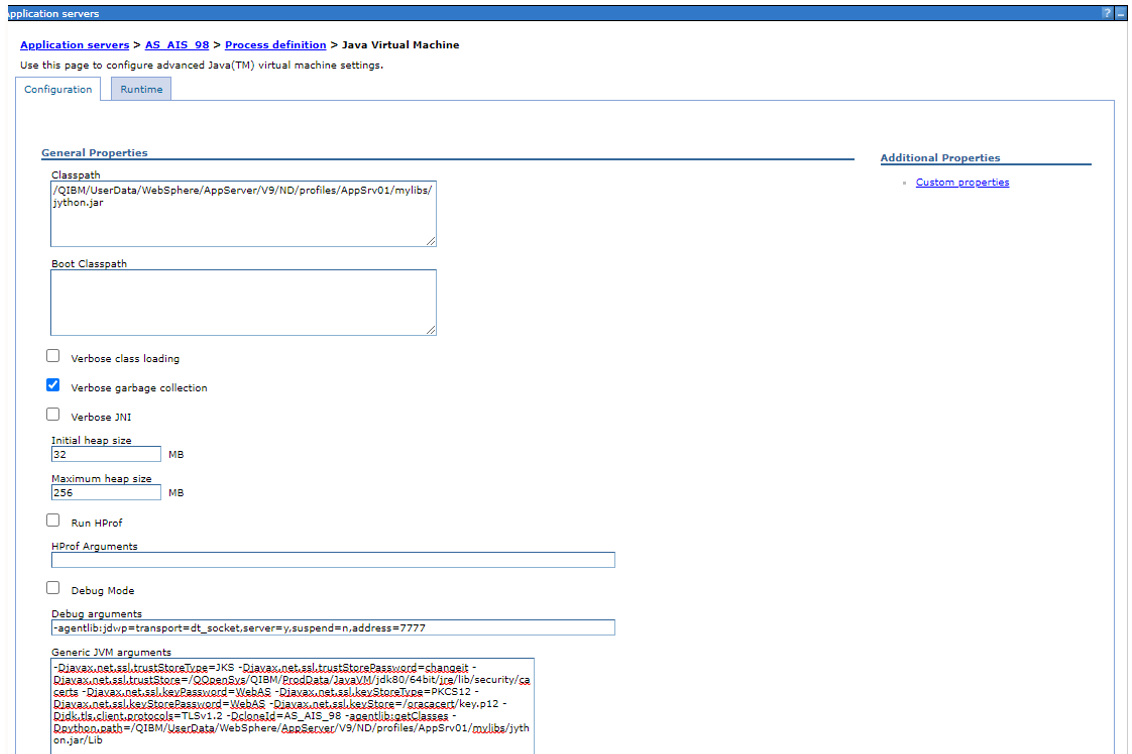
- Click OK and then click Save in the Java Virtual Machine page.
- Click OK and then click Save in the Process definition page.
-
To synchronize Server Manager with the deployed application:
Note: Saving the configuration in the WebSphere Application Server will redeploy the application, but you must synchronize Server Manager to recognize the deployed application.- In Server Manager, locate the AIS Server and update the setting in the Configuration section. This step is required so that Server Manager detects a change in the AIS Server when you click the Synchronize Configuration button.
- Click the Apply button to apply the changes and then return to the AIS Server home page.
- Click the Synchronize Configuration button to restart the AIS Server.