Using the Shared Library Method
- Save the JRuby JAR file on the machine where the WebSphere Application Server is installed. Make sure that the path is accessible.
- To add the JRuby JAR file as a shared library:
- On the WebSphere Application Server home page, expand the Environment node and click Shared Libraries.
- In the Class Path field, enter the fully qualified location of the JRuby JAR file that you saved in Step 1.
- To associate the shared library with the JDERestProxy application:
- In the left pane, click Applications, click Application Types, and then click the WebSphere enterprise applications link.
- Select the appropriate AIS deployment.
- Under References, select Shared library references.
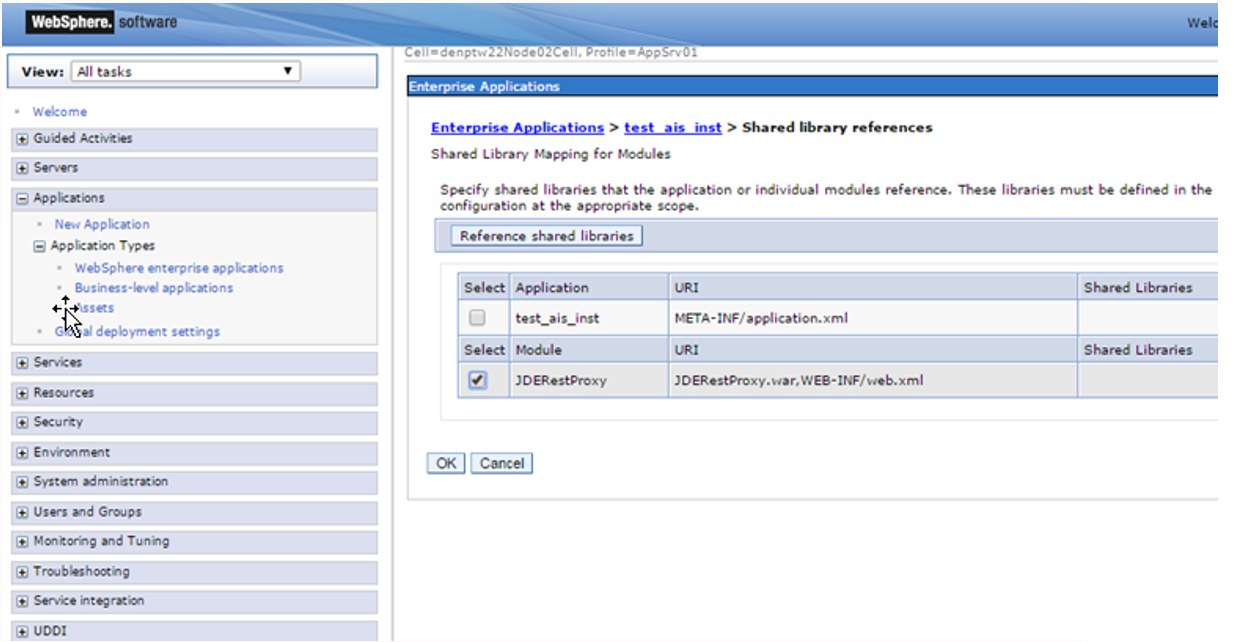
- Select the JDERestProxy option and then click the Reference shared libraries button.
- Use the directional arrow to move the JAR file to the selected group.
- Click OK.
- To synchronize Server Manager with the deployed application: Note: Saving the configuration in the WebSphere Application Server will redeploy the application, but you must synchronize Server Manager to recognize the deployed application.
- In Server Manager, locate the AIS Server and update the setting in the Configuration section. This step is required so that Server Manager detects a change in the AIS Server when you click the Synchronize Configuration button.
- Click the Apply button to apply the changes and then return to the AIS Server home page.
- Click the Synchronize Configuration button to restart the AIS Server.