Using the Shared Library Method and Configuring the Java Property
- Edit the .jar file manifest to include Specification-Version so that the manifest
file can be uploaded as a library on WebLogic.
- Add this path in the manifest file:
jython-standalone-2.7.2.jar\META-INF\MANIFEST.MF - Add this line after Implementation-Version: 2.7.2:
Specification-Version: 2.7.2 - Save the changes to the file and update the file in JAR.
- Add this path in the manifest file:
- Deploy JAR as a shared library on the same WebLogic Server on which the AIS Server (otherwise referred to as the JDERestProxy) is deployed. Ensure that the AIS Server is included as a target for the library.
- After the library is deployed, select the library to view the library details.
- Note the location of the path, as it will be used in the next step.
- Note the name of the library. For example,
JythonLibrary.
- Access the AIS Server instance from the WebLogic console. Click Environment, click Servers, and then click AISInstance.
- Click the Server Start tab.
- Lock and edit the server configuration. In the Arguments field, add the
following example argument at the end of the existing argument list. This is the
same path where the JAR file is uploaded on the WebLogic Server when you deployed it
as a library (See Step 3a). Make sure to add the
Libfolder at the end of the argument.-Dpython.path=/slot/user/oracle/Middleware/user_projects/domains/<ais_domain>/servers/AdminServer/upload/jython-standalone-2.7.2.jar/app/jython-standalone-2.7.2.jar/Lib - Save the configuration and commit the changes to release the lock.
- Before uploading the AIS server component to the Server Manager console, edit the
weblogic.xmlin the deployment package.- Open the AIS server component (par or jar) in a zip file editor and navigate
to the
weblogic.xmlfile as shown in this example:\E1_AISServer_9.2.5.4_mm-dd-yyyy_hh_mm.jar\JDERestProxy.ear\JDERestProxy.war\WEB-INF\weblogic.xml - Edit the
weblogic.xmlto include the shared library by the name it was created with in WebLogic (See Step 3b), as illustrated in the following example: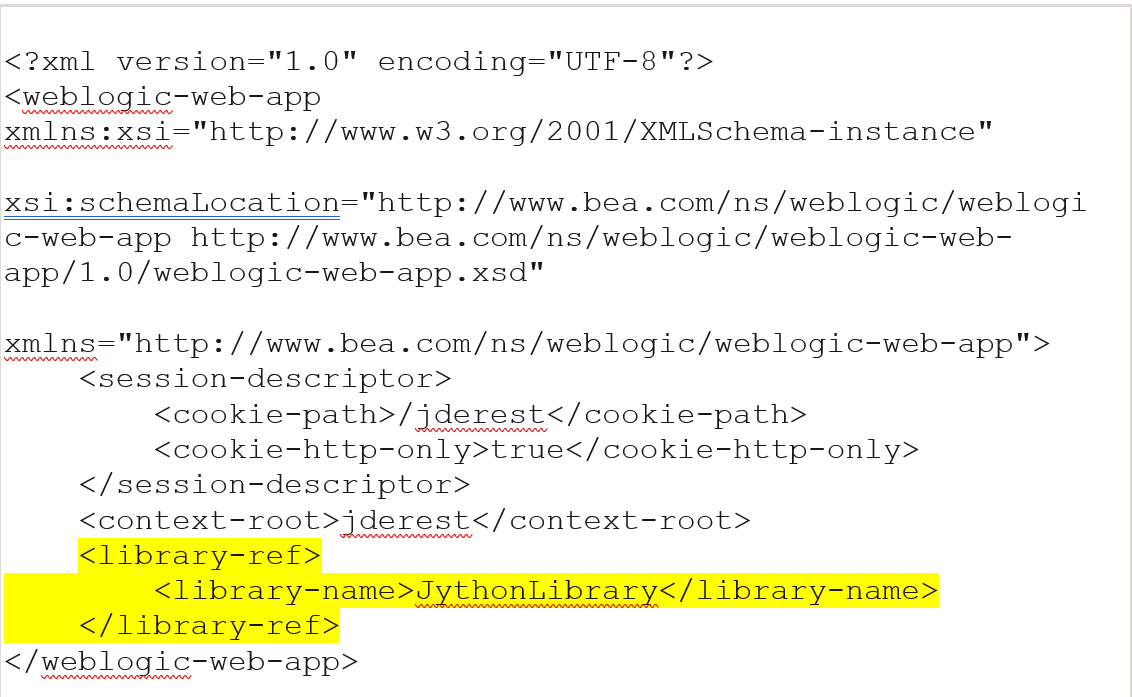
- Save the
weblogic.xmlfile and re-zip the AIS component.
- Open the AIS server component (par or jar) in a zip file editor and navigate
to the
- Upload and then deploy the component from Server Manager.