Understanding the Service Request Design Panel
The Service Request design panel contains two areas: the "Order of Execution" area and the "Available Actions" area. The "Order of Execution" area is where you define the sequence of actions to perform the desired task in EnterpriseOne. The "Available Actions" area serves as the workspace for finding and configuring all of the EnterpriseOne controls and fields that make up the sequence of actions in the "Order of Execution" area. You locate and configure the controls and fields in the "Available Actions" area, and then move each item to the "Order of Execution" and place them in the proper sequence.
Available Actions Area
In the Available Actions area, you can search on an EnterpriseOne form to load all of the available controls (menu items, buttons, check boxes, and so forth) and fields for that form. If the service request needs to invoke more than one application to complete the task, you can load the controls and fields of additional application forms as needed. You can select the Application Stack check box to enable application stack processing as described in the Understanding the Application Stack Option section.
The following image shows the results of loading an EnterpriseOne application form in the Available Actions grid:
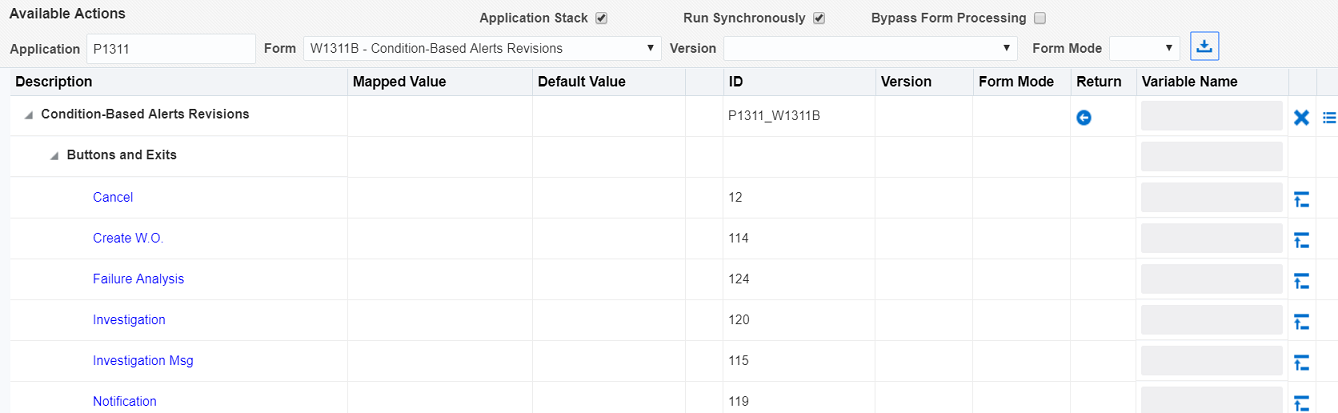
The columns in the Available Actions grid provide interactive features for configuring the controls and fields before you add them to the "Order of Execution" area. The following list describes how to use each column:
Description.
This column displays the controls and fields for each form in a collapsible/expandible parent node named after the EnterpriseOne form. Child nodes categorize other items, and include a Buttons and Exits node, a node for displaying the available Query by Example (QBE) fields in a grid (if applicable), and a node for displaying all of the available columns in a grid.
Note: The separate nodes for QBE fields and Grid columns are available with the IoT_Orchestrator_Components_2.0.1 download. See Downloading and Installing Orchestrator Studio in this guide.Mapped Value.
Use this column to map orchestration inputs to an EnterpriseOne field. You can only map inputs to a field if 1) the EnterpriseOne field is an editable field and 2) you defined the inputs in the orchestration as described in Adding Inputs to an Orchestration.
Default Value.
Enter a default, hard-coded value if there is no mapped value. You can also add a hard-coded value to use if the mapped value returns a null.
"Text substitution" check box column.
This check box enables you to add text substitution for an input. Text substitution enables you to combine input values into a text string for input into an EnterpriseOne field.
ID.
This column displays the ID of the control or field in EnterpriseOne. This is for informational purposes only.
Return.
You can specify any values that you want returned in the orchestration response after EnterpriseOne actions are invoked. If you do not specify any return values, all values on the form will be returned. Return values may be used by customized third-party gateway programs or devices to do further processing based on the values returned from EnterpriseOne applications.
Additional actions available in the grid are "Select First Row" and "Row Number for Update." You can use "Select First Row" if the service request tasks involves selecting the first row in the grid. If the service request task requires updating an existing row in an input capable grid, you can use the "Row Number for Update" row to map an orchestration input to a particular row in the grid. "Row Number for Update" is available with the IoT_Orchestrator_Components_2.0.1 download. See Downloading and Installing Orchestrator Studio in this guide.
After you configure each applicable control or field in the Available Actions area, you click the Add Action button in the last column to add each item as an action in the Order of Execution area at the top of the design panel.
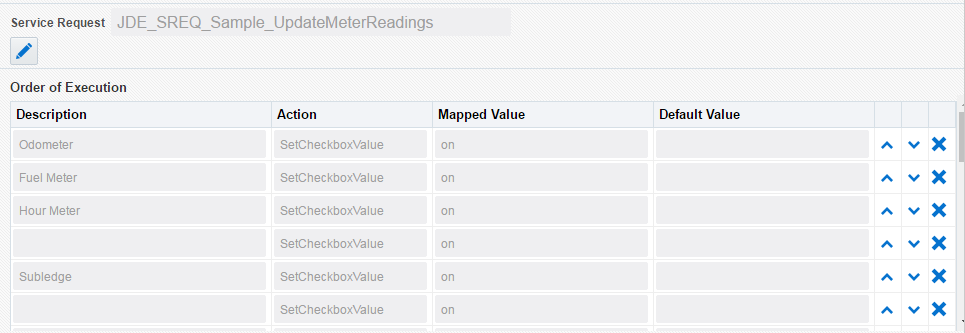
Order of Execution Area
When actions are added to the Order of Execution grid, you can reorder them using the up and down arrow buttons to the right of each row. You can also delete any actions using the Delete (X) button. The following image shows the "Order of Execution" area.