Associating a Form Interconnection with a Form or Row Exit
After you add a new form or row exit by using the Form Extension Manager side panel, you can associate a form interconnection with the newly added form or row exit. Associating a form interconnection enables the system to determine which form is called and displayed when you click the form or row exit.
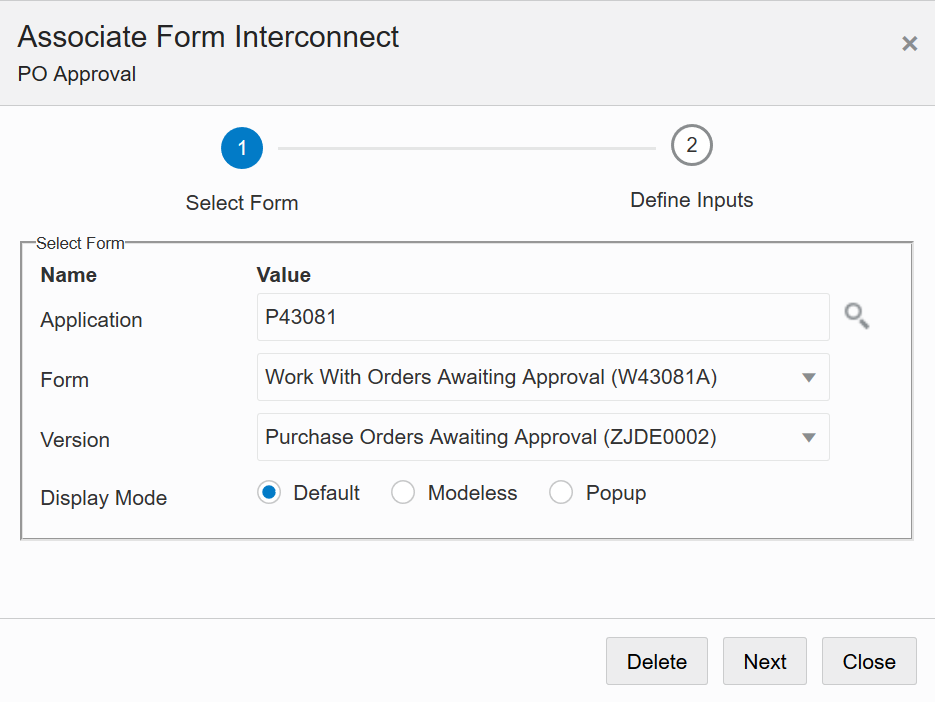
You can associate form interconnections by using the Associate Form Interconnect wizard. The Associate Form Interconnect wizard has two sequential steps as shown in the following image:
Indicators are displayed to help you move through the steps. A check mark on a step indicates that the step is complete and you can proceed to the next step. A red exclamation point indicates that the step is not complete. Click the Next button to proceed to the next step.
To associate a form interconnection with a form or row exit:
Open the EnterpriseOne form that you want to extend.
Click the Form Extension icon.
In the Form Extension Manager side panel, click the Manage Exits button.
The system displays the Manage Exits window.
Perform the following steps:
To associate a form interconnection with a form exit, click the Form tab and then click the corresponding Configure Exit icon for the form exit.
To associate a form interconnection with a row exit, click the Row tab and then click the corresponding Configure Exit icon for the row exit.
The system displays the Associate Form Interconnect wizard.
In the Select Form step (Step 1), define the form to which you want to connect by performing the following actions:
In the Application field, enter the application ID of the application to which you are connecting. You can use the visual assist to search for and select the application.
From the Form drop-down list, select the form to which you want to connect.
From the Version drop-down list, select the version of the form to which you want to connect.
Select one of the Display Mode options:
Default
Modeless
Popup
For more information about the types of form interconnections, see the JD Edwards EnterpriseOne Tools Form Design Aid Guide.
Click Next.
If you click Next without entering the application details, a red exclamation point is displayed on the Select Form step. A message is also displayed, indicating that you must select a valid application to proceed.
In the Define Inputs step (Step 2), define the mapping inputs for each data item that is included in the data structure of the target form.
Mapping Input
Click the Mapping Input field. The EnterpriseOne form controls are enabled for selection as mapping inputs. Click the control that you want to use as a mapping input.
The control that you selected is populated in the Mapping Input field.
Note:You can use extended form controls as mapping inputs.
Input Value
Use this field to enter a value for the mapping input.
Click Save.
Click Close.
In the Manage Exits dialog box, click OK.
Click Save in the Form Extension Manager side panel.
Click Close Side Panel.