Creating a New EnterpriseOne ADF Application
This section describes how to create a new EnterpriseOne ADF application.
In JDeveloper, create a new ADF Application.
On the New Gallery form, select Applications from the Categories section, and then click ADF Fusion Web Application from the Items: list.
Click OK.
On the Name Application form, enter the following information:
Application Name: E01012
Directory: C:\jdeveloper\mywork\E01012
Application Package Prefix: com.oracle.e1.E01012
Ensure that the Application Package Prefix is populated correctly with the following sample name: com.oracle.e1.E01012
Note: Oracle's standards are to name EnterpriseOne ADF applications beginning with the letter E, for example, E01012.
Accept the default settings and click Finish.
Add the jar files to your Model project by completing the following steps:
Right-click Model project
Select Project Properties
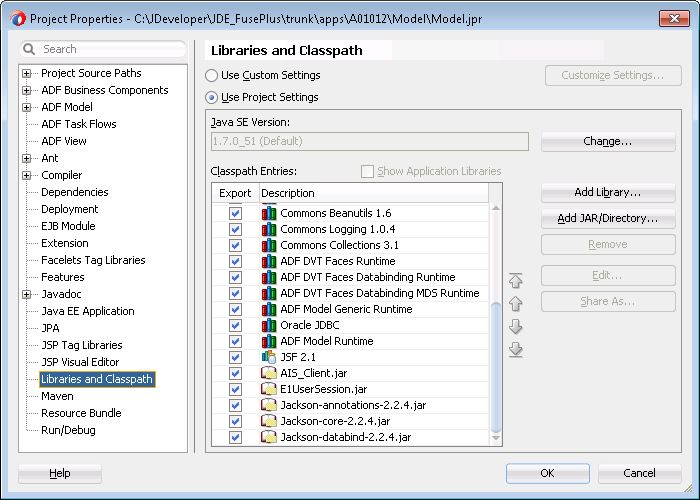
Select Libraries and Classpath (towards the bottom of the left pane)
Click the Add Jar/Directory… button located on the right side of the screen and add the following jars:
AIS_Client.jar
jackson-annotations-2.x.x.jar
jackson-core-2.x.x.jar
jackson-databind-2.x.x.jar
E1UserSession.jar
The following graphic displays the results you should now see:

Click the Add Library button located on the right side of the screen.
Click the ADF Model Generic Runtime Classpath entry, and then click OK.
Click OK to save the changes.
In the Projects panel on the left, delete the WEB-INF folder that has been added to the Model project.
Save changes made to the Model project.