 Building
and Testing the Orchestration
Building
and Testing the Orchestration Before You Begin
This 60-minute Oracle by Example (OBE) shows you how to build and test the orchestration.
What Do You Need?
To perform the steps in this OBE, you must have used process recorder to create a Form Request that updates the existing expense report with a new expense and add to an orchestration as explained in the preceding OBE.
 Building
and Testing the Final Orchestration
Building
and Testing the Final Orchestration
- In Orchestrator Studio, you should already be on the orchestrations page, if not, select Orchestrations from the home page.
- Click New.
- Enter the name:
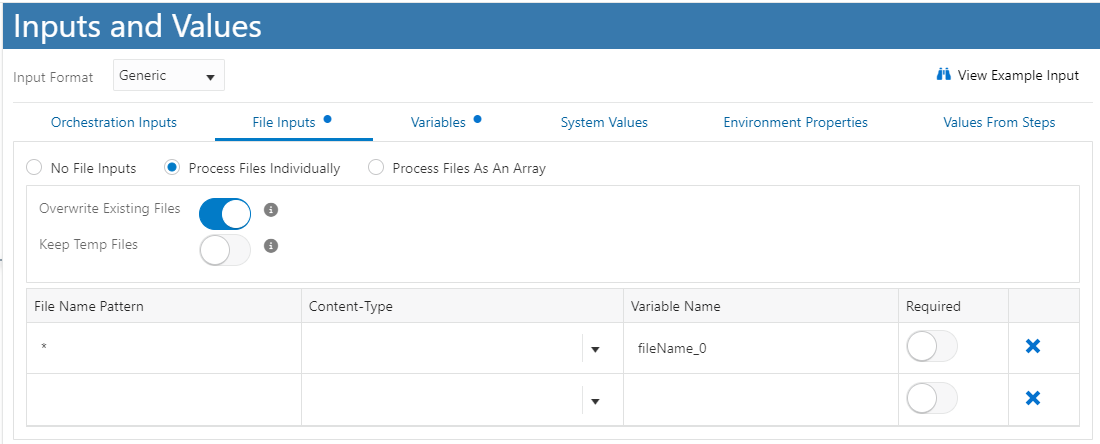
OCI receipt to E1 Expense. - Click the Start node and select File Inputs tab.
- Select Process Files Individually.
- Enter
a *in the File Name Pattern. - Let the Variable Name default to fileName_0.
- Enable the Overwrite Existing Files option (so the file name
stays the same).
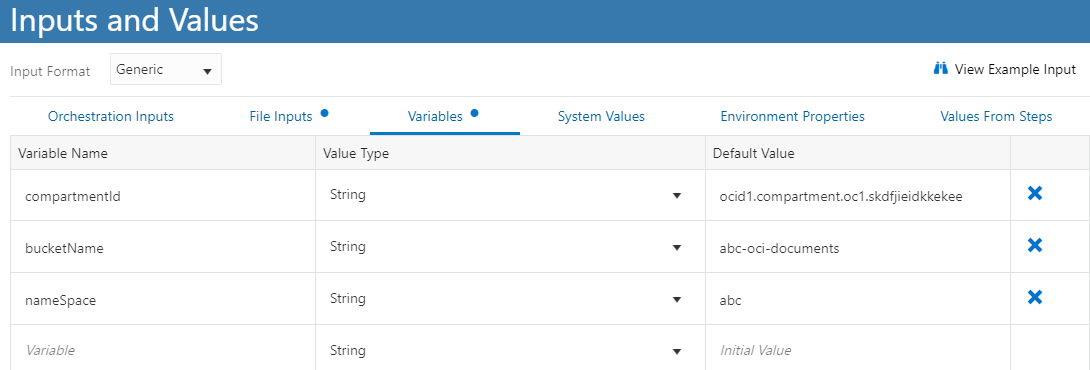
Inputs and Values for Orchestration - Select the Variables tab, enter these three
variables:
- compartmentId – populate the default value with your OCI compartment ID.
- bucketName – populate the default value with the bucket name (in prerequisites).
- nameSpace – populate the default value with your OCI namespace.
Variables tab - Save the orchestration.
- Double-click the line between the start and end node and select Connector.
- Enter
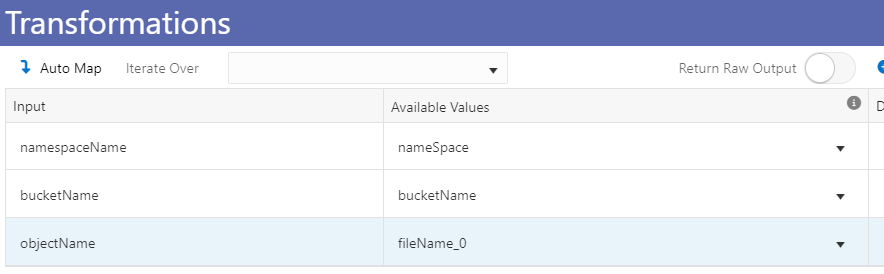
PUT Object Fileto find the connector. - Click the new connector node and select Transformations.
- Select the orchestration variables for namespaceName and bucketName.
- Select fileName_0 for both objectName and fileName.

Transformations - Save the orchestration.
- Test the orchestration so far.
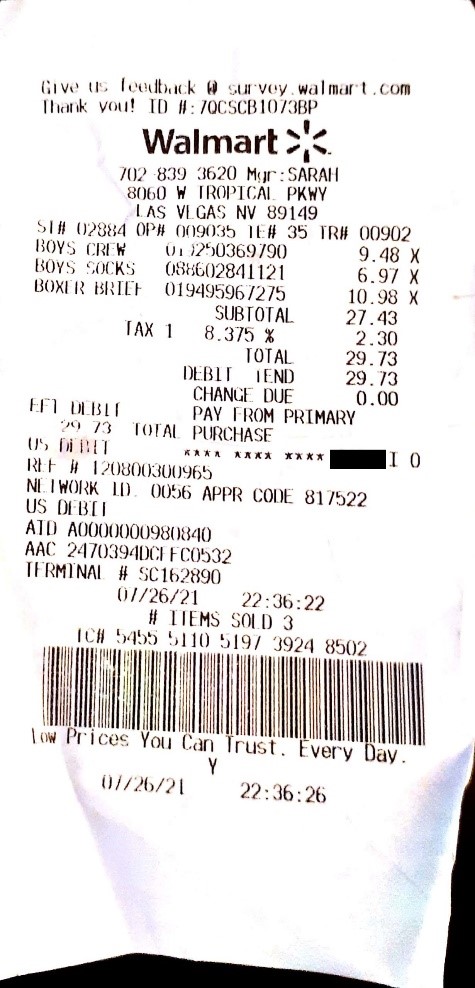
- You will be using the WalmartReceipt1.jpg image of the receipt for testing, download the image file locally.
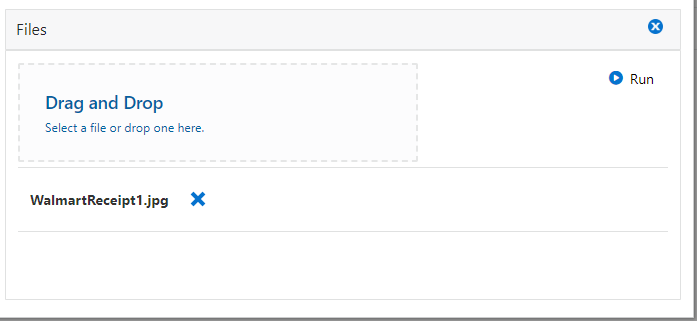
- Double-click the Start node to open the Run Orchestration window.
- Click the Files button, click the box or drag and
drop the
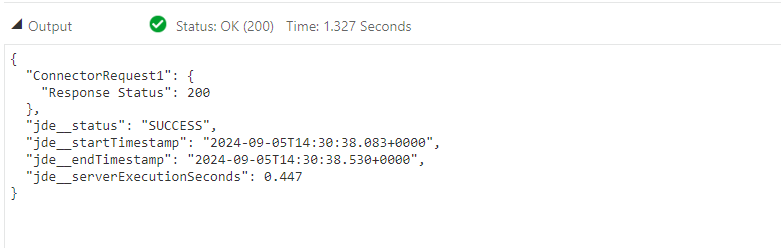
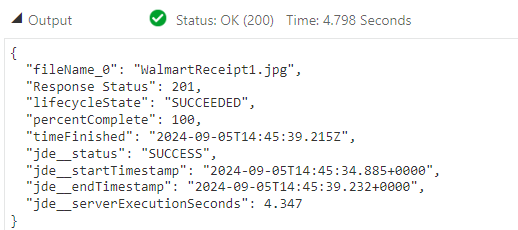
WalmartReceipt1.jpgfile to send it into the orchestration. - Click Run. The orchestration runs, returning a Status OK (200).
- Open your bucket in OCI, you will see the file uploaded.
- Close the Run Orchestrations window.
- Double-click the line after the first step, select Connector.
- Select OCI Document Key Values.
- Click the new node, select Transformations and map
the following:
- namespaceName= nameSpace(Variables)
- bucketName = bucketName (Variables)
- docToProcess = fileName_0
- compartmentId = compartmentId (Variables)
- nameSpace = nameSpace (Variables)
- Click Back on the diagram, and then click the End node and select Outputs and Assertions.
- Enable the following:
- fileName_0
- lifecycleState
- percentComplete (change this to a Numeric value)
- timeFinished
- Response Status
- Save the orchestration.
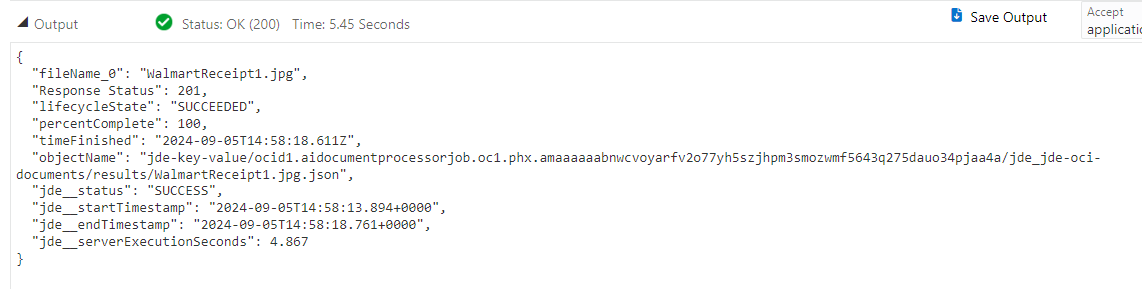
- Test the orchestration so far, by opening the Run Orchestration window from the start node.
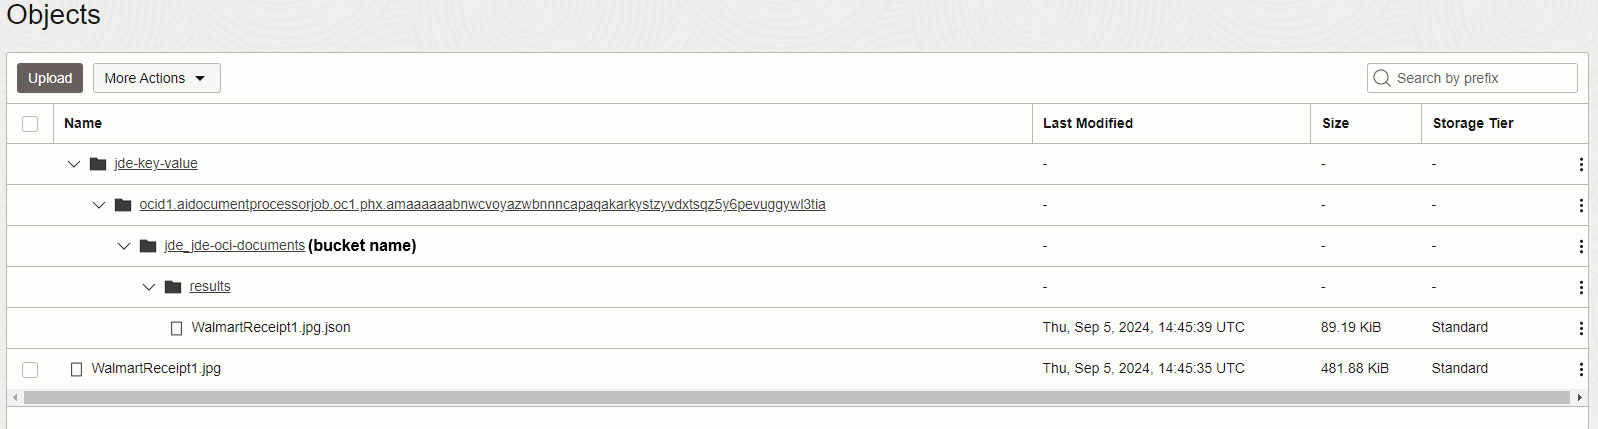
- Add the
WalmartReceipt1.jpgto the files and click Run. The orchestration runs, returning a Status OK (200). - In OCI, view your bucket. You should see a new folder
structure with a .json file.
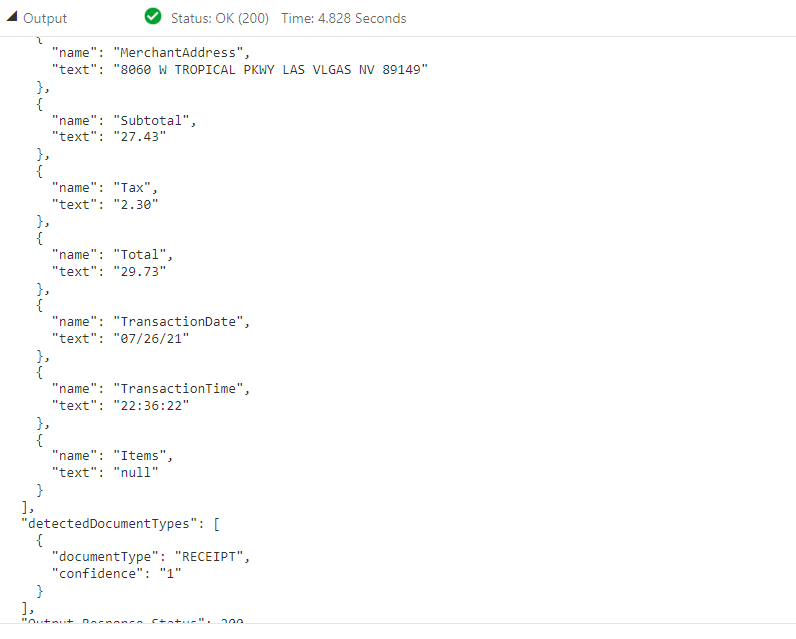
json file If you download the file, you’ll see it has the results of the document understanding API, at the bottom it has identified it as a receipt.
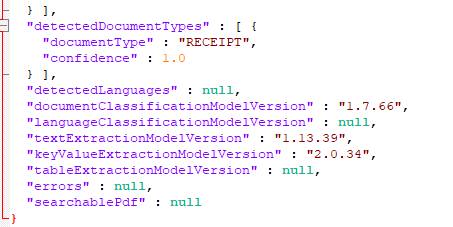
Results of document understanding API The next steps in the orchestration will return these results to use them in the orchestration.
- Close the Run Orchestrations window.
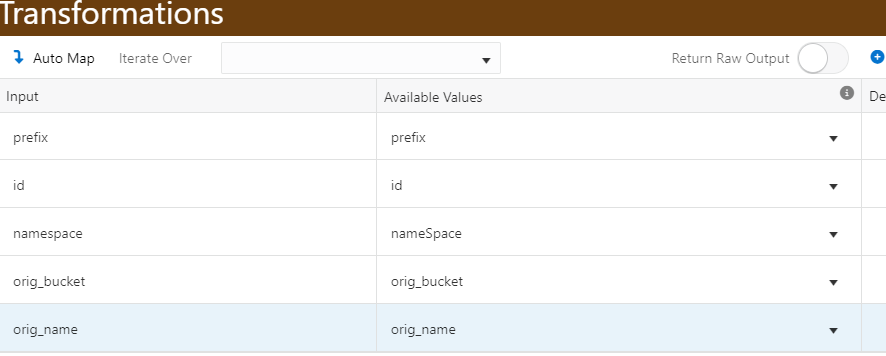
- Double-click the line before the end node and select Logic Extension, select Build Object Name.
- Click the new node and select Transformations.
Map the inputs as follows:
prefix = prefix
id = id
namespace = nameSpace
orig_bucket = orig_bucket
orig_name = orig_name
The Available Values are outputs for the OCI Document Key Values, except for nameSpace (variable).
Inputs and Available Values for OCI Document Key Values - Click the orchestration End node and select Outputs.
Enable the objectName in the outputs.

Outputs - Save and test the orchestration again. The objectName should
have a value similar to this example, but with your bucket
name (that is
jde-oci-documents). The following screenshot shows the path to the .json file we saw above.
Path to the .json file - Close the Run Orchestrations page.
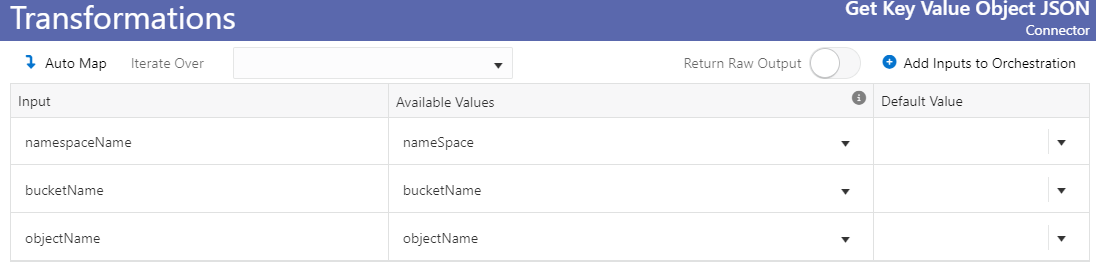
- Double-click the line before the end node, select Connector, then select Get Key Value Object JSON.
- Click the new node and select Transformations. Map
the following:
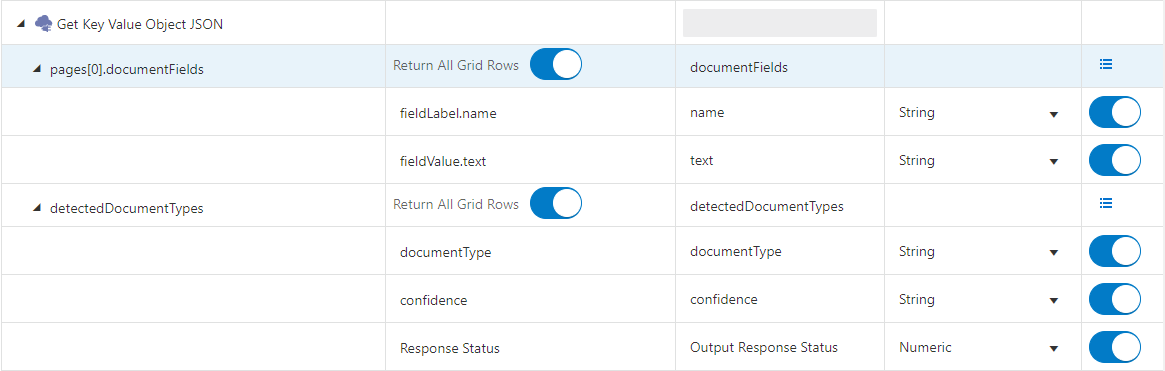
Transformations - Click back to the diagram, click the end node and select Outputs.
- Enable all the values from the new step and rename them as
necessary. The following screenshot shows the values used to
complete the tasks in this OBE:
Enabling and renaming the values - Save the orchestration and test again. The output should now
include details found in the receipt, the result of the
Document Understanding service.
Outputs - Close the Run Orchestrations window to continue building the orchestration.
- Double-click the line before the end node and select Connector.
- Select OCI Delete Object. Now that the receipt has been evaluated the orchestration will delete it from the bucket.
- Click the New node and select Transformations.
Map the following:
namespaceName = namespace
bucketName = bucketName
objectName = filename_0
Transformations - Double-click the line before the end node and select Logic Extension.
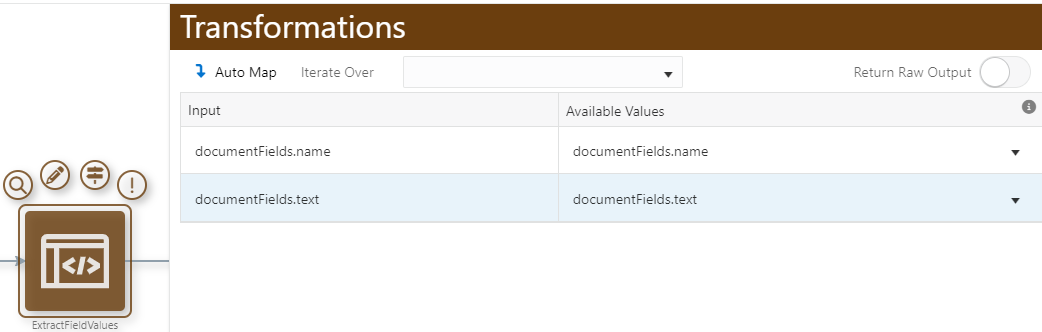
- Select ExtractFieldValues.
- Map the transformations, matching the two values from
outputs of the Get Key Value Object JSON.
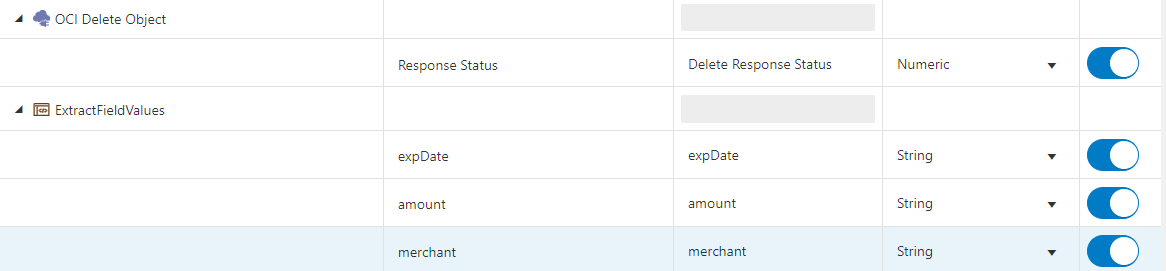
Map the transformations - Click the end node and select Outputs.
- Add the values from the two new steps (changing names as
needed). The following screenshot shows the values used to
complete the tasks in this OBE:
Add Values - Save the orchestration and test again. The output should
include a status (204) for delete and the three values from
the receipt.
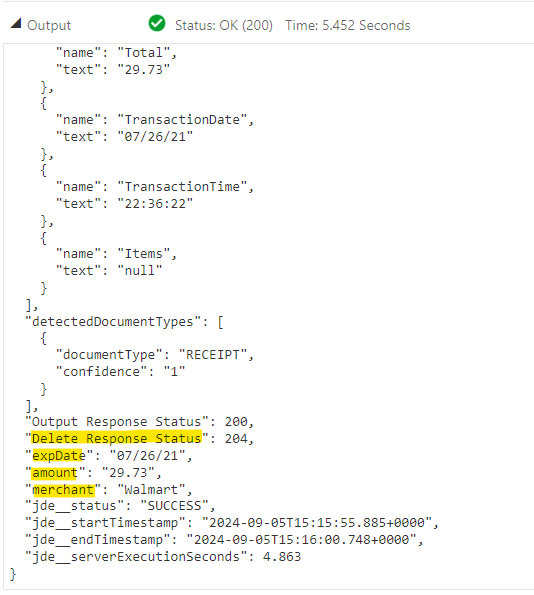
Verifying the Output - Check your bucket in OCI, the receipt .jpg file should no longer be there.
- Close the Run Orchestrations window to continue building the orchestration.
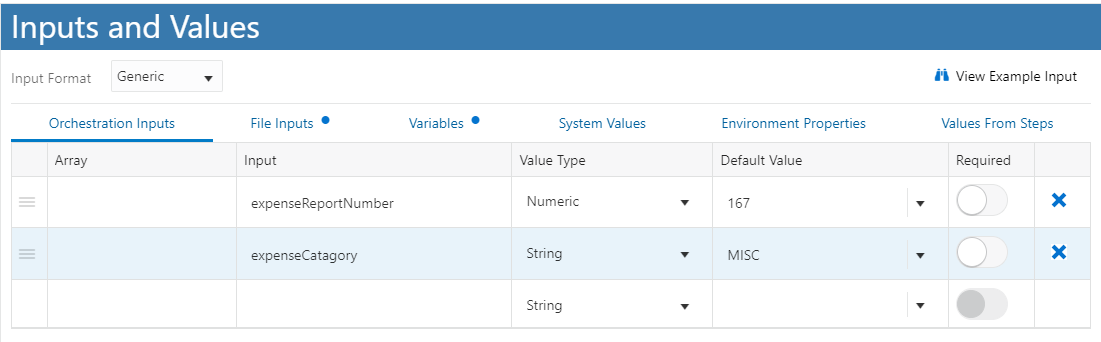
- Click the start node and select Inputs and Values.
- Add two inputs:
• expenseReportNumber, Numeric (set the default value to the expense report you created)
• expenseCatagory, String (set the default to MISC)
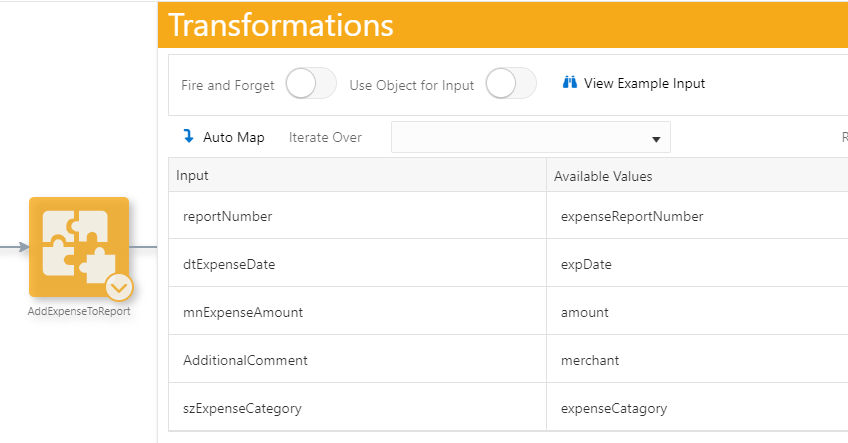
Inputs and Values - Double-click the line before the end node and select Orchestration.
- Select AddExpenseToReport.
- Map the transformations as follows, with the number and
category returned from the inputs and the expense date,
amount, and merchant returned from ExtractFieldValues step.
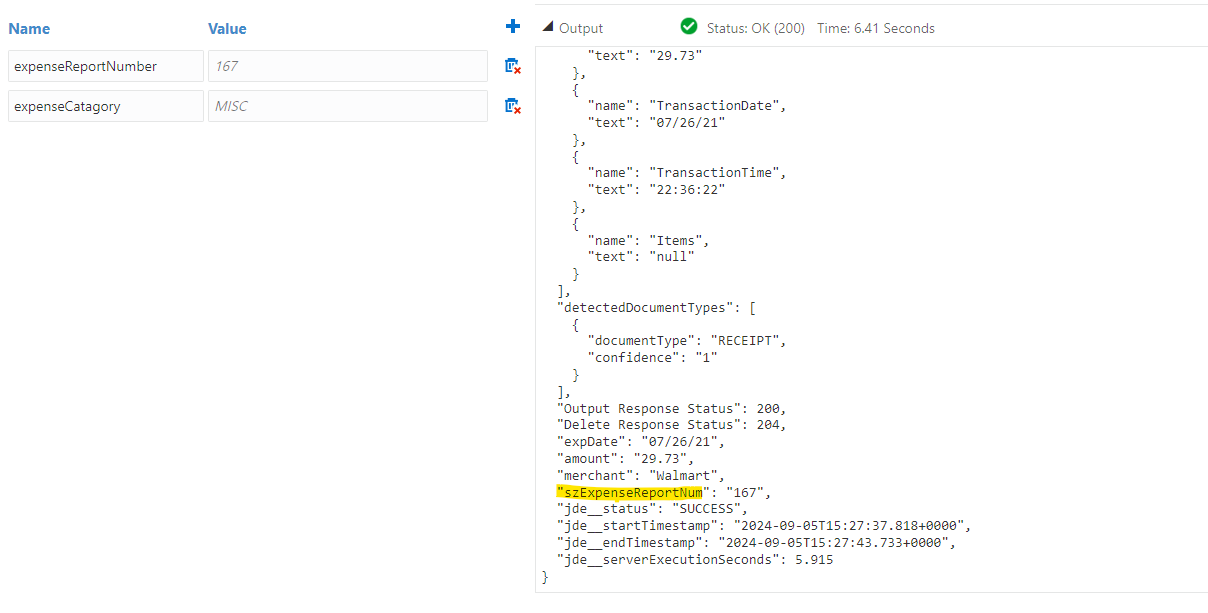
Map the transformations - Enable the output of report number for the new step in
orchestration outputs.

Enable the output - Save the orchestration and test again. The report number
should show in the output.
Report Number in Output - Now return to EnterpriseOne, Expense Entry.
- Find and select your report. A new line should be added with
the date and amount from the receipt.

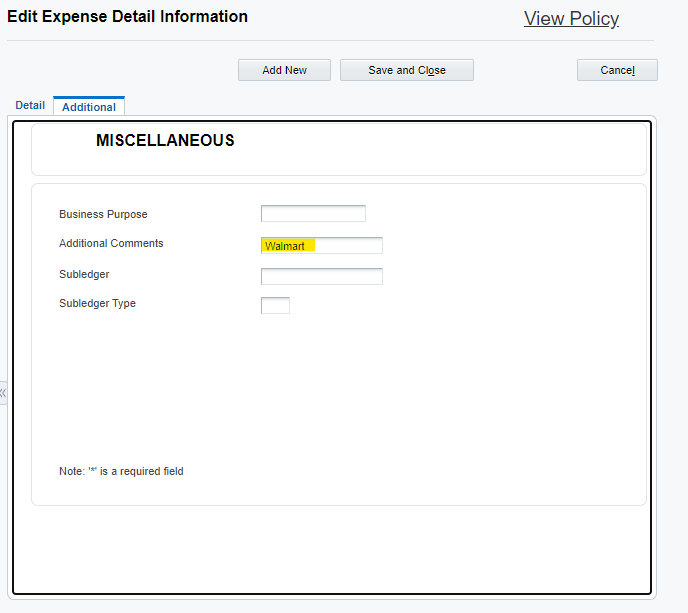
Expense Entry Report - Click the MISC link for the line to open the record and view
the Additional tab. The merchant’s name (Walmart) should be in
the record.
MISCELLANEOUS Information - The orchestration successfully used the OCI Document Understanding service to gather details from a receipt and those values were entered into an EnterpriseOne expense report.

Conclusion
In this learning path, you have learned how to:
- Use a Document Understanding in OCI to find key values in a receipt image.
- Create an Orchestrator connection with authentication and endpoint definition to the OCI Object Storage API and OCI Document Understanding API.
- Create a connector to put the receipt image in Object Storage.
- Create a connector to call the Document Understanding service to find key values in the uploaded image.
- Create a connector to download the JSON that is the result of the Document Understanding service.
- Create various orchestration steps to gather the information from the result, add it to EnterpriseOne records and attachments.
You can use these skills and a similar approach to call many of the OCI APIs using orchestrations.