Creating JMS Queues in a Transaction Server container Installed in WebSphere Application Server
To create a JMS queue in a Transaction Server container installed in WebSphere Application Server:
Start the Transaction Server from the Server Manager Management Console.
Open the WebSphere Administrative Console.
Expand the Resources node in the left panel.
Expand the JMS node.
Click the link for JMS Providers.
Click the Default messaging provider whose scope contains this value:
server=RTE_Container
Under Additional Properties, click Queue connection factories.
The following sequence of screens shows the fields and values on the JMS providers screen in WebSphere:
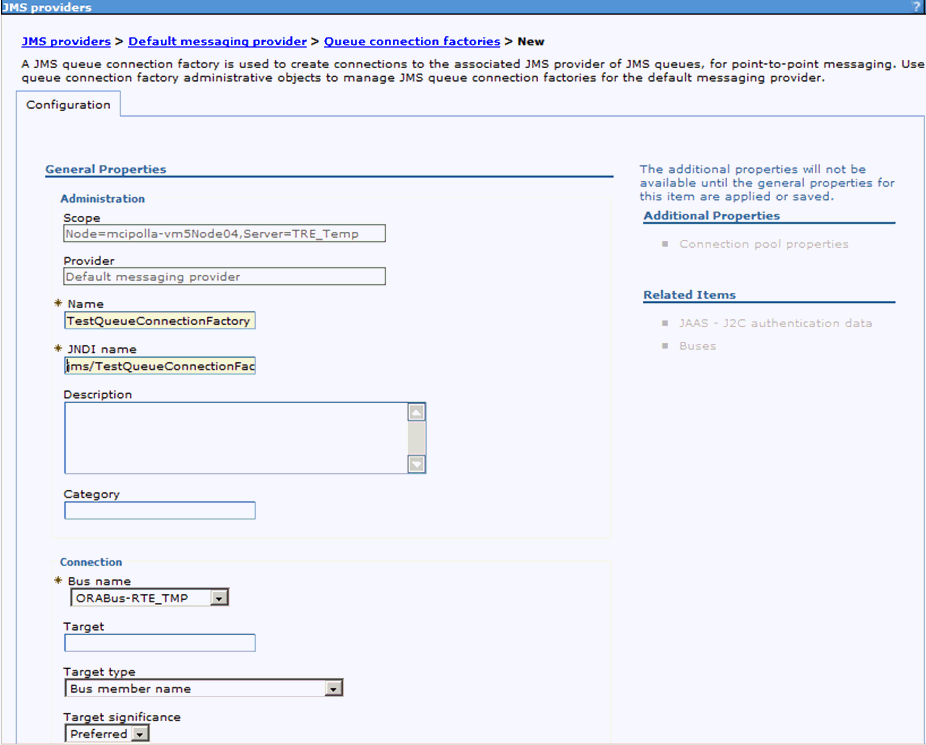
On the WebSphere Queue Connection Factories page, click the New button and complete these fields:
Field
Value
Name
TestQueueConnectionFactory
JNDI Name
jms/TestQueueConnectionFactory
Bus name
Select the Bus name created for Transaction Server.
Click OK to save the details.
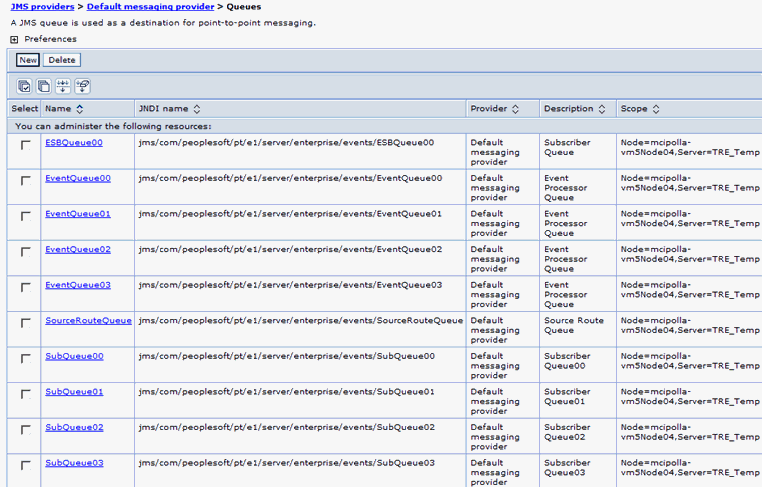
Click Default messaging provider in the top breadcrumb.
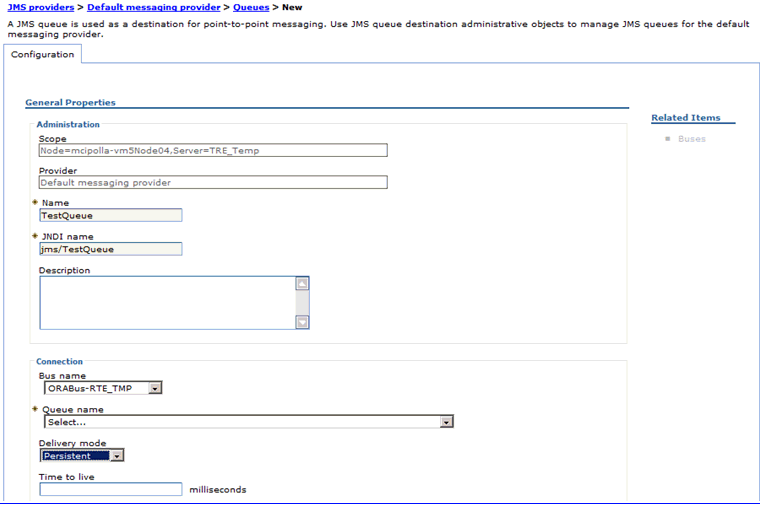
Click Queues under Additional Properties to view a list of queues available for the Transaction Server.
The following screen shows an example of a Queues screen in WebSphere.
Click the New button and complete the required fields as shown in the following screens:
For the Queue name field, use the pulldown to select the option Create Service Integration Bus Destination as shown in the following screen:
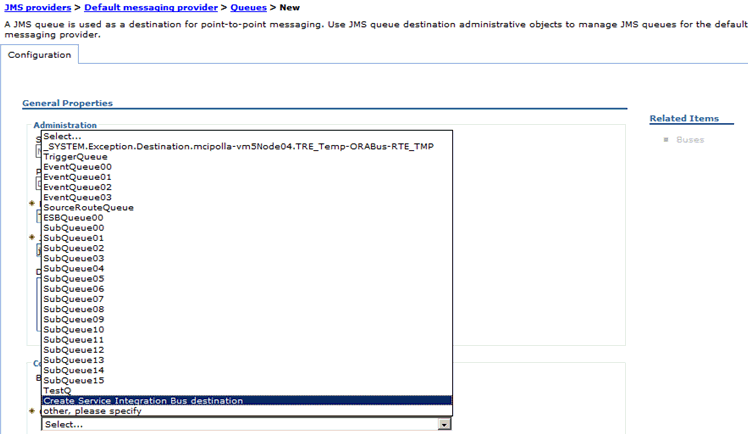
After you select Create Service Integration Bus destination from the pulldown, the following Create new queue dialog is displayed:
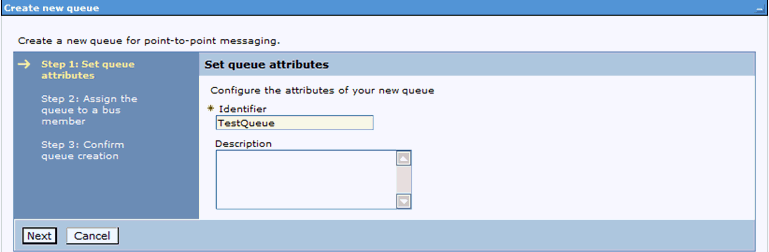
On Create New Queue - Step 1: Set queue attributes, enter a value for the required Identifier field and click the Next button.
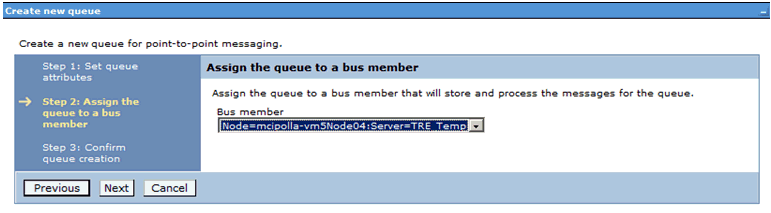
On Create New Queue - Step 2: Assign the queue to a bus member, use the pulldown to select The Transaction Server container as the Bus Member.
Click the Next button.
After creating the bus destination, the newly created bus destination is set as the queue name for the configured Queue. The newly created bus destination can be verified by using this navigation:
Service Integration > Buses > <BUS_NAME> Destinations
Note: If any available unused bus destination is available in the Queue list, then it can be selected from the dropdown rather than creating a new bus destination.Note: The values specified in the table below for Name and JDNI name are samples only. Any unique value can be given. All other values should remain the same as the defaults.Field
Value
Name
TestQueue
JNDI Name
jms/TestQueue
Queue name
Create Service Integration Bus destination (TestQueue)
Persistence
Persistent
Click the OK button to save the settings and view the newly created queue.