Performing Common Setup for All Microsoft Windows Servers
This section shows you how to set up each core Microsoft Windows server required to run JD Edwards EnterpriseOne on Oracle Cloud Infrastructure.
Prerequisites
Using the user interface in Oracle Cloud Infrastructure, you must have created a Microsoft Windows VM instance for each server that will be deployed by JD Edwards EnterpriseOne One-Click Provisioning. At a minimum, the core JD Edwards EnterpriseOne servers include the Provisioning Server, Compute Database Server, Enterprise Server, WebLogic Server, and Deployment Server. For more information, refer to the OBE "Creating Microsoft Windows Instances as VMs in Oracle Cloud Infrastructure" in this Learning Path.
General
- Ensure that the host name for the server contains only alphanumeric values. Special characters are not allowed.
-
All servers in the provisioning cycle must be configured with the same Microsoft Windows user name and credentials, where the user name must be opc. This common user must have aadministrator rights, that is, the user must be part of the Administrator group.
Note:JD Edwards EnterpriseOne One-Click Provisioning supports only these special characters for Windows user passwords:
_@~!#%*+(){}[].? - If you change the password on any single machine in the provisioning cycle, you must likewise change the password all the other machines and reboot the Provisioning Server to recognize those changes.
Enable Remote Command Execution Through PowerShell
From PowerShell, use this command to enable remote command execution:
winrm quickconfig -q
Enable Inbound Ports in the Firewall
If you have the Microsoft Windows firewall enabled for any recommended profile (public, private, default), you need to open inbound and outbound ports for One-Click Provisioning to deploy the Deployment Server in the Microsoft Windows instance in Oracle Cloud Infrastructure. These ports are also required for JD Edwards EnterpriseOne runtime to function properly.
Use this procedure to open the inbound ports for each Microsoft Windows instance.
- Go to Administrative Tools and select Windows Firewall with Advanced Security.
- In the left pane, highlight Inbound Rules.
- In the right pane, select Actions, then select Inbound Rules, and click New Rule.
- On the Rule Type field, select Port as the type of rule to create.
- Click the Next button.
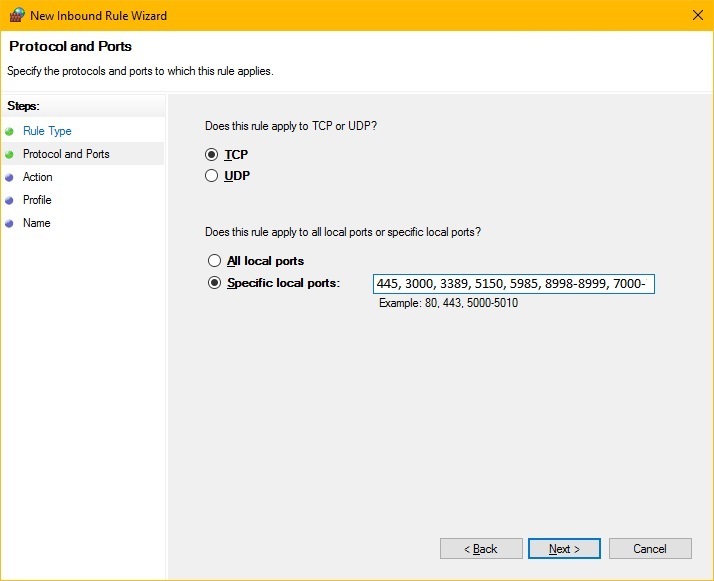
- On the Protocol and Ports page:
- You can accept the default value of TCP for the protocol to which this rule applies.
- Select the Specific local ports option, and for each Windows Server, enter each of the ports shown for that server in the following table. Separate the ports by a comma.
Windows Server Firewall Port List
Component
Inbound Ports to Open
Provisioning Server 445
3000
3389
5150
5985
8998-8999
7000-7001
14501-14502
Database Server 445
3389
5150
5985
<DB_PORT> Note: For SQL Server database, this is the value the user provides using the Provisioning Console.
14502-14510
Enterprise Server 445
3389
5150
5985
6017-6022
14502-14510
Web Server 445
3389
5150
5985
<WLS_ADMIN_PORT> See Note 1
<SSL_ACCESS_PORT> See Note 2
<SSL_ACCESS_PORT-1> See Note 3
14502-14520
Deployment Server 445
3389
5150
5985
6017-6022
14502-14510
Note 1: This is the Admin Port on which the Admin Server is running. This value is set by the user while creating a WebLogic domain.
Note 2: This SSL port must be opened to enable the Server Manager Console to complete the tasks.
Note 3: This port number is equal to the value of the SSL port minus one. This port must be opened to enable the Server Manager to complete the provisioning tasks. For example, if you have specified the port value as 8081 in the One-Click Provisioning Console, you must open 8080 port (8081-1).
Also, you must open a port for each of the WebLogic Servers on Oracle Cloud Infrastructure. For example, if you have the following environments and server combinations, you should open eight ports: four ports for SSL for the port numbers specified by using the Provisioning Console, and four ports for non-SSL. The value of a non-SSL ports should be the value of an SSL port minus one.
- DV HTML
- PD HTML
- DV AIS
- PD AIS
The following example shows the ports you should specify for the Provisioning Server. The complete list is not captured in the screenshot.
- Click the Next button.
- On Action, you can accept the default value which is Allow the connection.
- Click the Next button.
- On Profile, select all the firewall profile options (Domain, Private, Public).
- Specify a name for the rule. For example, JDESMC_RDP
- Click the Finish button to save the rule and exit the wizard.
Enable Outbound Ports in the Firewall
If you have the Microsoft Windows firewall enabled for any recommended profile (public, private, default), you will need to open inbound and outbound ports for One-Click Provisioning to deploy the Deployment Server in the Microsoft Windows instance in OCI. These ports are also required for JD Edwards EnterpriseOne runtime to function properly.
Use this procedure to open the outbound ports in your Microsoft Windows instance.
- Go to Administrative Tools, and select Windows Firewall with Advanced Security.
- In the left pane, highlight Outbound Rules.
- In the right pane, select Actions, and click New Rule.
- On the Rule Type field, select Port as the type of rule to create.
- Click the Next button.
-
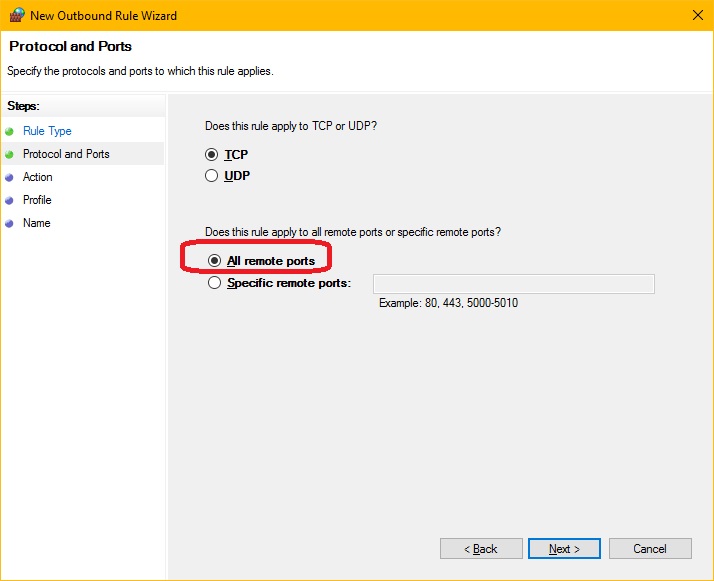
On the Protocol and Ports page:
- You can accept the default value of TCP for the protocol to which this rule applies.
- Select the All remote ports option.
- On Action, you can accept the default value which is Allow the connection.
- Click the Next button.
- On Profile, select all the firewall profile options (Domain, Private, Public).
- Specify a name for the rule.
- Click the Finish button to save the rule and exit the wizard.
Configure Settings for Ethernet Connections
You must configure the settings for the Ethernet connection to specify the domain name of the Domain Name System (DNS) for the Availability Domain to which all the JD Edwards EnterpriseOne servers belong.
For example, if your subnets look like those shown in the example below, you must
configure your network settings using this procedure: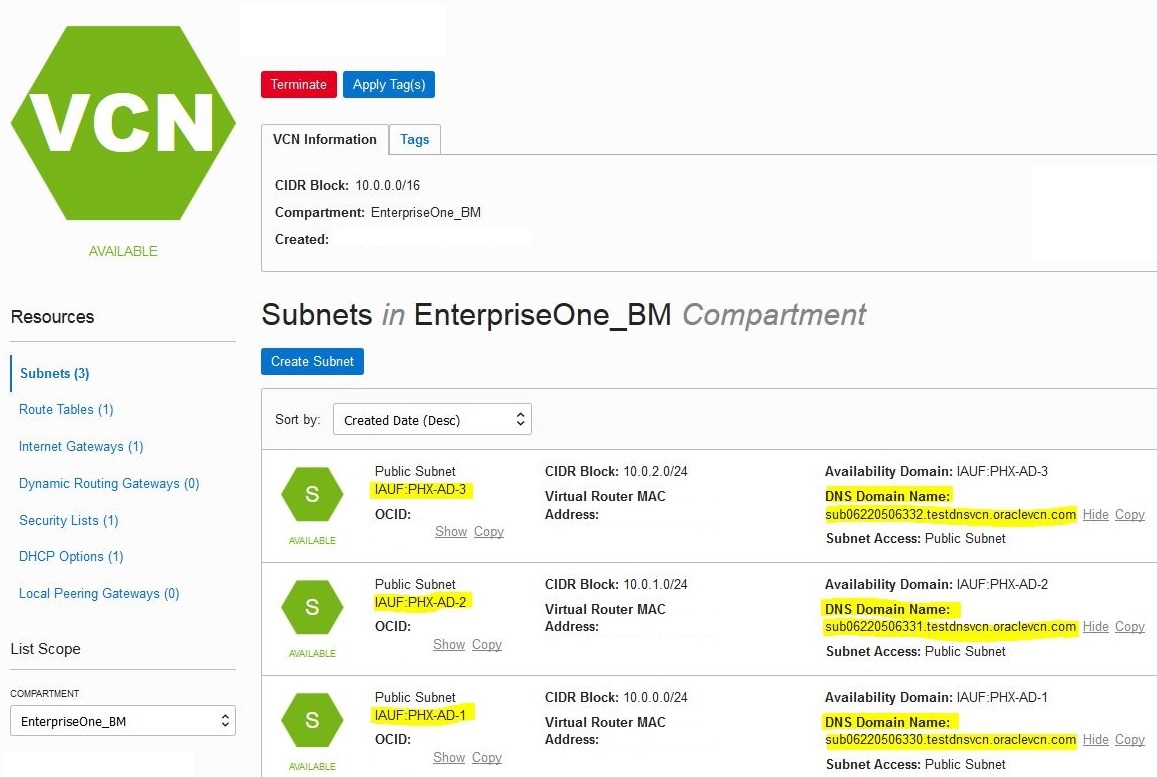
- Open Network and Sharing Center.
- From Ethernet settings, select Network, then select Connections, and click Ethernet to open Ethernet Status.
- On the Ethernet Status window, click the Properties button.
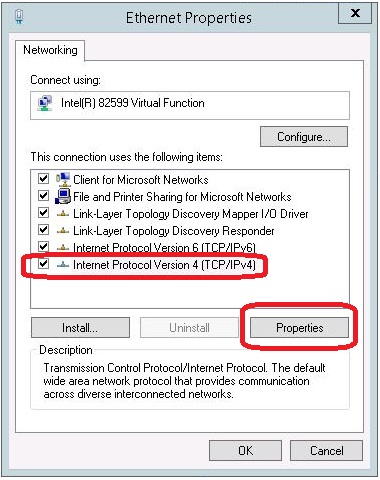
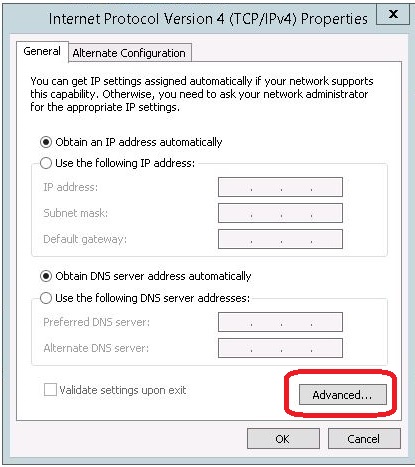
- On the Ethernet Properties window, select the Internet Protocol Version 4
(TCP/IPv4) option and click the Properties button.
- On the Internet Protocol Version 4 (TCP/IPv4) Properties window, click
the Advanced button.
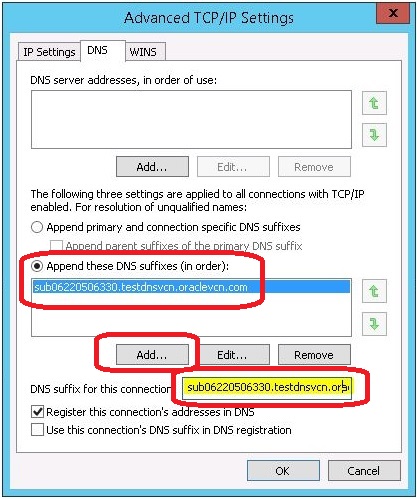
- On the Advanced TCP/IP Settings window, select the Append these DNS suffixes (in order): option and click the Add button.
-
On the TCP/IP Domain Suffix dialog box, enter the value of the DNS Domain Name for your Availability Domain. For example, assuming that your subnets areas shown in the preceding screenshot showing the subnets for each Availability Domain and all the servers are created in the sub0622506330.testdnsvcn.oraclevcn.com subnet, you would enter this value for the suffix:
sub0622506330.testdnsvcn.oraclevcn.com
- Click the Add button to add the DNS suffix.
- Add this same suffix (in this example,
sub0622506330.testdnsvcn.oraclevcn.com) in the field labeled DNS
suffix for this connection.
- Click the OK button to accept the values and exit the Network and Sharing Center.
Change Security Option
If you chose a user other than opc for the One-Click Provisioning deployment of your Deployment Server, use this procedure to change the Microsoft Windows security option so that the user is recognized by JD Edwards EnterpriseOne.
- Log in to the Deployment Server as the user you configured, which is other than the opc user.
-
Open the Microsoft Windows Local Security Policy program by going to Start and selecting Run, or by using this Command Prompt:
secpol.msc - On the Local Security Policy window, navigate to Local Policies and select Security Options.
-
Locate and edit this setting:
Network Security: LAN Manager authentication level
Use the drop-down list to select this setting:
Send NTLM V2 response only
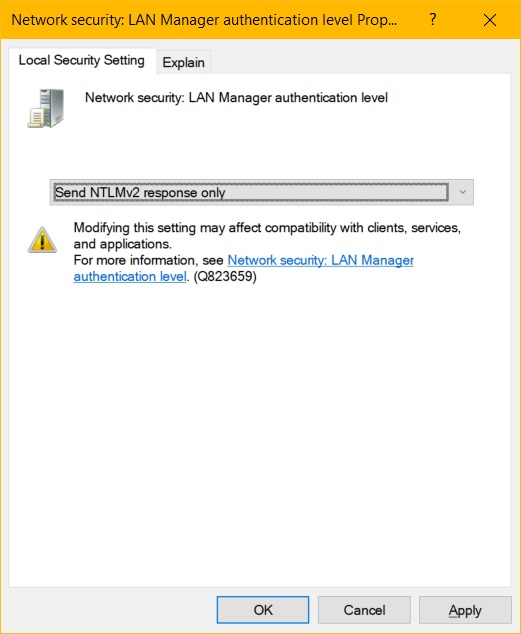
- Click the Apply button to save the setting.
Change the Maximum Transmission Unit (MTU) Setting
The recommended MTU setting is 1500. Use this procedure to check, and if necessary change, the current MTU setting.
-
Open Windows PowerShell as Administrator and run this command (as a single contiguous line) to check current value of the MTU setting:
Get-NetIPInterface | where {($_.InterfaceAlias -eq "Ethernet") -and ($_.AddressFamily -eq "IPv4") -and ($_.NlMtu -Gt 0)} -
If the returned value is not set to 1500, run this command (as a single contiguous line) to set the MTU value to 1500:
Get-NetIPInterface | where {($_.InterfaceAlias -eq "Ethernet") -and
                            ($_.AddressFamily -eq "IPv4") -and ($_.NlMtu -Gt 0)} |
                            Set-NetIPInterface -NlMtuBytes 1500