Performing Post Installation for the Standalone Deployment Server with Microsoft SQL Server Database
This section shows you how to perform the postinstallation tasks for the standalone Deployment Server with the Microsoft SQL Server database.
This section is only applicable if you have deployed a standalone Deployment Server with the Microsoft SQL Server database using One-Click Provisioning.
Background
You can use One-Click Provisioning to install a standalone Deployment Server. A standalone Deployment Server is deployed when you first use One-Click Provisioning to provision a Deployment Server only, and then provision other servers such as the Database Server, Enterprise Server, and HTML Servers. This section describes how to complete the postinstallation steps for a standalone Deployment Server.
If you have used One-Click Provisioning to deploy a standalone Deployment Server (that is, you did not use One-Click to initially deploy a complete system), you must perform this procedure on your Deployment Server to enable access by JD Edwards EnterpriseOne:
- Configure the ODBC Data Source for SQL Server to Enable JD Edwards EnterpriseOne Users to Log In To the Deployment Server
Configure the ODBC Data Source for SQL Server to Enable JD Edwards EnterpriseOne to Log In To the Deployment Server
Use this procedure to configure the Microsoft SQL Native Client 11 that was delivered with the deployment of the Microsoft SQL Server database on the Deployment Server that was provisioned by One-Click Provisioning. This configuration is necessary to enable JD Edwards EnterpriseOne users to log in to the Deployment Server.
- Access the Deployment Server as described in the task "Accessing the Deployment Server" in the preceding section "Performing Postinstallation Tasks for the Deployment Server" of this Learning Path.
-
Navigate to this directory:
C:\Windows\System32 Launch this executable to open the ODBC Data Source Administrator (64-bit) program:
odbcad32.exeUpon execution, the following window is displayed:
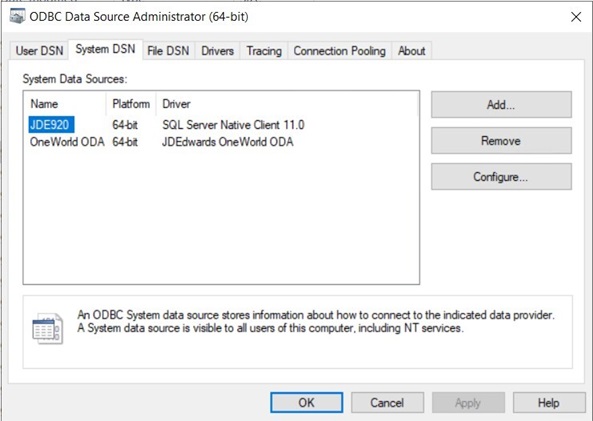
- On the ODBC Data Source Administrator (64-bit) window, click the System DSN tab.
- Click the Add button.
-
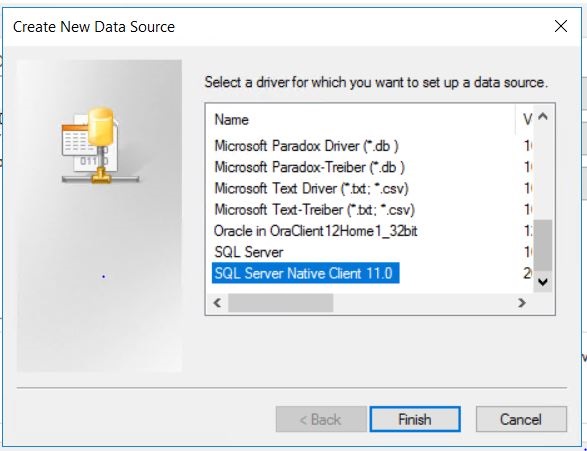
On the Create New Data Source window, scroll through the list and select this option:
SQL Server Native Client 11
- Click the Finish button.
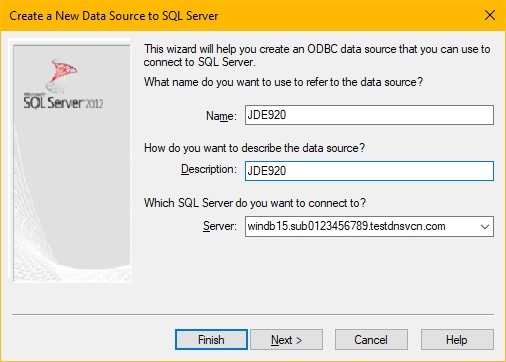
On the Create a New Data Source to SQL Server window, complete these fields:
-
NameEnter the value JDE920.
-
Description
Optionally you can enter a description, such as JDE920.
-
ServerEnter the fully qualified domain name (FQDN) for your SQL Server Database Server.
For example:
windb15.sub0123456789.testdnsvcn.com
-
- Click the Next button.
-
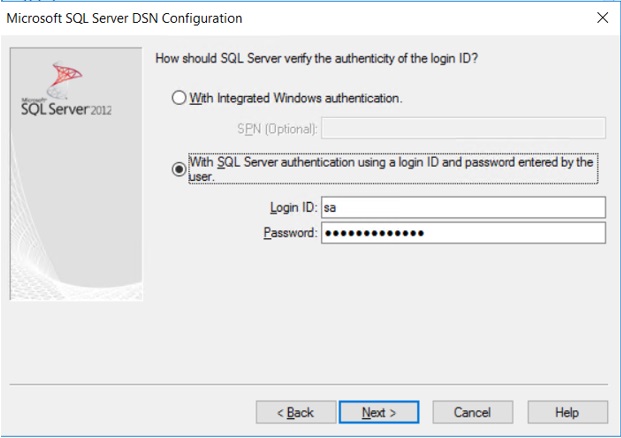
On the Microsoft SQL Server DSN Configuration window, click this option:
With SQL Server authentication using a login ID and password entered by the user.
-
Complete these fields:
-
Login ID
Enter the value sa
-
Password
Enter the password for your SQL Server database.
-
Click the Next button.
Important:At this point, the system validates the connection to the SQL Server database using these credentials. You cannot proceed until the credentials are validated.
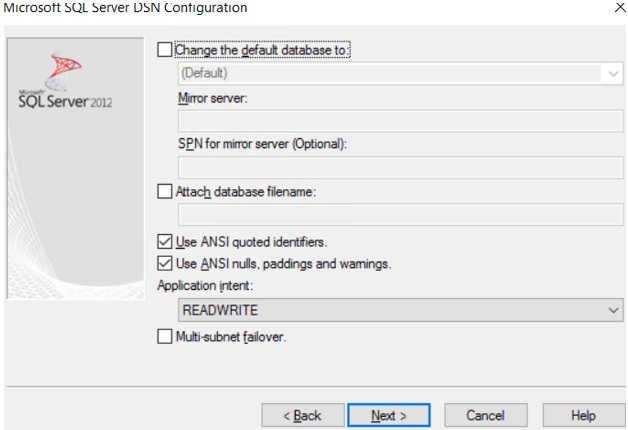
- On the Microsoft SQL Server DSN Configuration window, you should accept the
default values without making any changes.
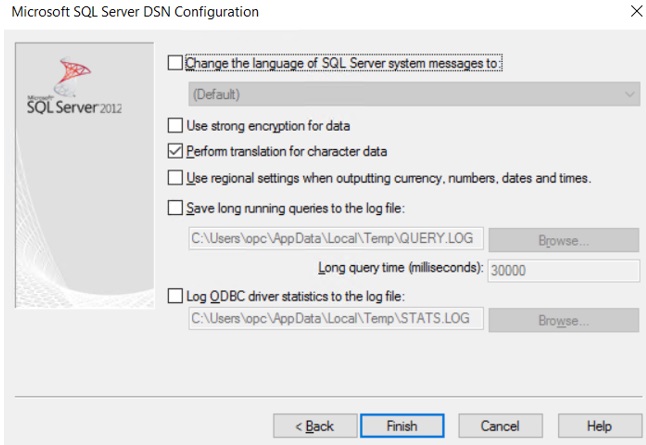
- On the Microsoft SQL Server DSN Configuration, again you should accept the default values without making any changes.
- Click the Next button.
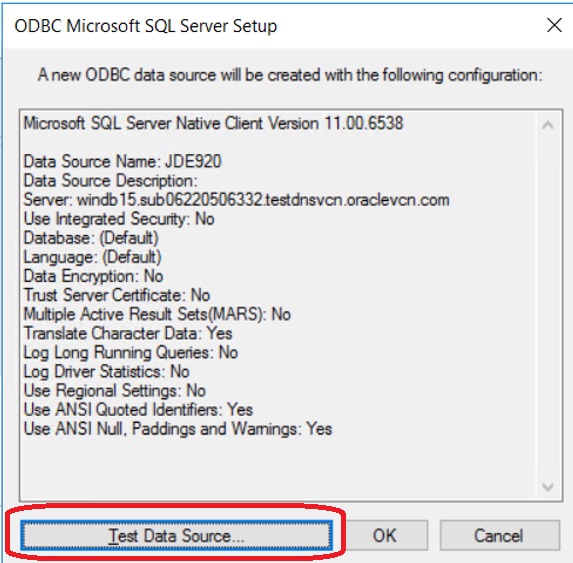
- On the ODBC Microsoft Server Setup window, click the Test Data Source... button to verify that the configuration of the ODBC Data Source for SQL Server is successful.