Using the Migration Wizard
To use the Migration Wizard:
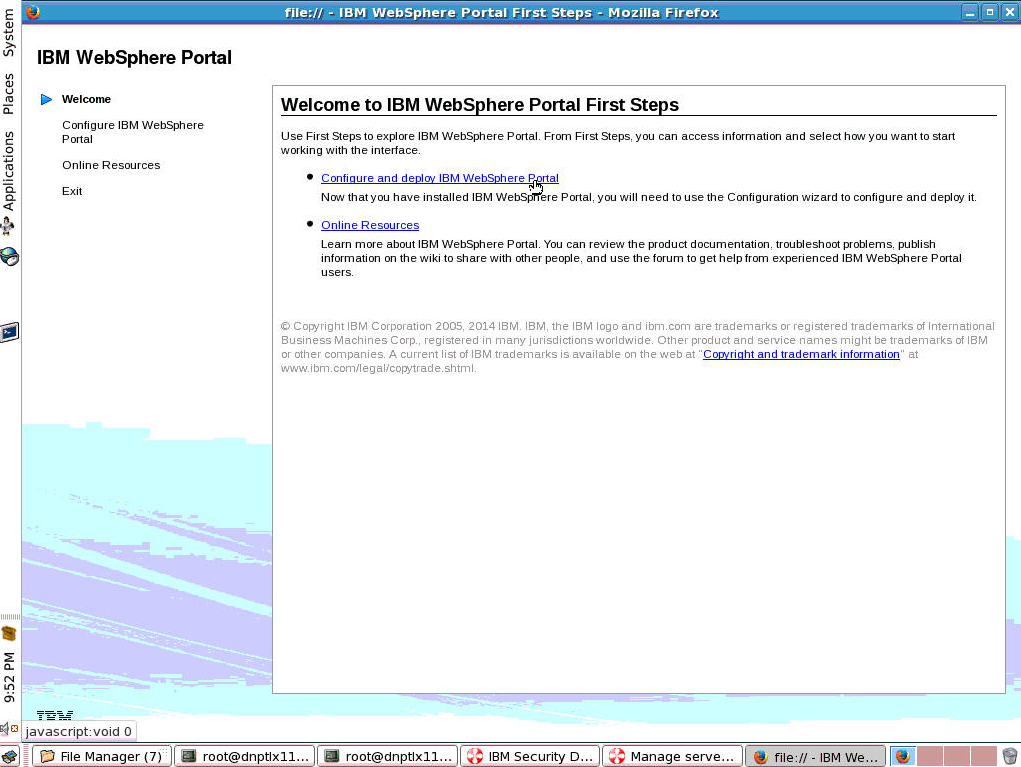
On the Manage server state tab, select IBM WebSphere | IBM WebSphere Portal Server V8.5 | First Steps to launch the Portal Server First Steps application.
Select the Configure and deploy IBM WebSphere Portal Server hyperlink.
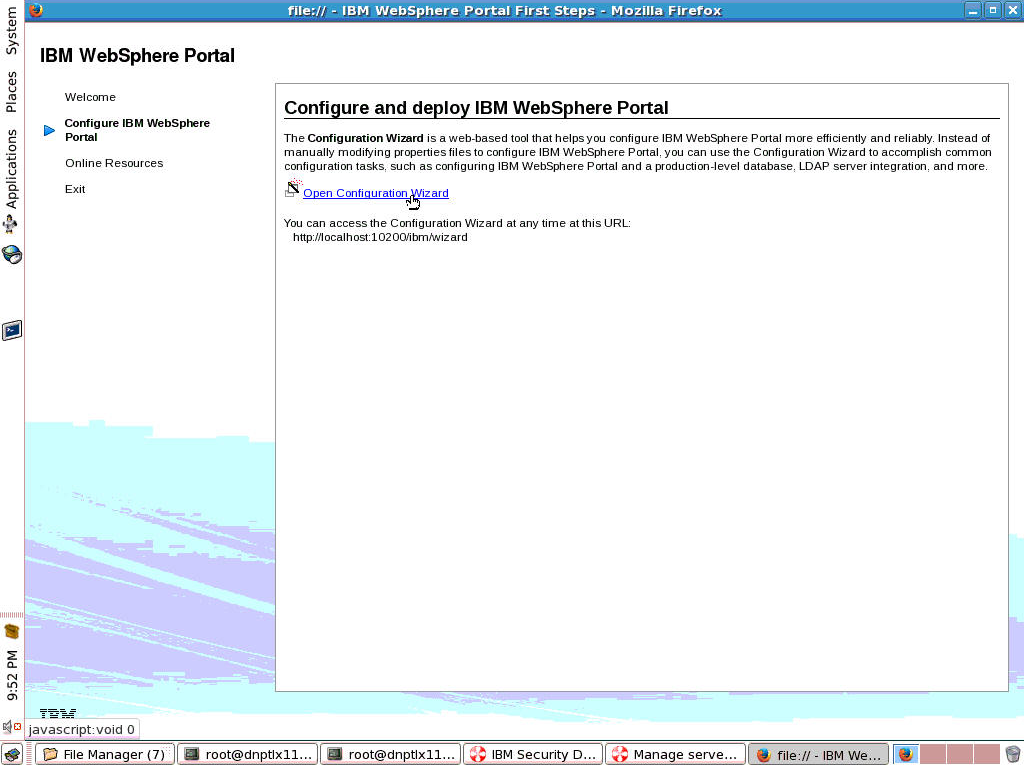
Select the Open Configuration Wizard hyperlink.
Select IBM WebSphere | Start the server.
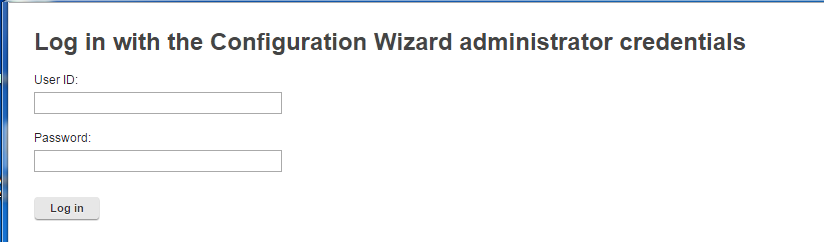
Enter User ID and Password to login.
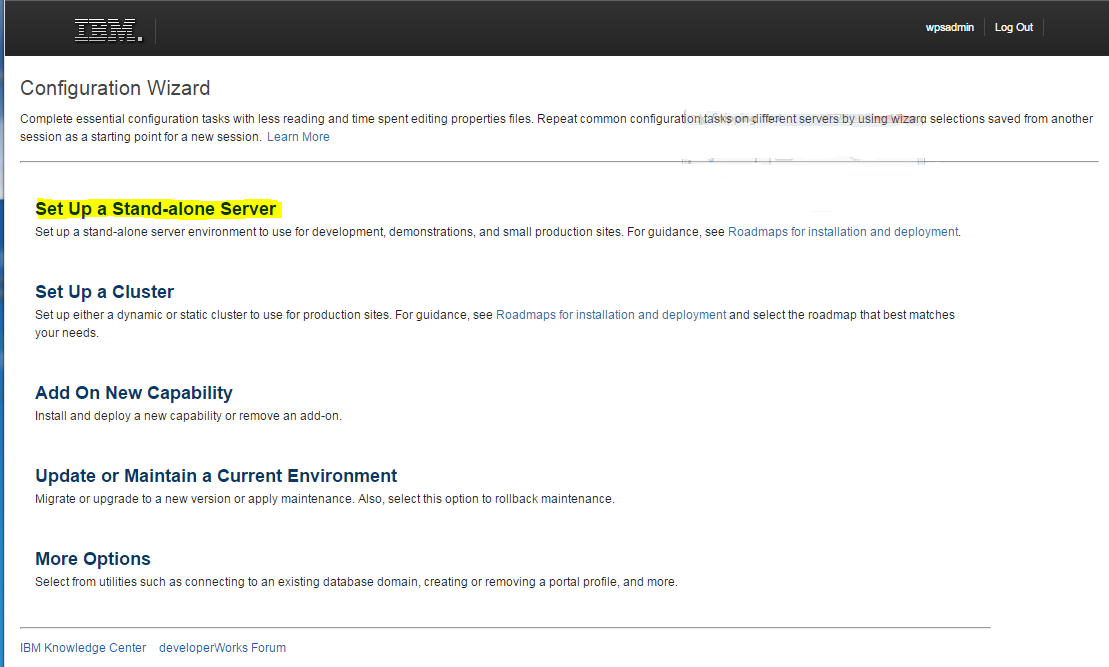
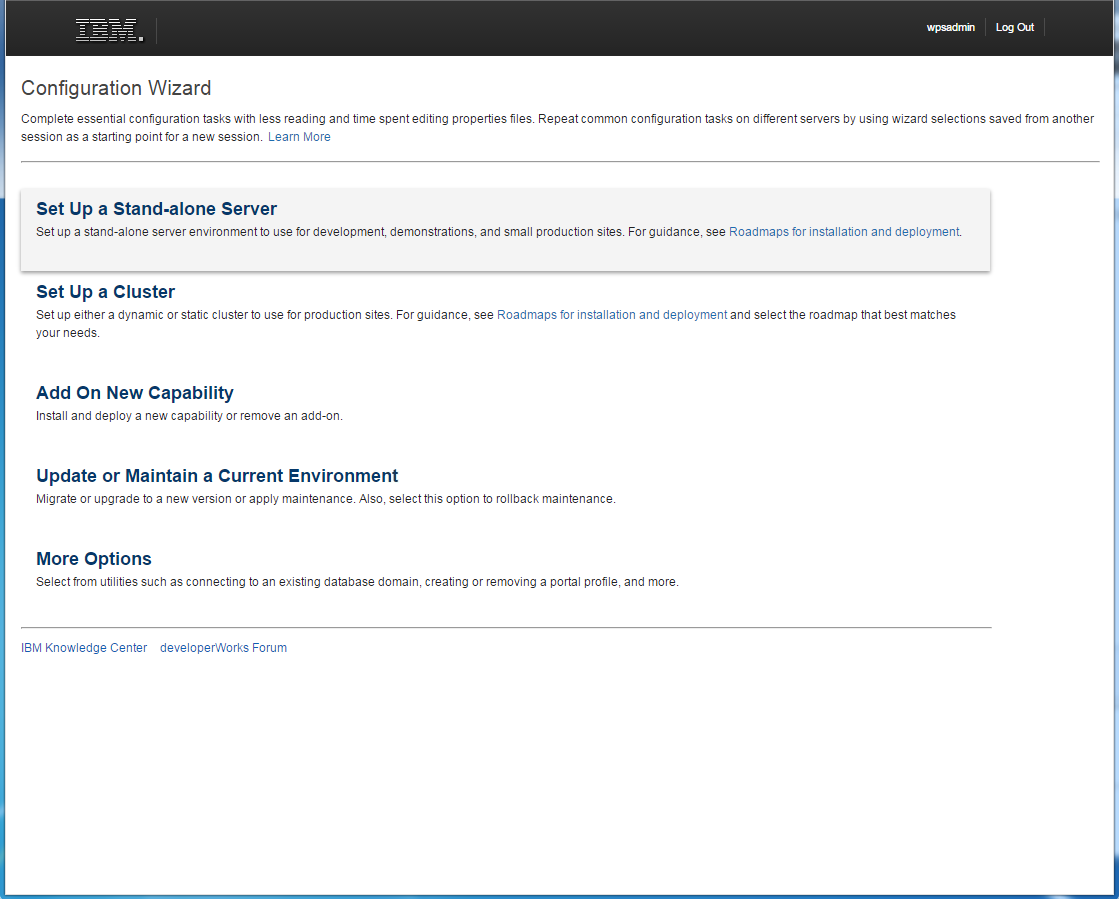
Select Set Up a Stand-alone Server.
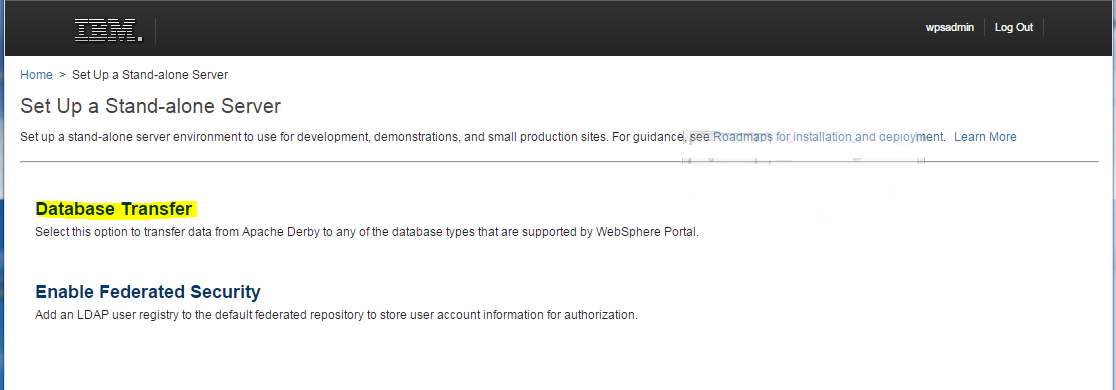
Select Database Transfer.
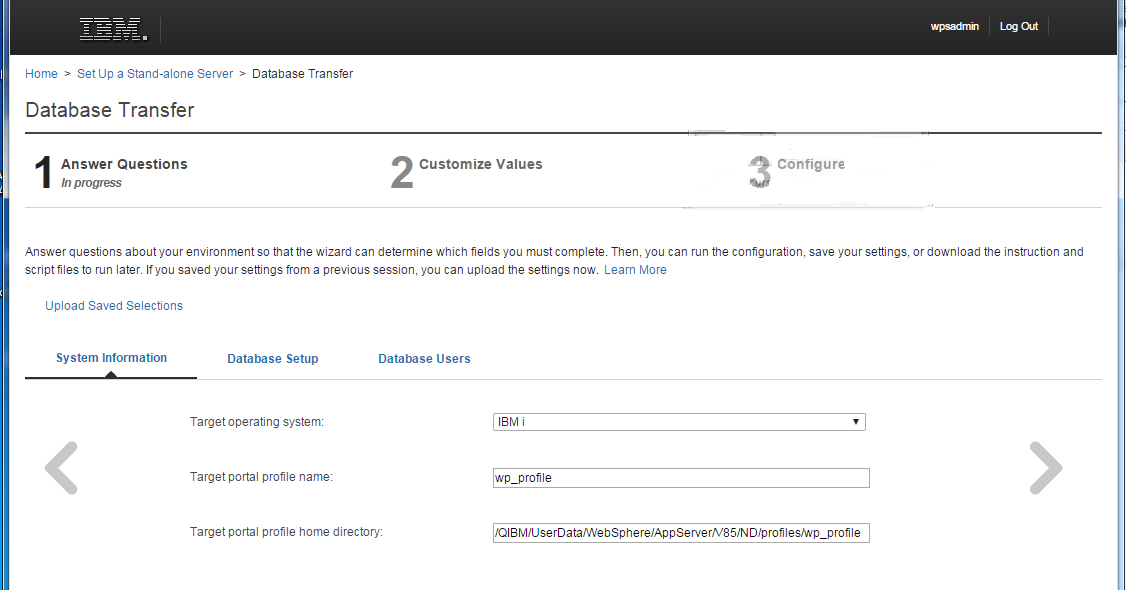
Answer the System Information questions for Database Transfer and then click the right arrow.
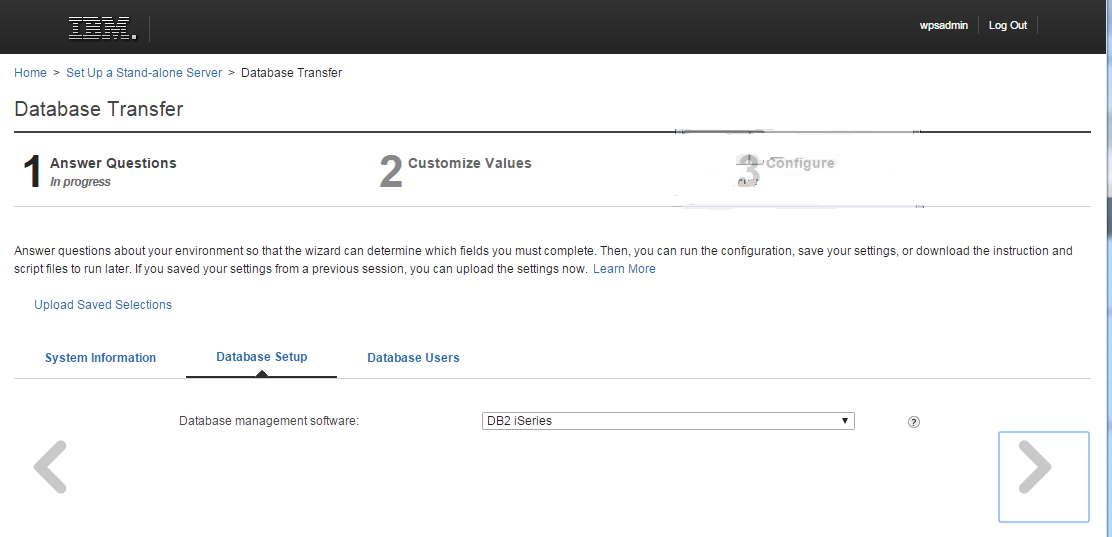
Select the Database management software from the dropdown values and then click the right arrow.
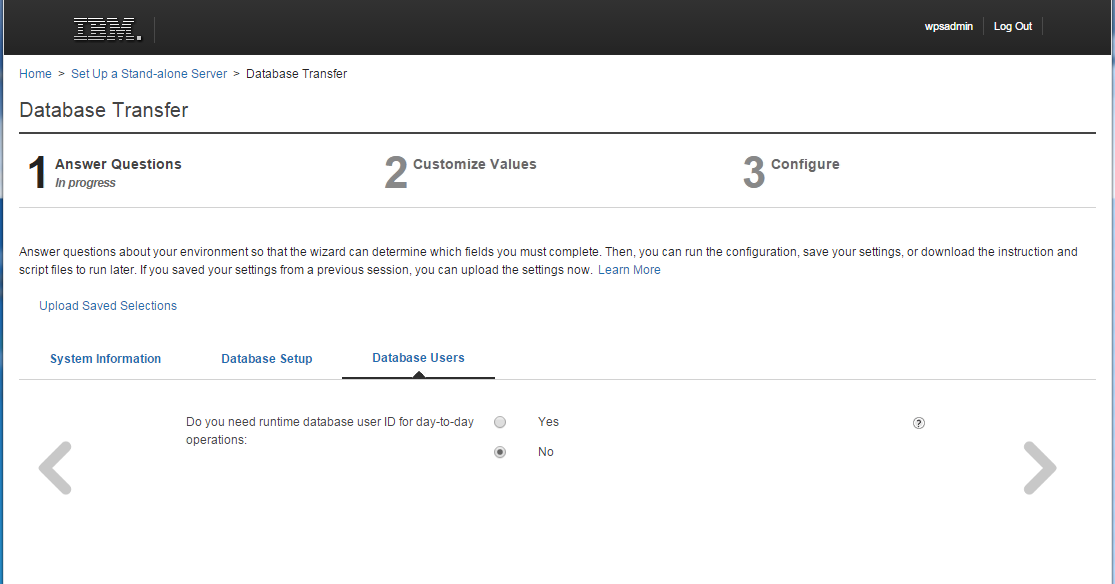
Answer the question for Database Users and then click the right arrow.

Answer the questions for System Information and then click the right arrow.
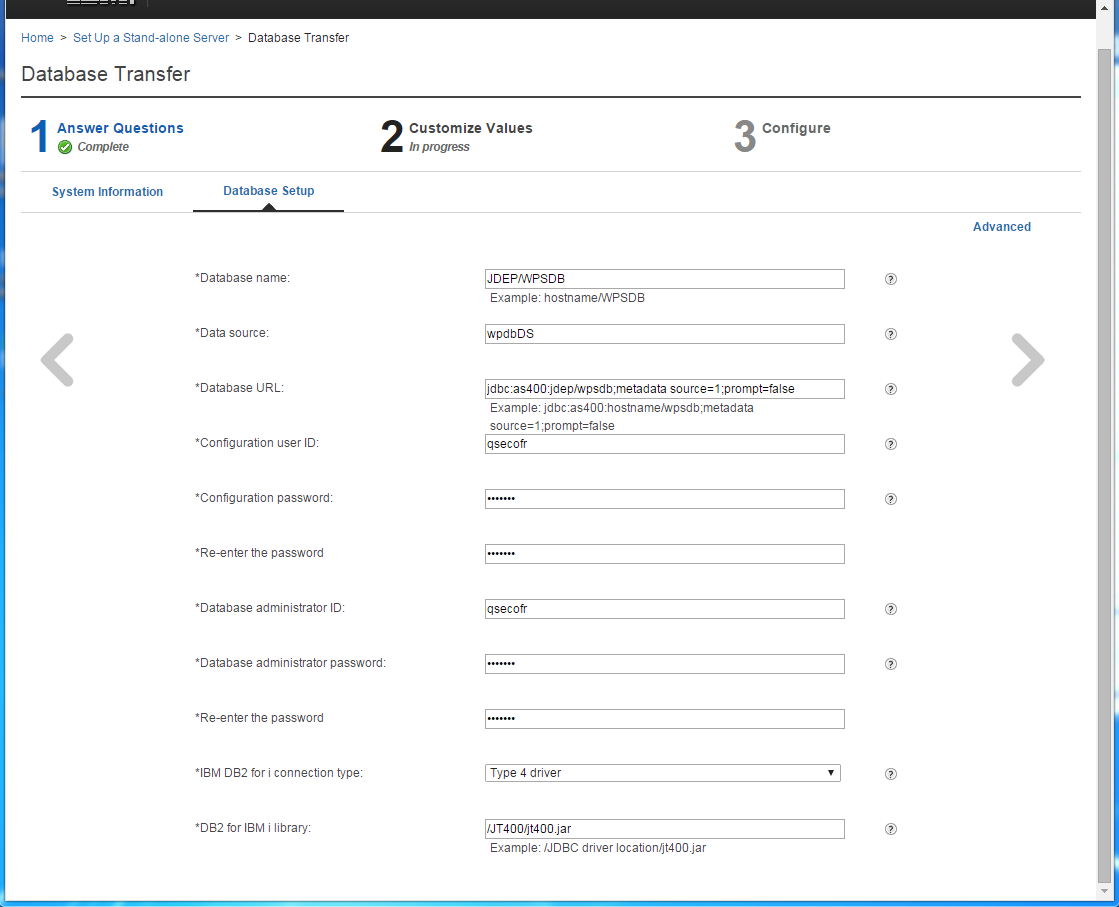
Enter the Database Setup parameters and then click the right arrow.
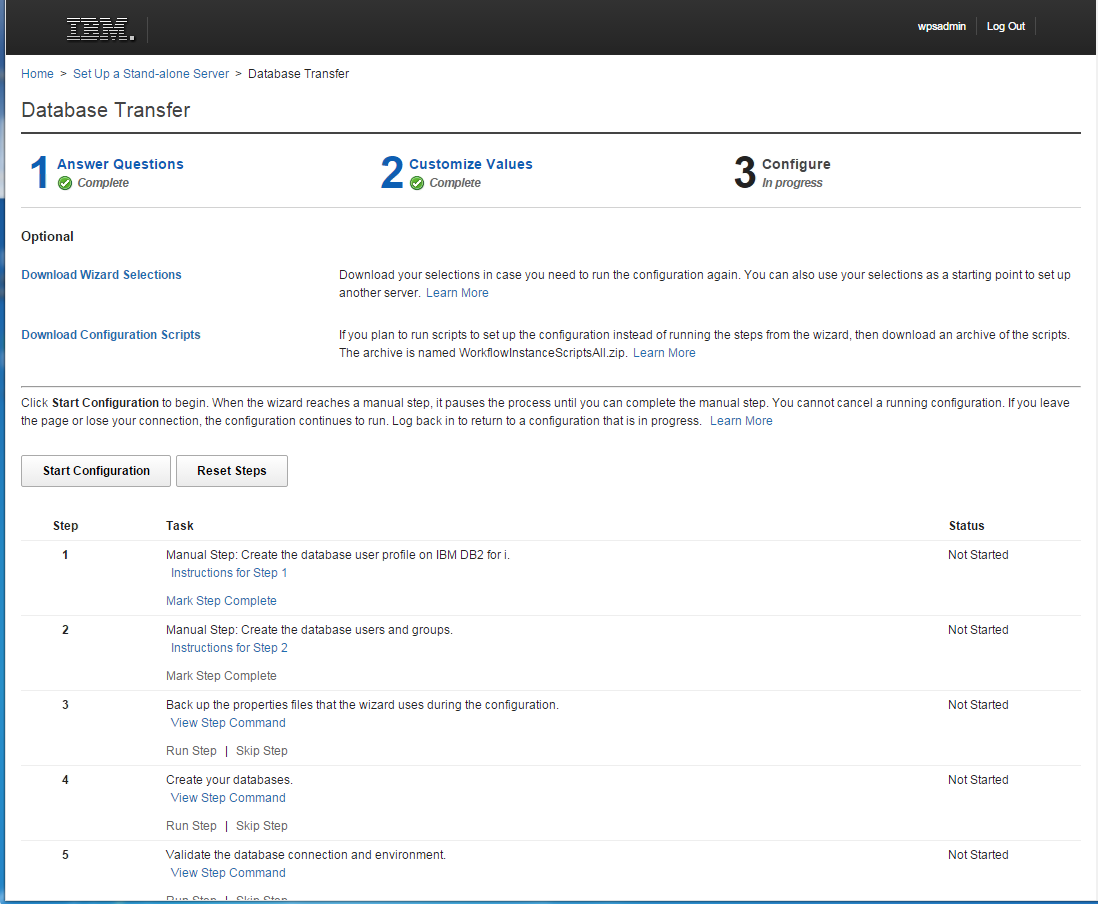
Click on the Start Configuration button.
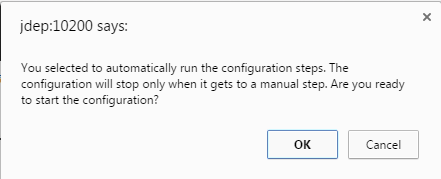
Click OK.
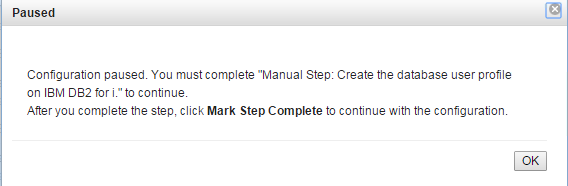
The configuration will pause with a notice to complete a manual step. Click OK when the manual step has been completed.
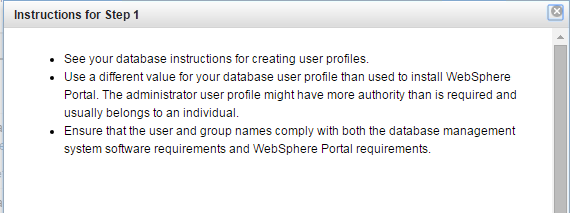
Follow your instructions for creating user profiles.
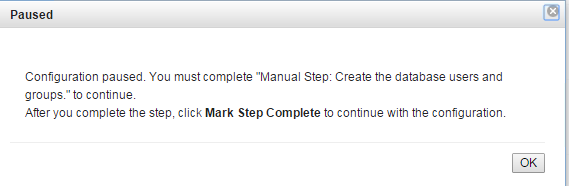
The configuration will pause with a notice to create the database users and groups. Click OK when manual step 1 has been completed.
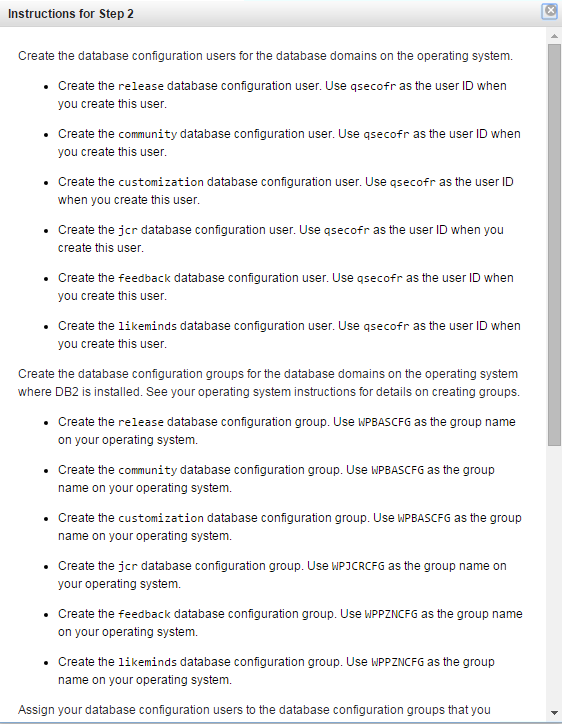
Perform manual step 2.
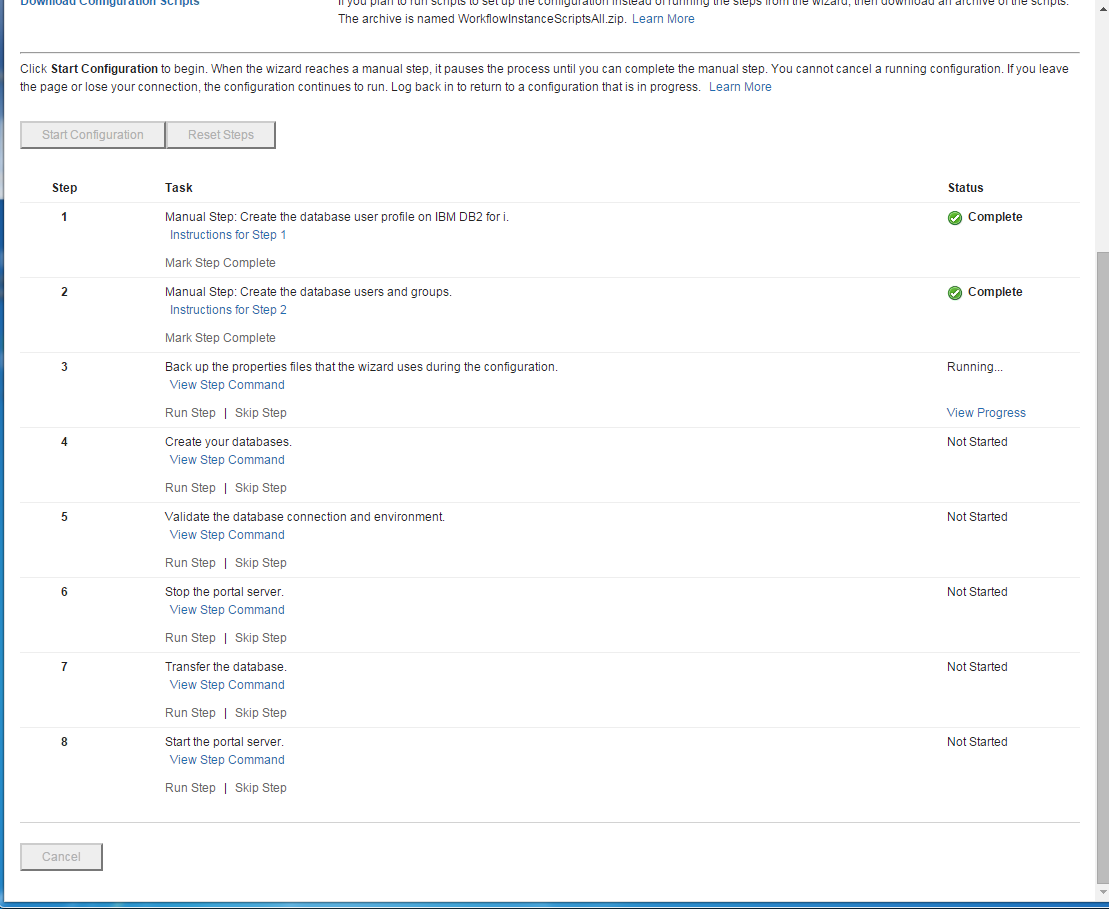
The configuration page will appear showing the status of the steps.
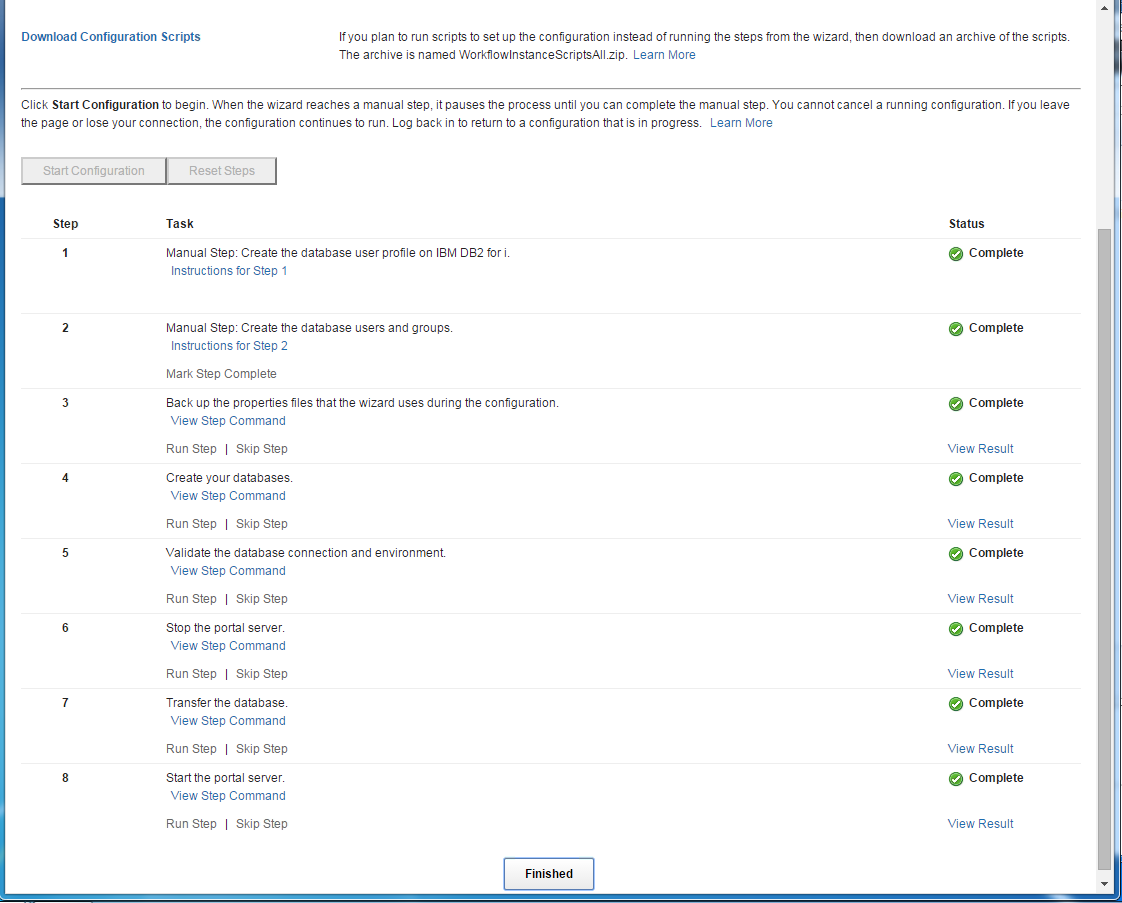
When the configuration has finished the status will show Completed for each step. Click the Finished button.
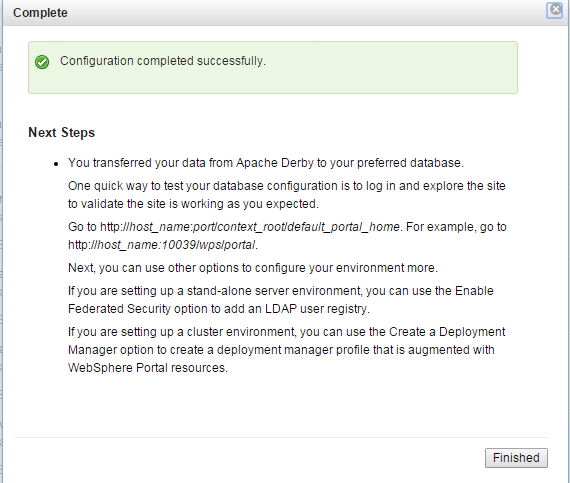
A confirmation page will appear providing to test and configure your environment.
Select the Set Up a Stand-alone Server option.
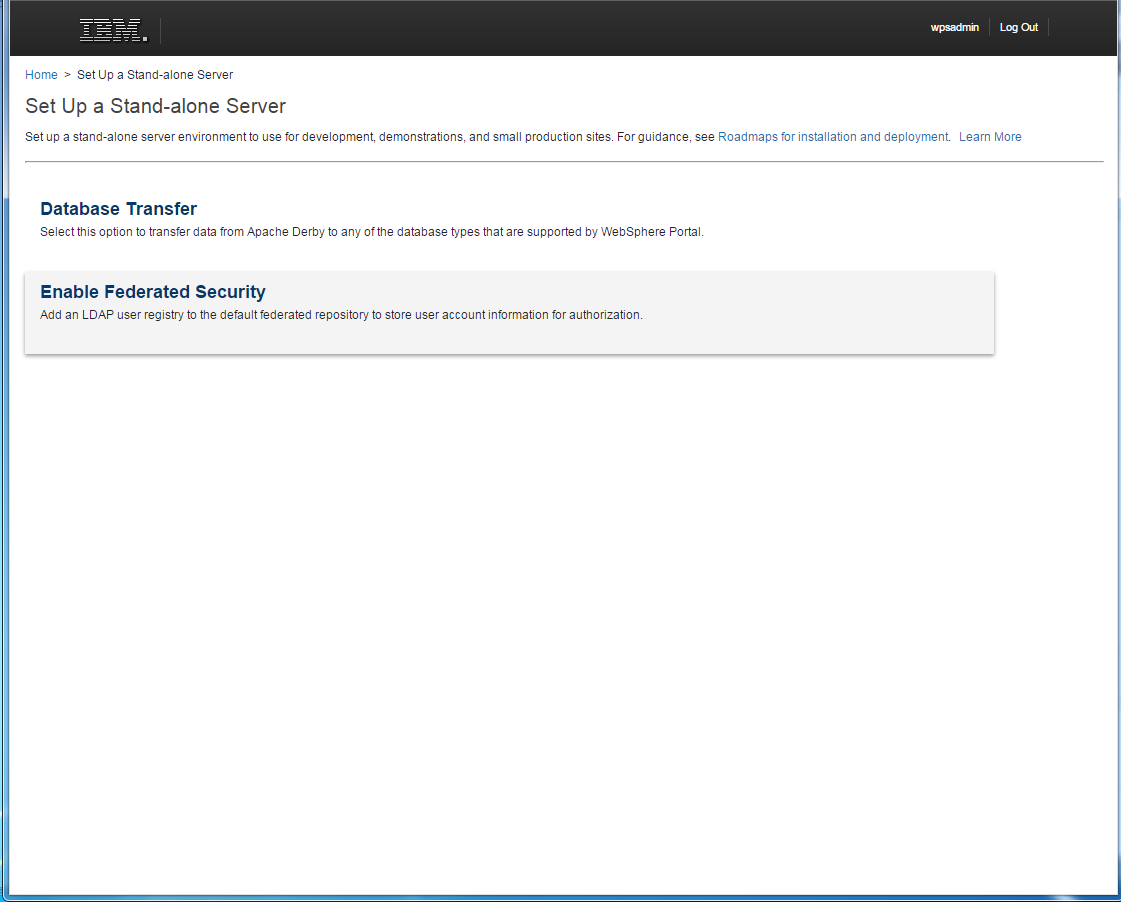
Select the Enable Federated Security option.
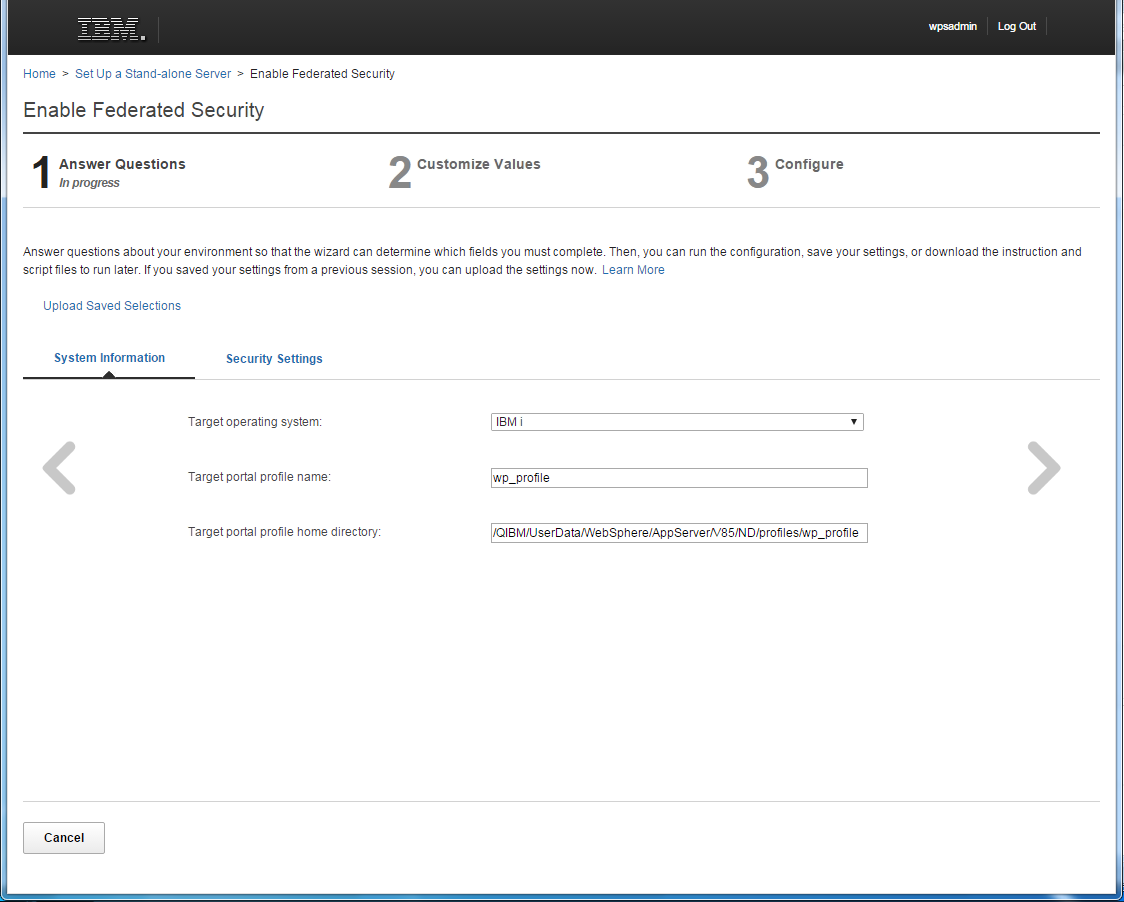
Answer the System Information questions for Enable Federated Security and then click the right arrow.
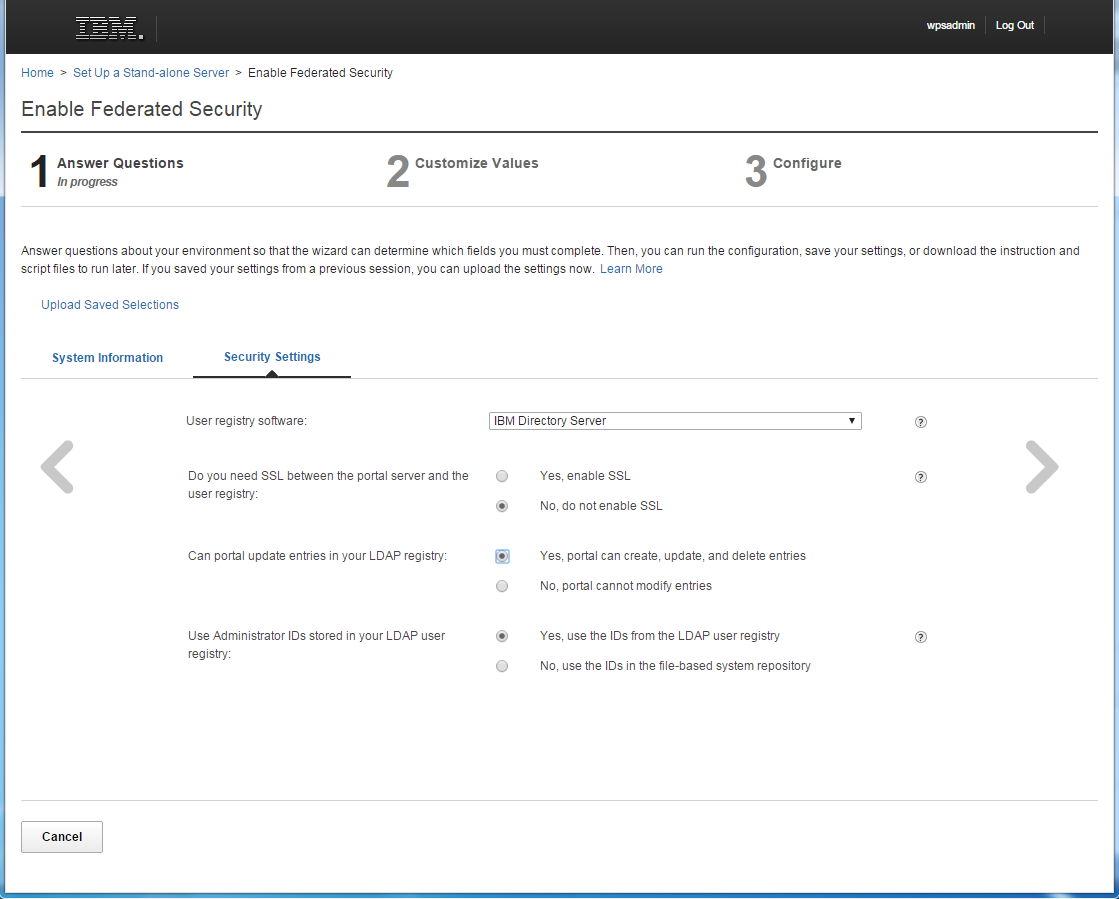
Answer the Security Settings questions for Enable Federated Security and then click the right arrow.
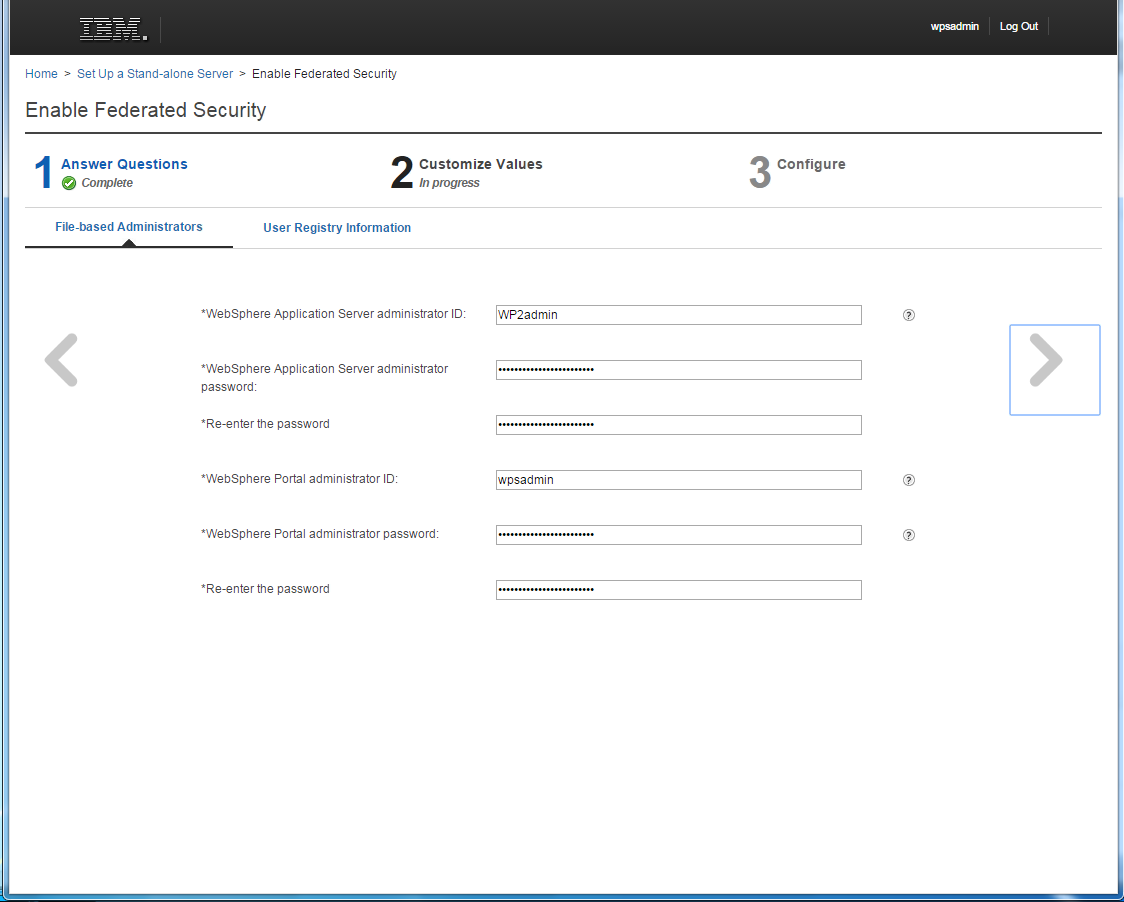
Enter the parameters for the File-based Administrators and then click the right arrow.
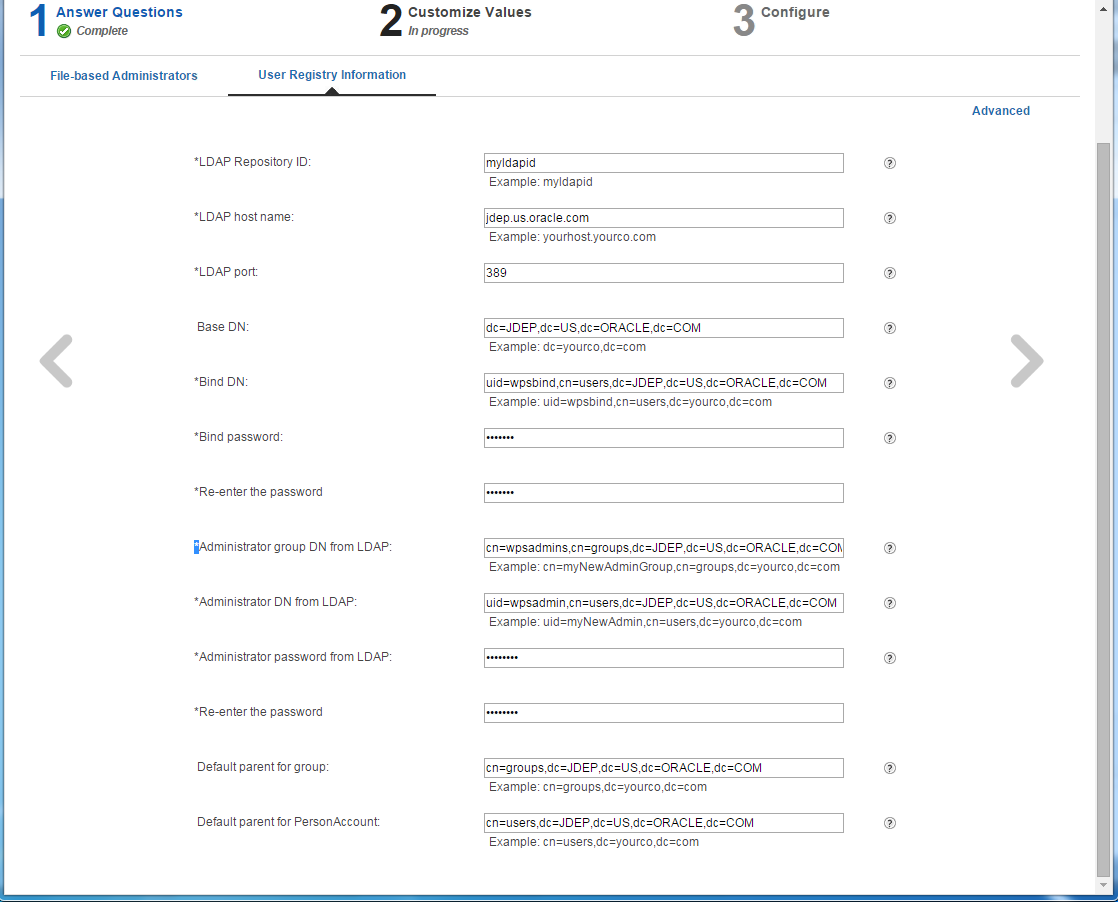
Enter the parameters for User Registry Information and then click the right arrow.
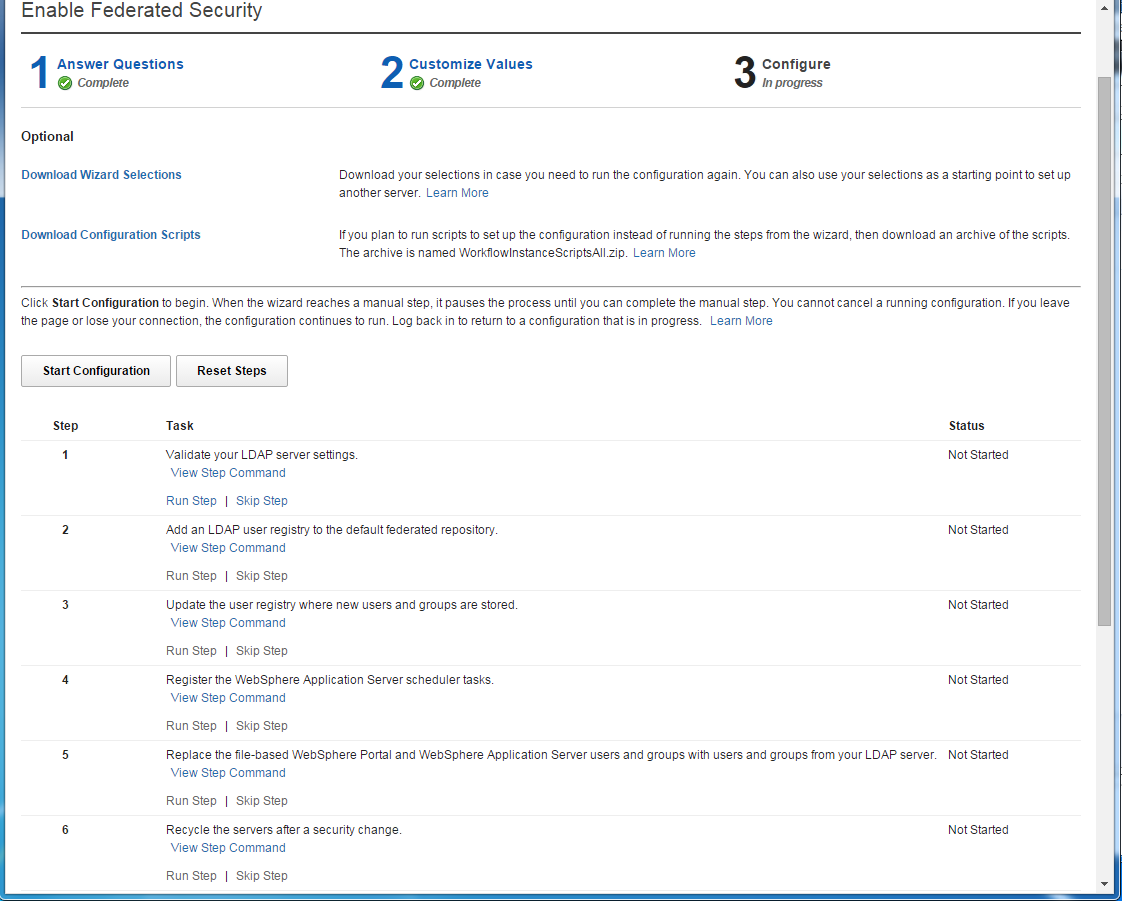
Click the Start Configuration button.
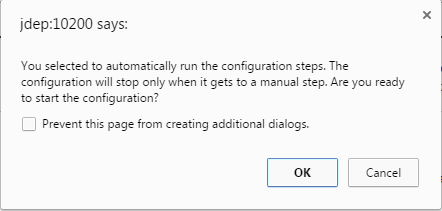
Click OK to begin the configuration.
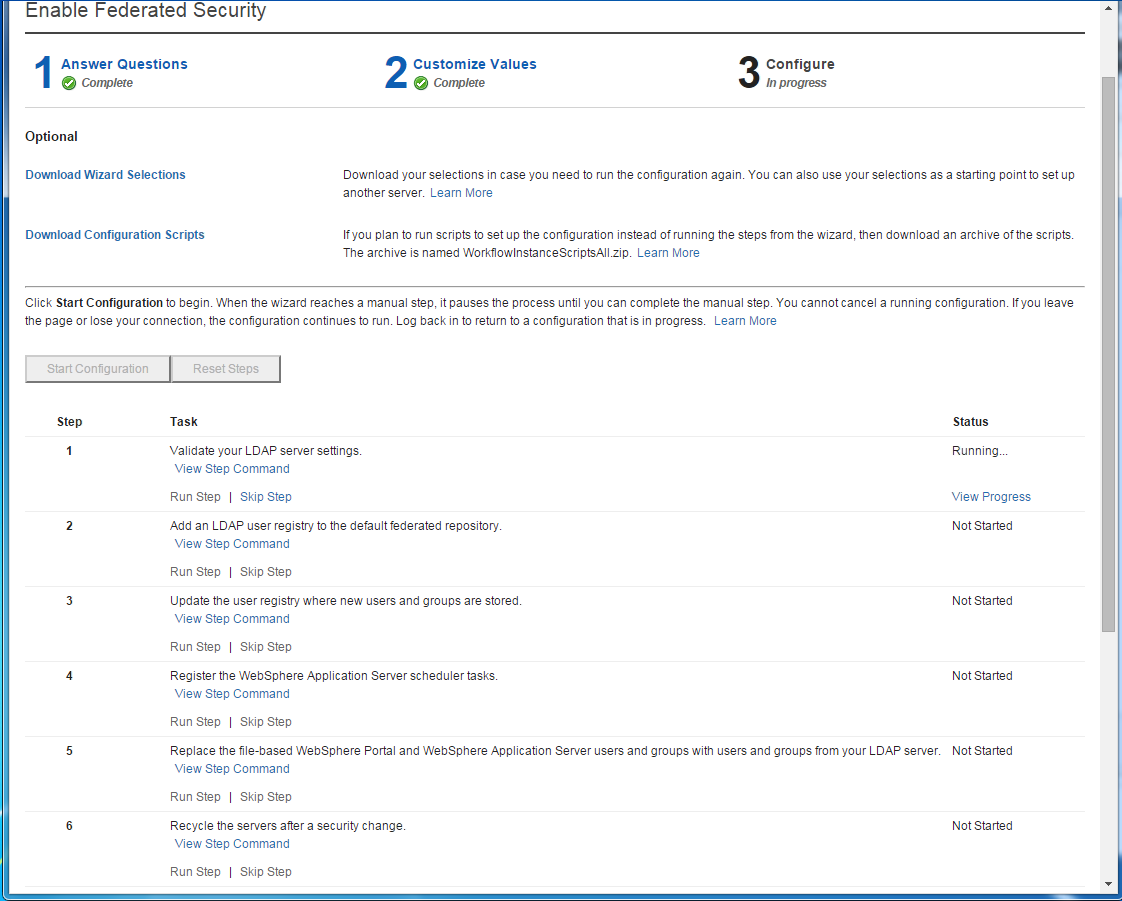
The configuration screen will show the status of the steps as the configuration progresses.
When the configuration has finished the status will show Completed for each step. Click the Finished button.