Balance Sheet Case Study Task: Create Column Titles in the Statement Header
The column titles in the table grid do not print on each page of the balance sheet statement that you generate. To include column titles on each page, you must set up the column titles in the header area of the layout. You also want to replace the standard text provided in the layout with text that describes your statement.
In this task, you will create and format column titles in the statement header. You will hide the column headers in the table grid in the next task.
To create and format column titles in the header:
Select the cell that includes the text Table Title, and then press Delete.
Select a grid cell in the header area.
If the grid cell is empty and in the position in which you want the column titles, skip to Step 5; otherwise, continue with Step 4.
Click the Add a Row above or Add a Row below icon in the Insert section of the Layout Grid Cell tab.
Select the Text Item option from the Insert tab.
Double-click in the text item cell, and enter Description.
Format the text using the options in the Font section on the Text tab:
Select Tahoma.
Change the font size to 10pt.
Click the Bold icon.
Add the following text in the Text Item cell:
Current Actual
Last Month End
Change This Month
Change This Year
Using your space bar, center each title you entered over the appropriate column.
Click the Save icon to save your layout.
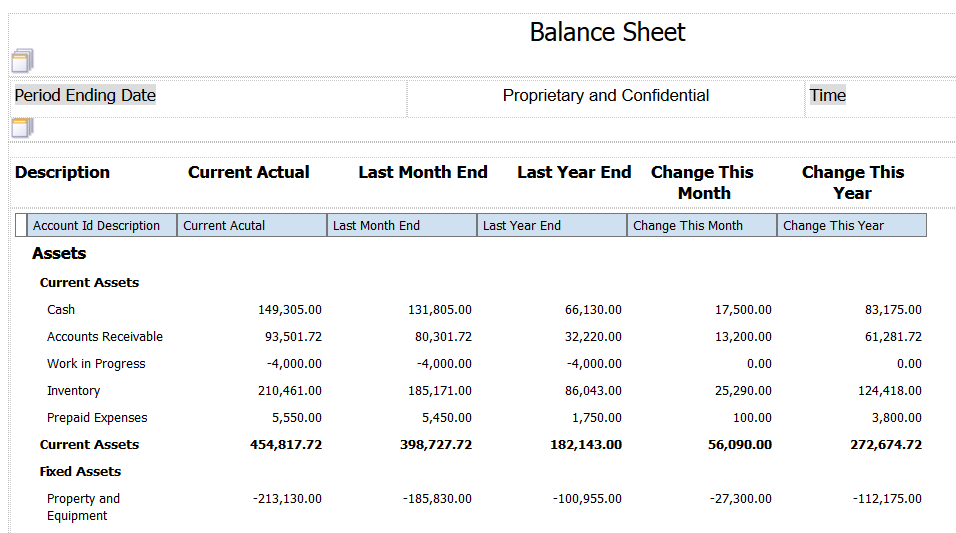
After you complete the steps in this task, your statement layout should look like the following image: