Associating
the Servers
Associating
the Servers Before You Begin
This 15-minute tutorial shows you how to associate the Servers to the Simplified Upgrade Plan.
Background
After defining the Simplified Upgrade Plan using the Installation Workbench, associate the Plan with Deployment, Enterprise, HTML, and Data Servers.
What Do You Need?
To perform the steps in this tutorial, you must have:
- Defined Simplified Upgrade Plan using the Installation
Planner.
This task is described in the preceding OBE of this Learning Path.
 Associating
the Deployment Server
Associating
the Deployment Server
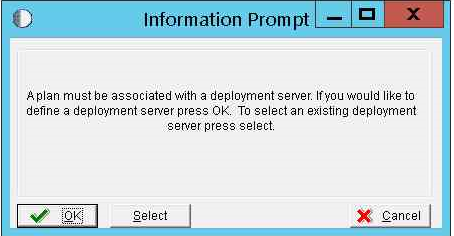
- The following Information Prompt window is displayed after you click the OK button on the Location Search window. To associate the Deployment Server, click the Select button.
- On the Machine Search window, select the required Deployment Server, and then click the Select button.
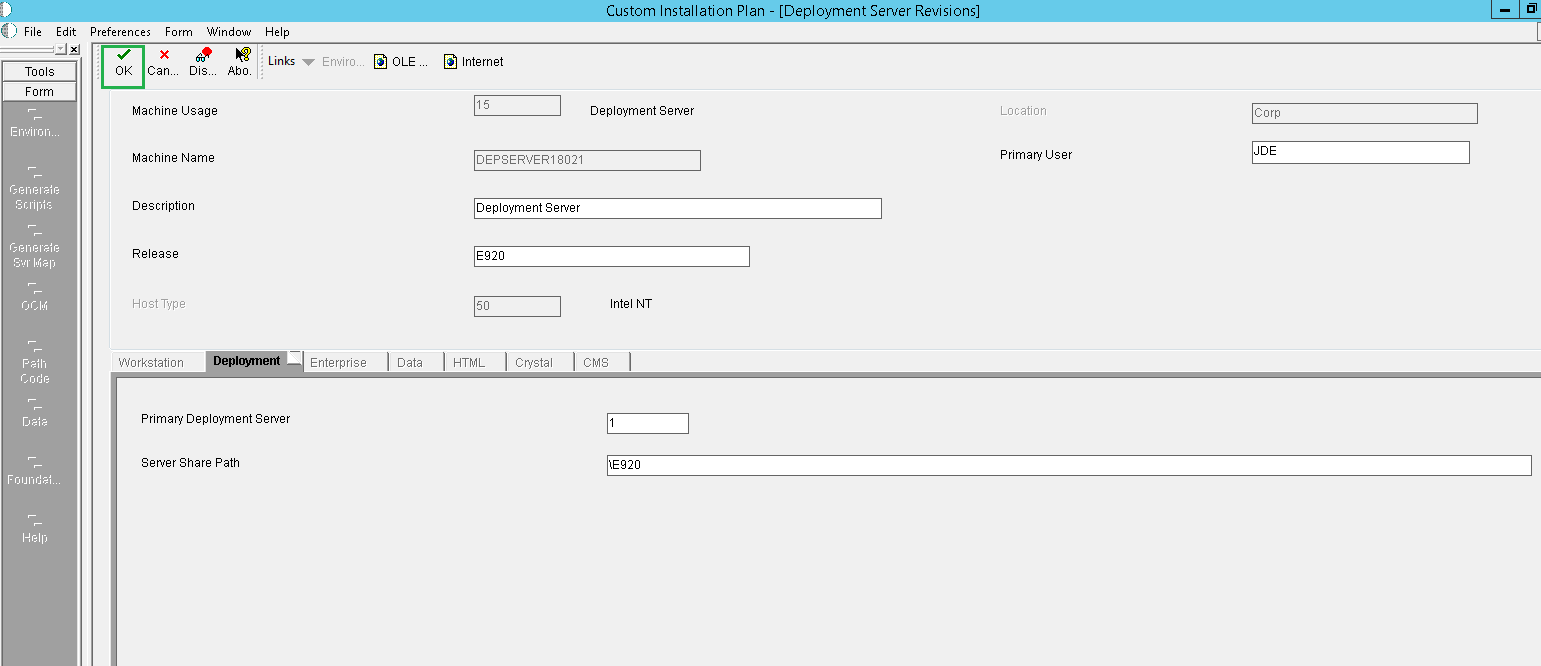
- On the Deployment Server Revisions window, enter the values as illustrated in the following example, and then click the OK button.
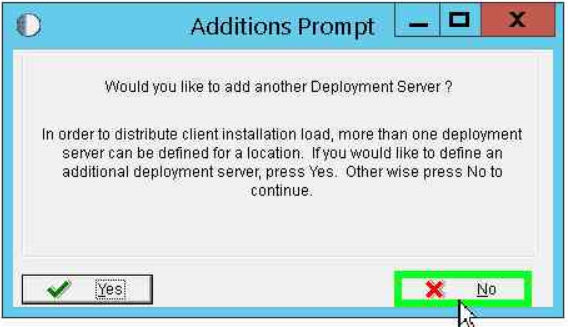
- On the Additions Prompt, click the Yes button to add another Deployment Server. For this example, click the No button.
 Associating
the Enterprise Server
Associating
the Enterprise Server
- The following Information Prompt window is displayed when you click the No button on the Additions Prompt window after associating the Deployment Server. Click the Select button to associate an Enterprise Server.
- On the Machine Search window, select the required Enterprise Server, and then click the Select button.
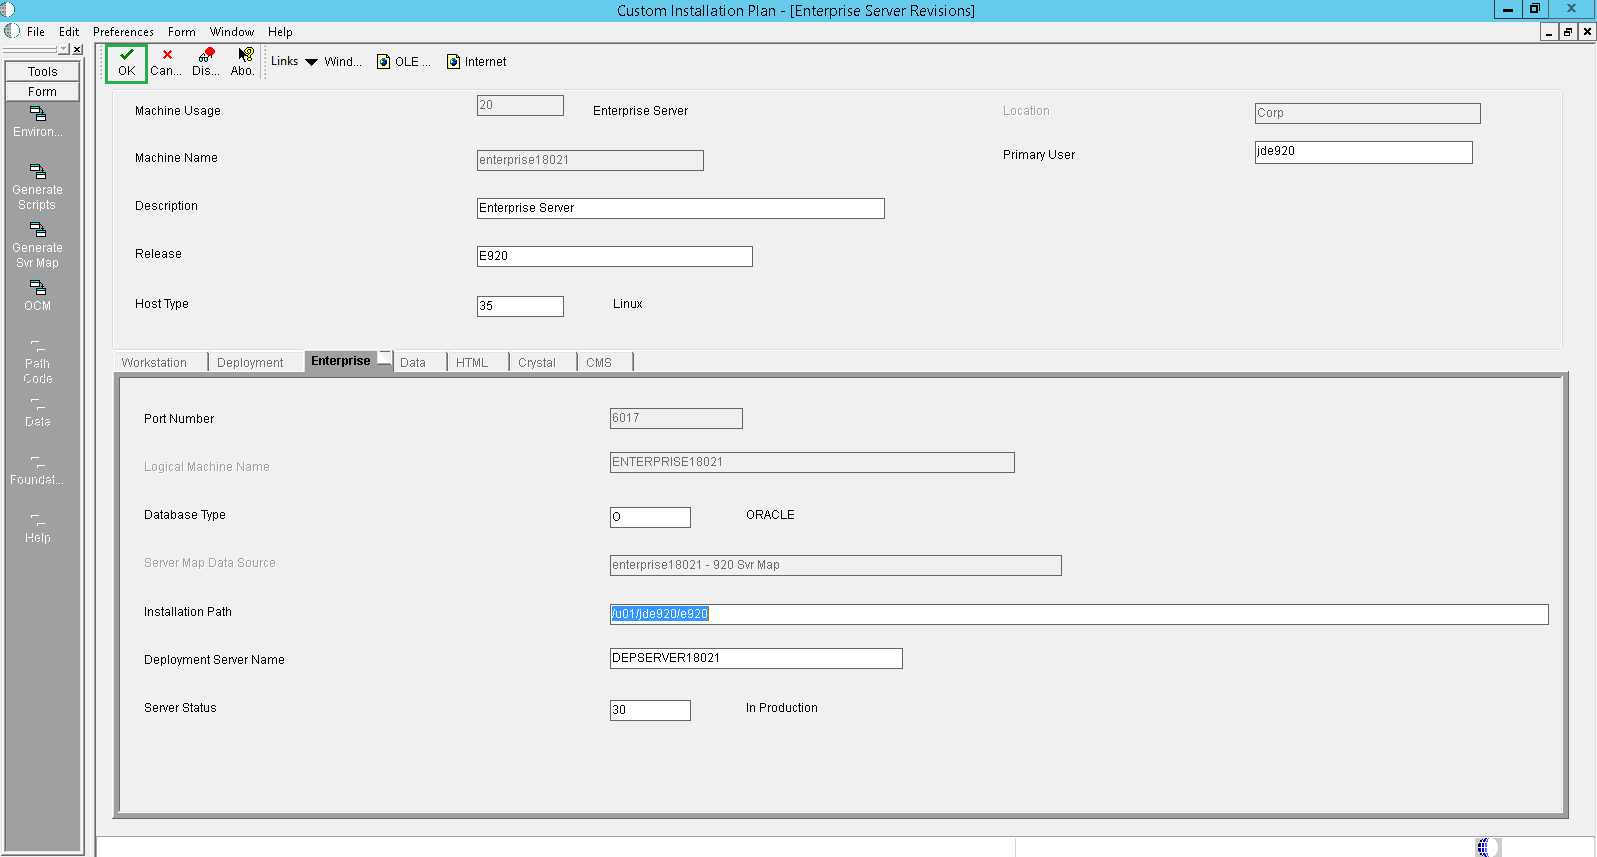
- On the Enterprise Server Revisions window, enter the values as illustrated in the following example, and then click the OK button.
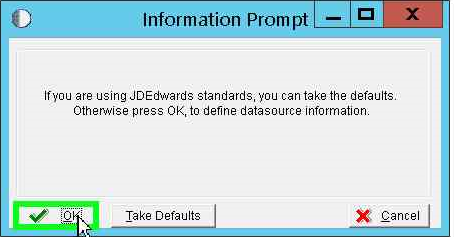
- Click the OK button on the Information Prompt window to define the data source information. The Data Source Revisions is displayed.
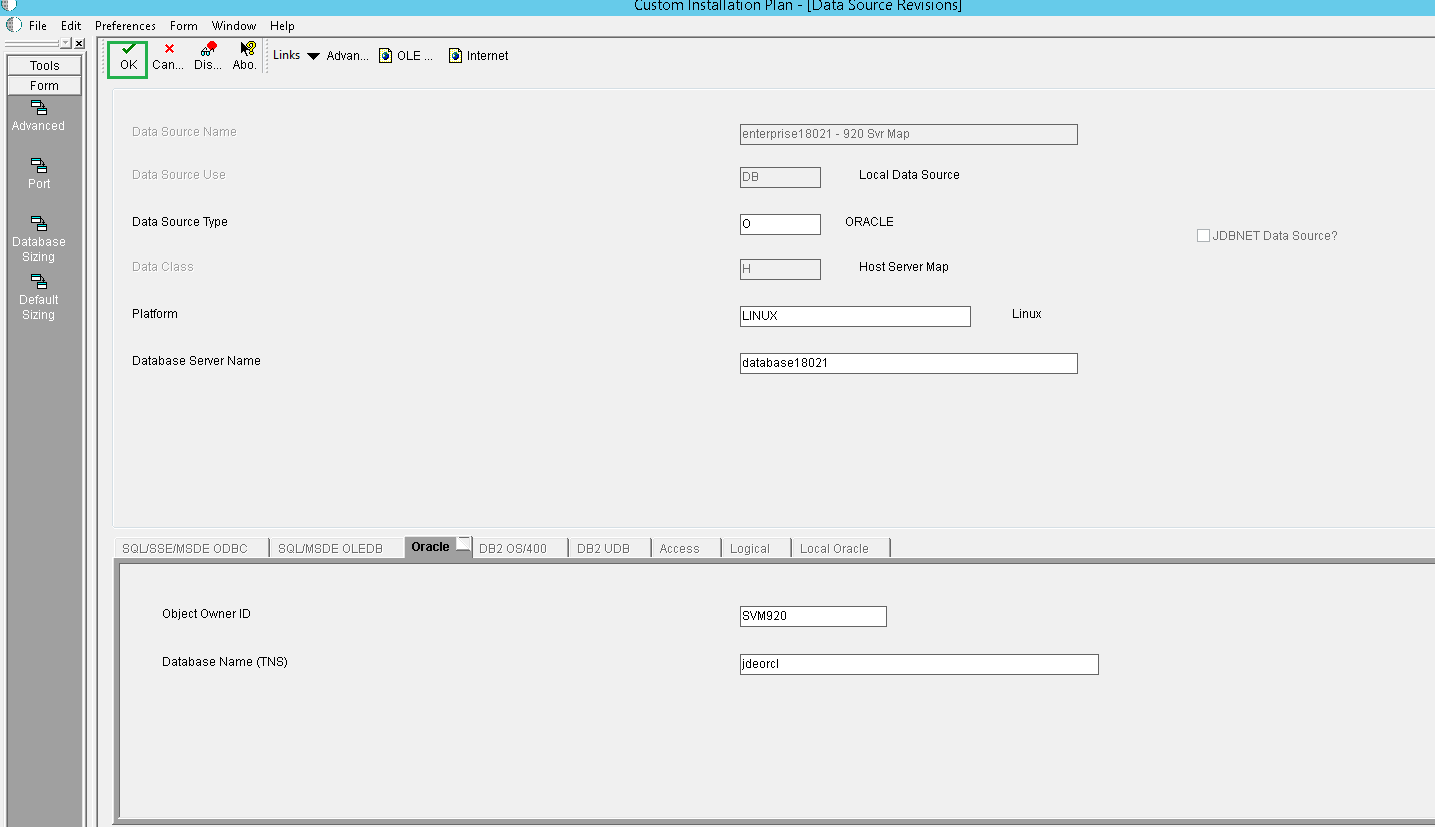
- On Data Source Revisions window, enter the values as illustrated in the following example, and then click OK.
- On the Additions Prompt window for adding another Enterprise
Server, click the No button.
If you have provisioned more Enterprise Servers, click the Yes
button to add more Enterprise Servers.
Important:

Consider a scenario where you have multiple Enterprise Servers provisioned using One-Click Provisioning. The Pristine pathcode exists on Server 1 and the Target pathcode (for the upgrade) exists on Server 2. Use the following manual procedure to prepare Server 2 for the upgrade:
- Ensure that your upgrade plan specifies that the Table Conversions are set to run on Server 2. The Server 2 has the Target pathcode for upgrade.
- Copy the Pristine pathcode folder (../PS920) including the spec folder with the spec.ini file from Server 1, and add it to the Server 2 folder, and ensure that the PS920 and DV920 folders are located in the same directory.
 Associating
the HTML Server
Associating
the HTML Server
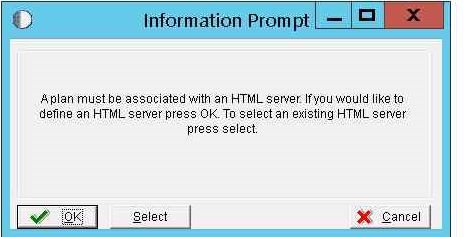
- The following Information Prompt window is displayed after you click the No button on the Additions prompt window for adding another Enterprise Server. Click the Select button to associate the HTML Server.
- On the Machine Search window, select the required HTML Server, and then click the Select button.
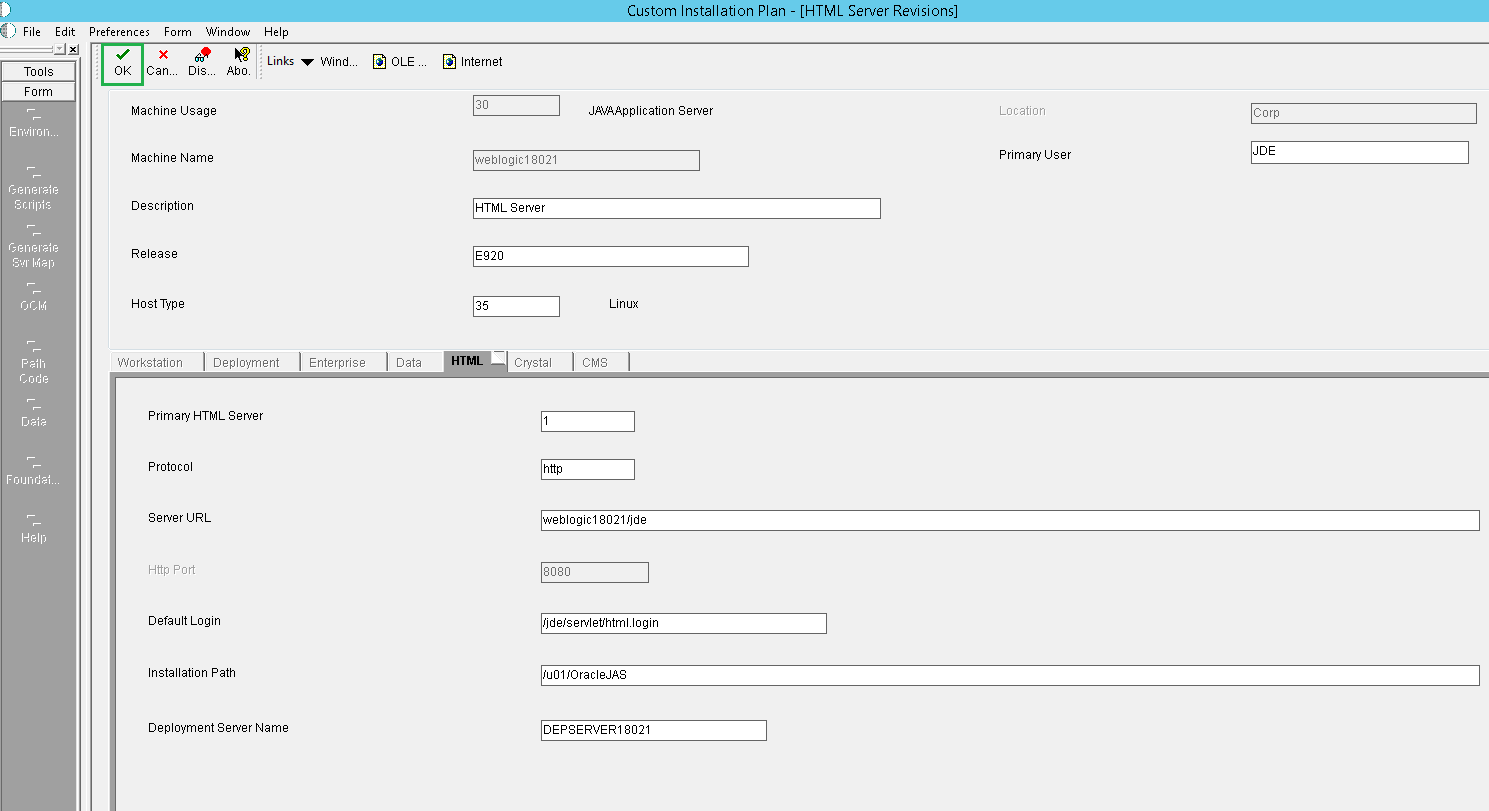
- On HTML Server Revisions window, enter the values as illustrated in the following example, and then click the OK button.
- The Addition Prompt window is displayed. You can click the Yes button to another JAVA Application Sever. For this example, click the No button.
 Associating
the Data Server
Associating
the Data Server
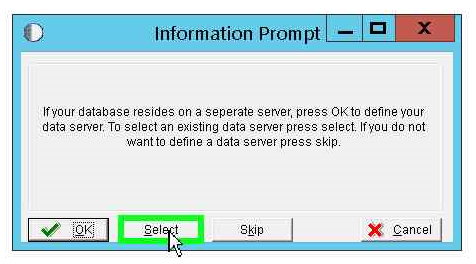
- On the Information Prompt window, click the Select button to select an existing Data Server.
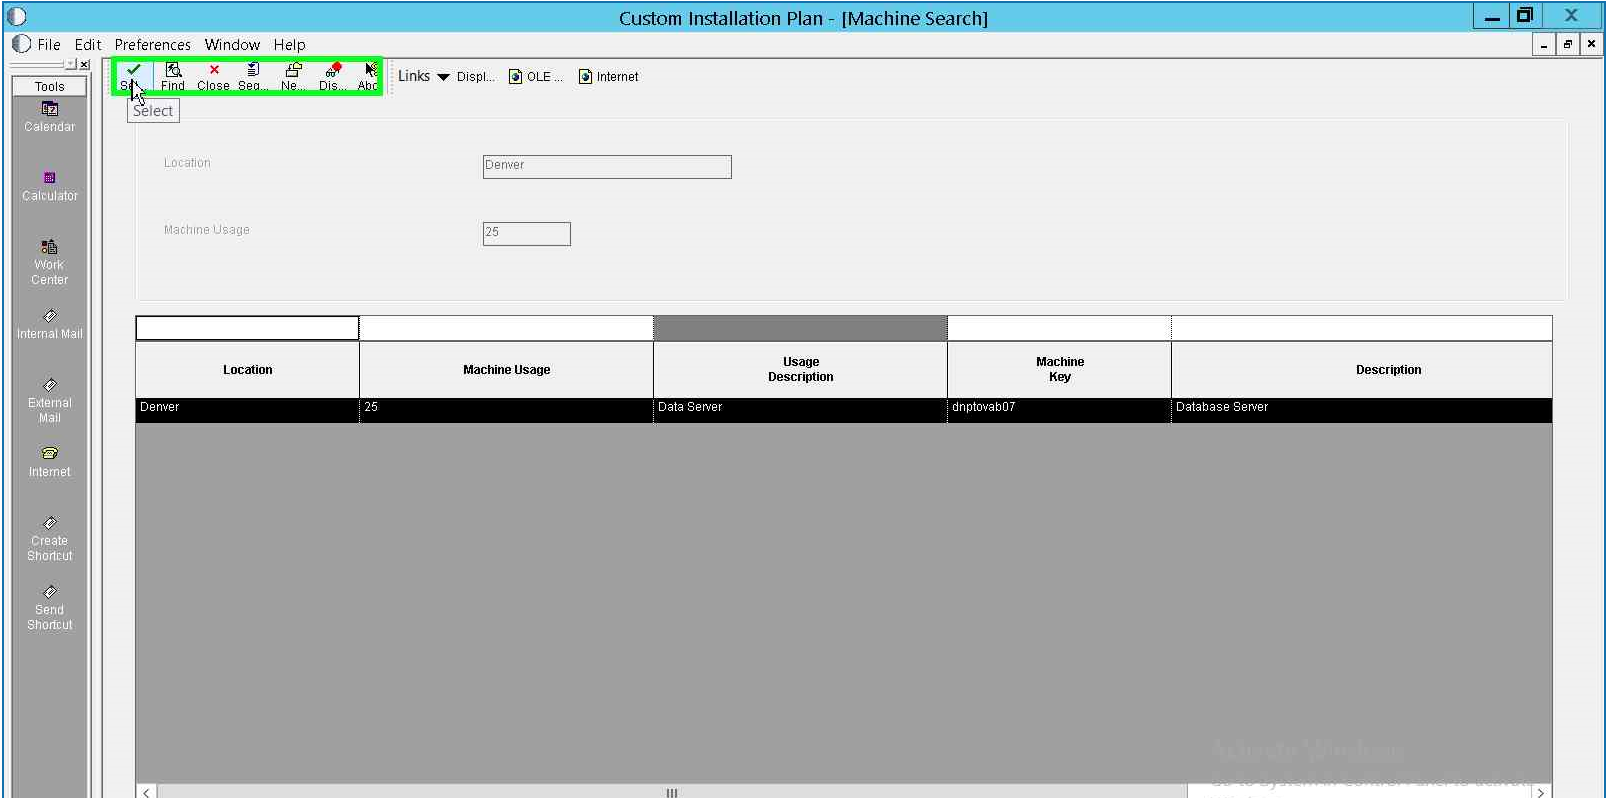
- On Machine Search window, select the required Data Server, and then click the Select button.
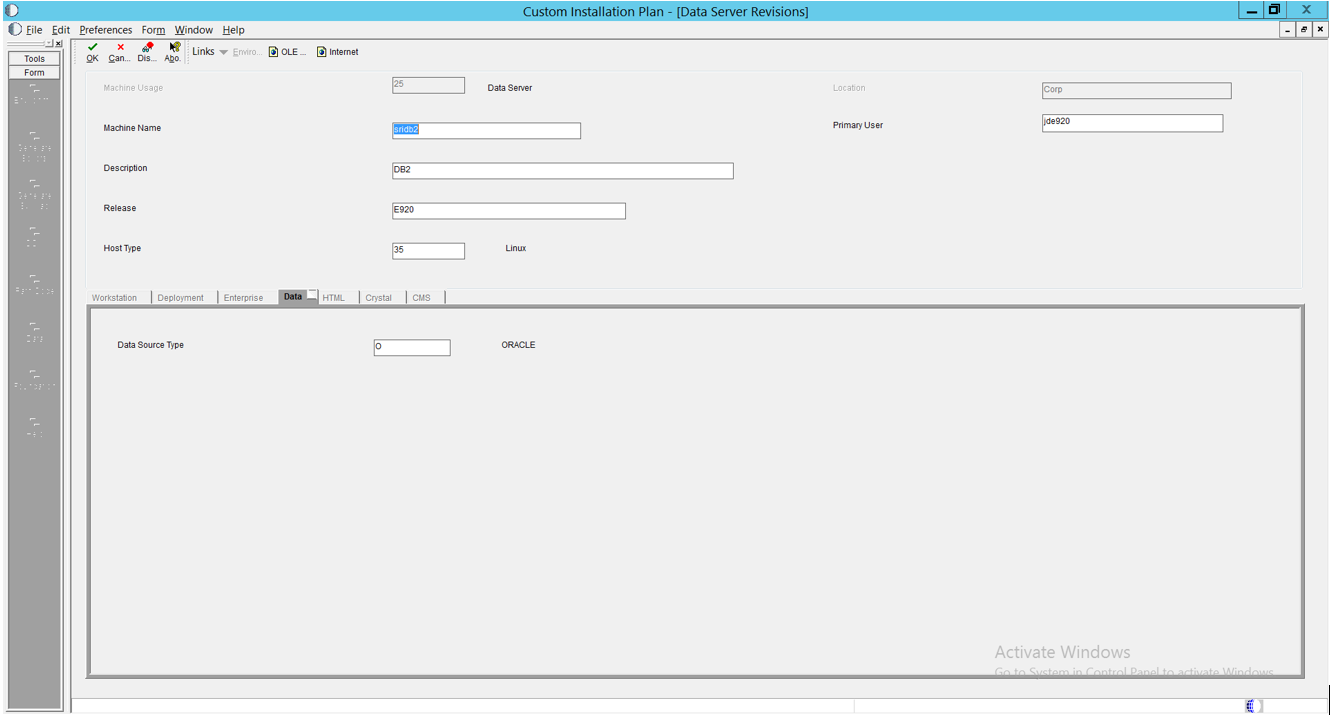
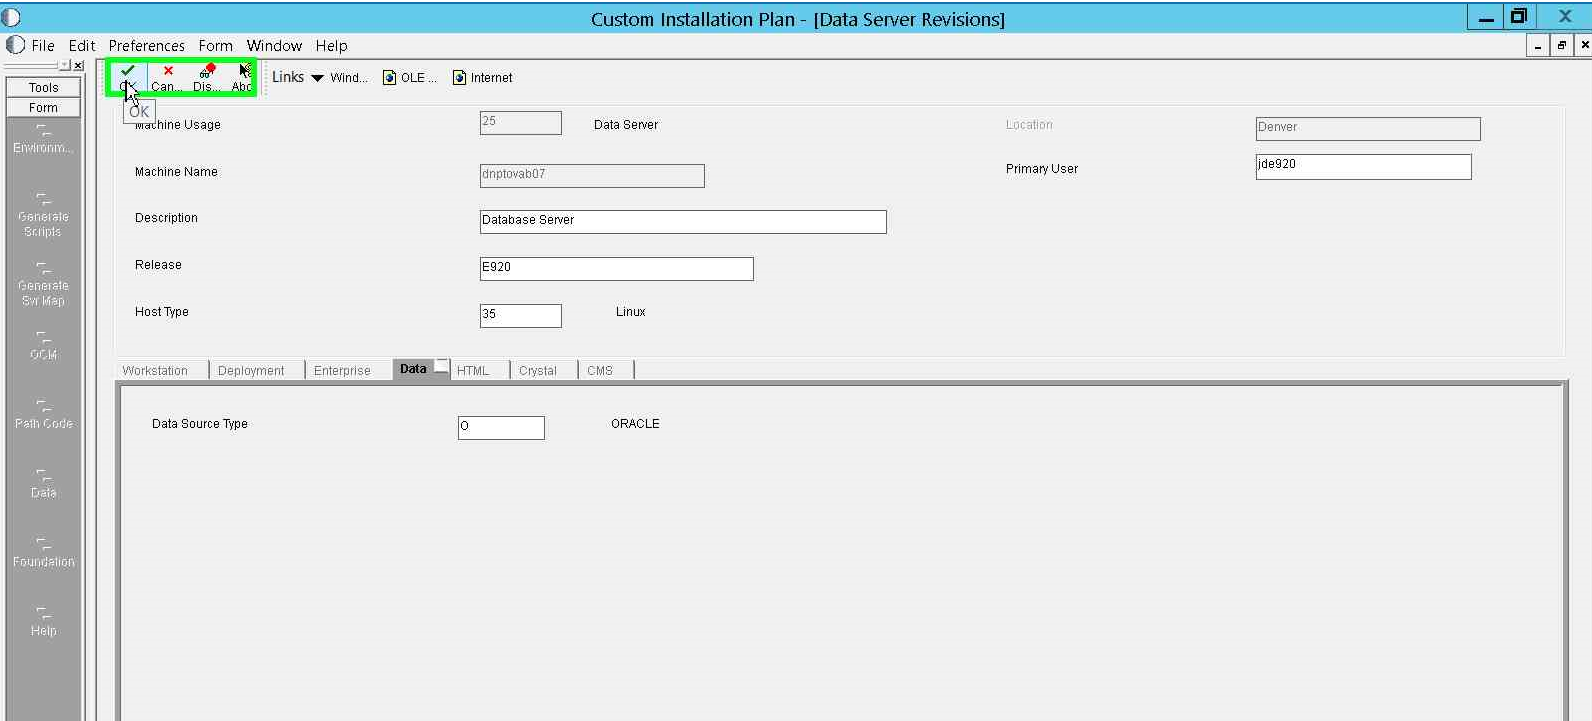
- On Data Server Revisions window, enter the values as illustrated in the following example, and then click the OK button.
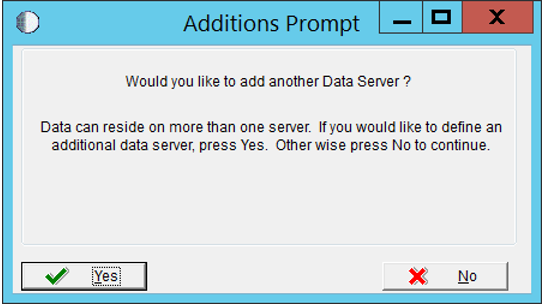
- The Additions Prompt window is displayed. You can click the Yes button to add more Data Servers. For this example, click the No button. To add more Data Servers, see Add Multiple Database Servers.
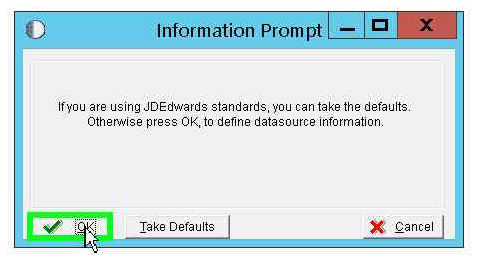
- The Information Prompt window is displayed. Click the OK button to define the Data Source information.
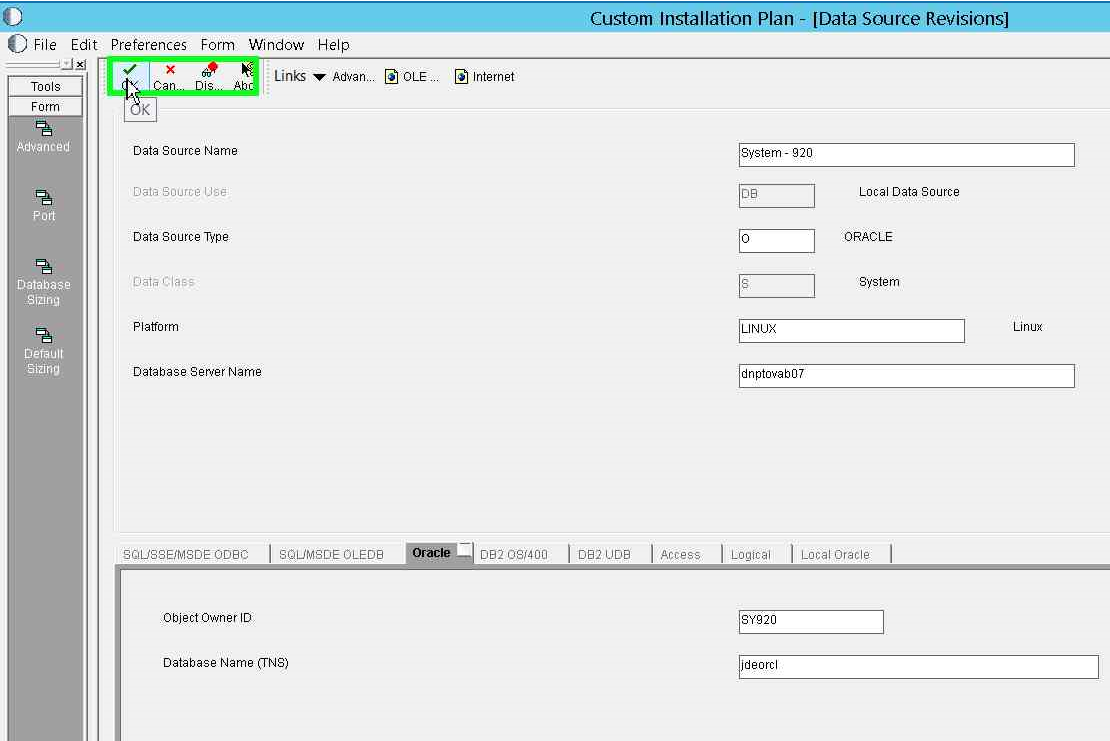
- On the Data Source Revisions window, enter the values as illustrated in the following example, and then click the OK button.
Use this procedure to add additional Database Servers while creating the Simplified Upgrade plan.
- The following Additions Prompt window is displayed after you add the first Database Server. Click the Yes button.
- On the Data Server Revisions form, enter the details of the second Database Server as illustrated in the following example, and then click the OK button.