Entering Deployment Server Information
While Release 9.2 enables more than one Deployment Server to be defined, only the primary Deployment Server is defined at this time. You can choose a primary Deployment Server from the list of existing servers or you can enter information for a new server.
To enter Deployment Server information:

-
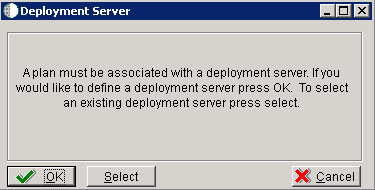
Click the OK button to add a Deployment Server.

-
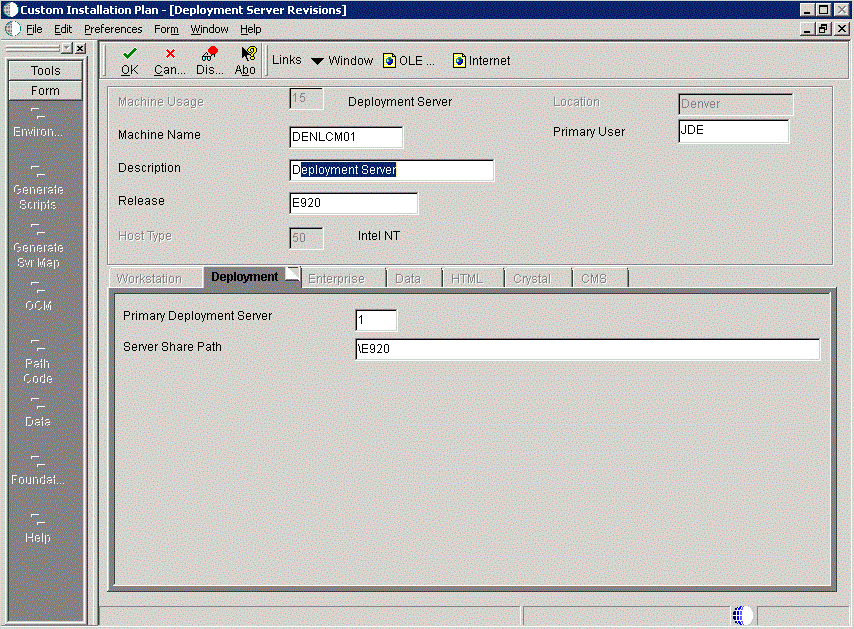
On Deployment Server Revisions, complete or verify these fields:
Field
Description
Machine Usage
Displays the value 15 by default to indicate that this is a Deployment Server.
Machine Name
The name of the Deployment Server appears by default. The name is case sensitive, should not exceed 15 characters, and should not contain any special characters.
Description
Enter a long description for the machine. This description should include the location with which this Deployment Server is associated and whether or not it is the primary server.
Release
Enter the release number you are installing or use the visual assist button to choose one from the list. The default value is E920.
Host Type
Displays the value 50 appears by default, indicating that the server type is Intel NT.
Location
Displays the current location.
Primary User
Displays the user to whom an email is sent when a package is deployed. The default value for Primary User is jde920.
This is also the UNIX user ID that is used to install Release 9.2 on the Enterprise Server. For example, jde920.
-
On the Deployment tab, complete this field:
Field
Description
Primary Deployment Server
Enter the hierarchy of the servers. Values are:
1- Primary Deployment Server (default value)
0 - Secondary Deployment Server
The server share name of the directory to which you installed Release 9.2 on your Deployment Server. Verify that the server share name for Release 9.2 is:
\E920 -
Click the OK button.
Tip:If you enter invalid information into a tab field, a stop sign symbol appears next to the tab name, such as Deployment Server. For more information about the error, click the stop sign icon in the bottom right-hand corner of the form.

-
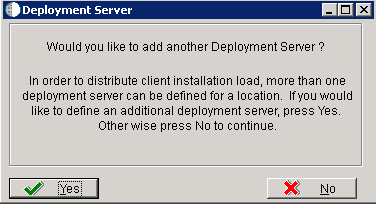
To add another Deployment Server, click the Yes button and repeat steps 1 through 3.
-
To continue with Installation Planner setup, click the No button.