Preparing the Prototype Environment
To make sure you retain all modifications from your prototype environment:
Make sure the network services JD Edwards EnterpriseOne network services are running on the Enterprise Server.
Note: The service names will be prefixed with JDE for releases prior to 8.9 and after 8.11, while the prefixed will be PSFT for releases 8.9, 8.10, and 8.11.From the System Administration Tools menu (GH9011), select Batch Versions.
Transfer PD versions to prototype so the two environments are the same.
Run R9830512.
Select ZJDE0001 and click Copy.
Create a new version name and a new version title.
Leave security set at 0.
To select the new version on the version prompting form, check the Data Selection box.
Select the advanced options to bring up the Advanced version prompting form and select to Override Location.
Click Submit.
When prompted for the override location, select LOCAL.
Modify the data selection logic like this:
where BC Version History (F983051) is not equal to "XJDE0000-XJDE9999",
and BC Version History (F983051) is not equal to "XJDEAAAA - XJDEZZZZ"
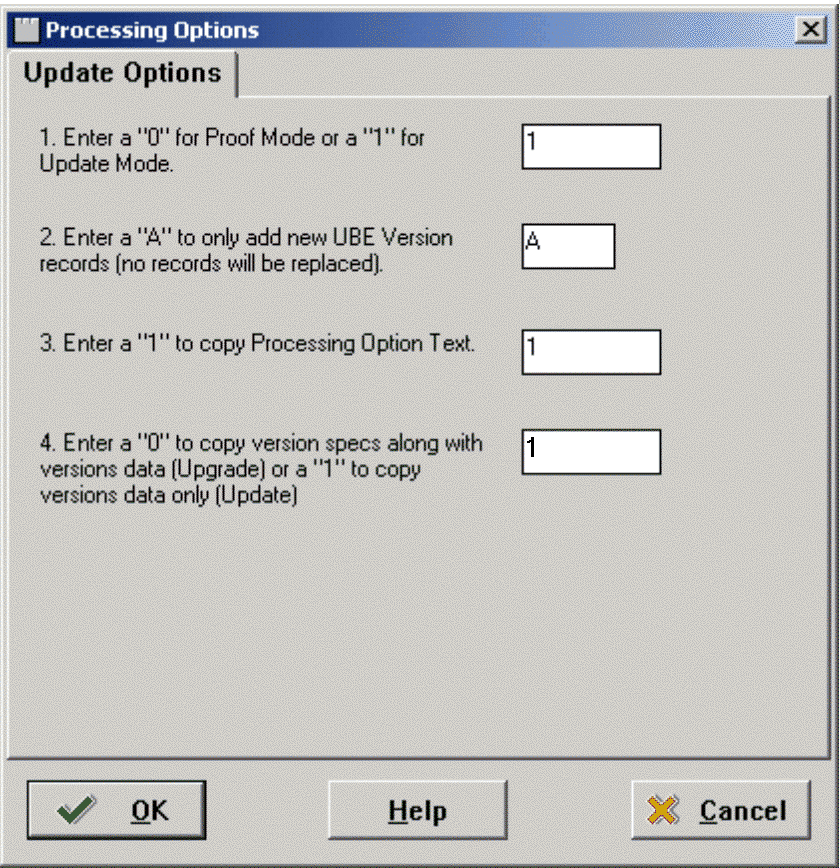
When prompted to enter processing options, ensure that they are set at 1, A, 1, and 1, as shown on this screen:

Click the OK button on printer selection.
Click the OK button on Processing Options.
Build a prototype package. This package can be used later to verify that your custom versions were upgraded properly.
Deploy the prototype package to Development Clients. Run the release you are upgrading from, for example, B7333.
See Also
Transferring Objects and Package Build in the JD Edwards EnterpriseOne Tools Package Management Guide for more specific instructions about building and deploying packages.