Tamatsuki Transfer Entry Page
Use the Tamatsuki Transfer Entry page (IDO_TAMATSUKI_JPN) to assign tamatsuki candidates to posts.
Navigation:
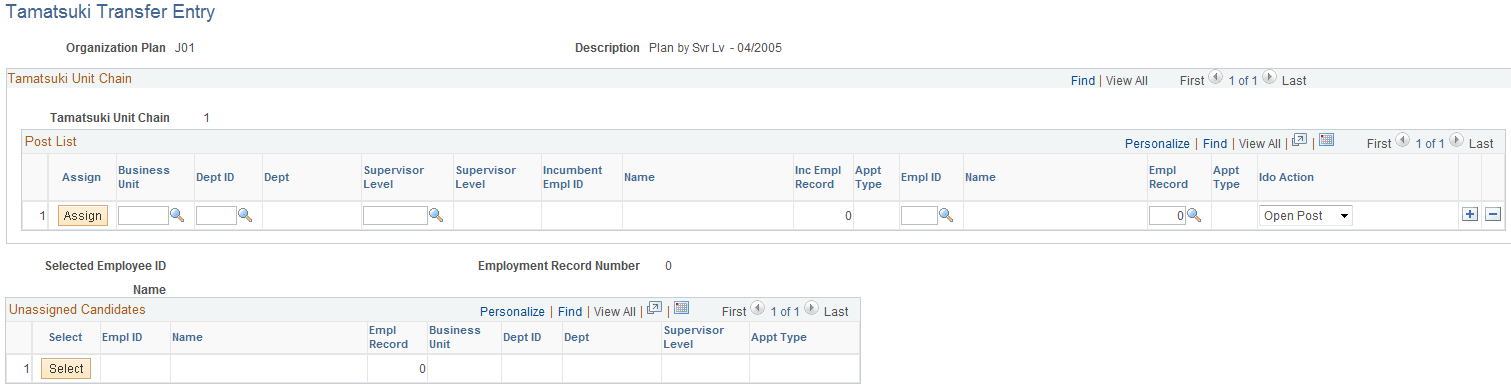
This example illustrates the fields and controls on the Tamatsuki Transfer Entry page. You can find definitions for the fields and controls later on this page.
Note:
When the user needs to change the middle of the Tamatsuki Chain (Unit), the user should delete the whole unit and enter information from the first row.
Post List
| Field or Control | Description |
|---|---|
|
Assign |
Use this button to assign the selected employee to the open post. When no one is selected from the unassigned candidate grid, the selected employee's post is entered on the first row. |
|
Business Unit |
This field can only be entered for the first row. The next rows are inserted automatically based on the selected employee's post. |
|
Dept ID |
This field can only be entered for the first row. The next rows are inserted automatically based on the selected employee's post. |
|
Supervisor Level |
This field can only be entered for the first row. The next rows are inserted automatically based on the selected employee's post. |
|
Ido Action |
Open Post is the default value when you insert a new row. When an employee is placed in an open post, the system automatically inserts a new row so that another employee can be assigned to the open (vacated) post. Possible values are:
|
Unassigned Candidates
| Field or Control | Description |
|---|---|
|
Select |
In the Unassigned Candidates group box, click the Select button next to the row of the employee that will be assigned to a post. The Selected Employee ID field shows the currently selected employee. |