Using Navigation Buttons and Links
You can view data in grids and scroll area by using navigation buttons and links. The following table describes the buttons and links that might appear in a grid or scroll area.
| Field or Control | Description |
|---|---|
|
|
Click to insert one new row after the current row. |
|
|
Click to insert multiple rows. Specify the number of rows (1 to 99). |
|
|
Click to delete the current row of data. |
|
|
(Show Next Row) Click to display the next row or set of rows of data. Note: The Show Next Row and Show Previous Row buttons are disabled if you are viewing all rows of data. |
|
|
(Show Previous Row) Click to display the previous row or set of rows of data. |
|
|
(Show All Columns) In a tabbed grid only, click to expand grid columns to the right so that tabs are no longer needed. |
|
|
(Show Tabs) In a tabbed grid only, click to return the expanded grid to its tabbed state. |
|
Personalize |
Click to access the personalization page for that grid, which enables you to sort by column and reorder, hide, and freeze columns. |
|
|
(Download to Excel) Click to download the grid contents to an Excel spreadsheet. Note:
The downloaded file is
named |
|
|
(Zoom) Click to display the grid in a modal window. |
|
View All |
Click to display the maximum number of rows available to be viewed at once on a page. When this feature is enabled, the link changes to read View x so that you can return to the original setting. The value of x can change, and the application developer sets it. |
|
Find |
Click to find a row of data containing a specified search string. |
|
First |
Click to access the first row or set of rows of data. Note: The First and Last links are not available if you are viewing all rows at once, in which case you scroll to see your data. |
|
Last |
Click to access the last row or set of rows of data. |


Keyboard shortcuts are also available for certain buttons. See Using Keyboard Shortcuts.
In addition to these links and buttons, rows use a numbering system. For example, if a grid or scroll area were set to view only one row at a time, then the navigation header might read 1 of 2 or 1 of 20, depending on how many entries there were. If the grid or scroll area were set to view three rows of data at a time, it might read 1-3 of 20. Click the arrows to view the next or previous series of rows. In the Messages scroll area, for example, the count indicates that it contains 721 total rows of data, displaying just one row at a time. Select View 100 to see the rows in groups of 100 at a time.
This example shows a sample scroll area.
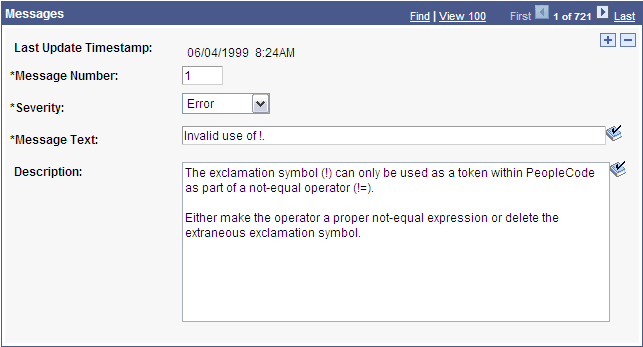
The example shows View 100 instead of View All because of the personalization that limits the number of rows that appear in View All mode. Setting it too high could affect performance; the default setting is 100.
Note:
Be aware of the differences between the grid and scroll area navigation header, which can appear as a header and a footer in any grid or scroll area control, and the universal navigation header, which appears in the upper-right corner of every page.