Setting Up the Distribution Path
To set up the distribution path, complete these steps:
-
Create a new user in Service Manager on the target database.
-
Set up the path on the source database.
-
Create the distribution service on the source database.
Creating a New User on the Target Database
-
Sign in to Service Manager on the target database.
-
Select the link for the deployment, for example PSFT_TARGET.
-
Select User Administration from the menu on the left.
-
Click the plus sign (+) to add a user.
-
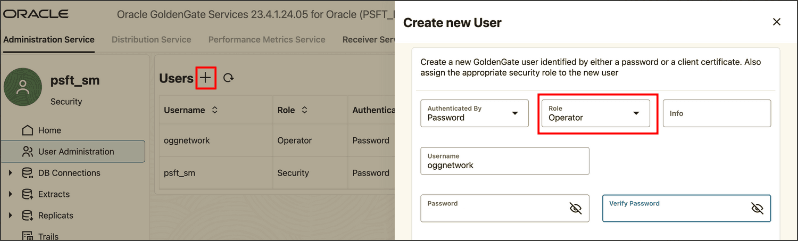
On the Create new User page, enter values for these options:
-
Authorized By — Accept the default, Password.
-
Role — Select Operator from the drop-down.
-
Username — Enter a name for the new user, which is oggnetwork in this example.
-
Password and Verify Password — Enter a password for the new user.
This example illustrates the Create new User page in Service Manager.
-
-
Click Submit.
Setting Up the Path on the Source Database
Configure an alias for the distribution path on the source database.
-
Sign in to Service Manager on the source database.
-
Select the link for the deployment, for example PSFT_SOURCE.
-
Select Administration Service.
-
Select Path Connections from the navigation panel on the left.
-
Click the Path Connections plus sign (+) to enter credentials to connect to the deployment on the target database.
-
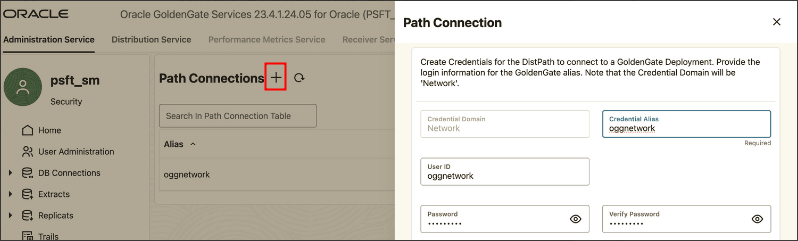
On the Path Connection page, enter values for these options:
-
Credential Domain — This is preset as Network and cannot be changed.
-
Credential Alias — Enter an alias for the user credential, which is oggnetwork in this example.
-
User ID — Enter the new user that you created on the target database, oggnetwork in this example.
-
Password and Verify Password — Enter the password for the specified user.
This example illustrates the Path Connection page in Oracle GoldenGate Service Manager.
-
-
Click Submit.
Creating the Distribution Service on the Source Database
Before creating the distribution service, ensure that you have completed the previous sections to create a user and set up a path.
-
Select the link for the deployment from the navigation panel on the left, and then select Distribution Service.
-
Select Distribution Paths from the navigation panel on the left.
-
Click the plus sign (+) to add a Distribution Path.
-
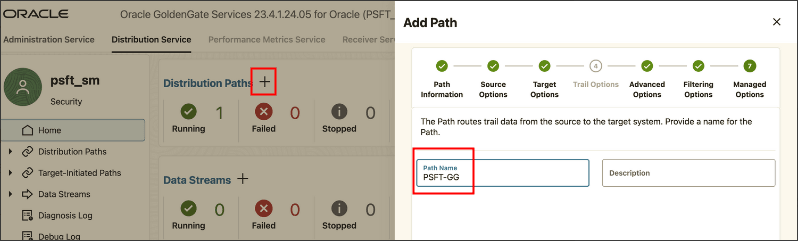
On the Add Path page, enter a path name, which is PSFT-GG in this example, and an optional description.
This example illustrates the Add Path panel in Service Manager.
-
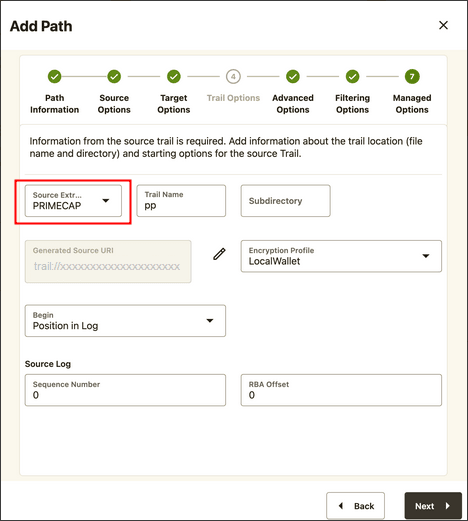
Select the file defining your extract, which is PRIMCAP in this example.
The information in the other fields on the page are supplied by the system based on the information in the parameter files.
This example illustrates Trail Options on the Add Path page.
-
Click Next.
-
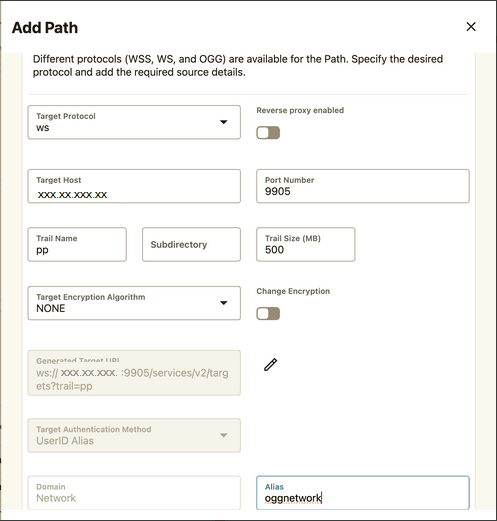
Select one of these target protocols:
-
WSS — Secure web socket
-
WS — Web socket, which is shown in this example.
-
OGG — Oracle GoldenGate protocol.
This example illustrates the Add Path page to specify target protocols.
-
-
Provide the following values. You can accept the values in the other fields on the page.
-
IP address for the target host
-
The target port number, which is 9905 in this example.
-
Trail name, which is pp in this example.
-
Alias, which is oggnetwork in this example.
-
-
Click Next on the following pages until you reach the last step.
-
Select Create Path and Run.
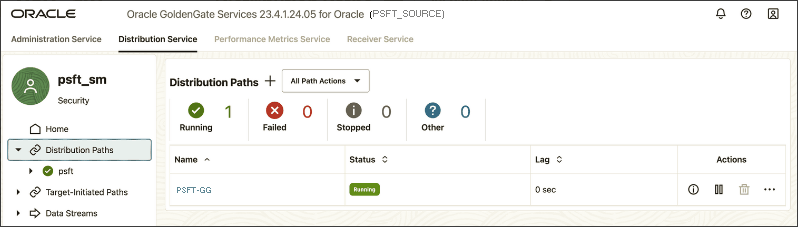
You should see a distribution path with Running status.
This example illustrates the Distribution Paths page with a running distribution path.