Choosing Tree Levels and Tree Nodes
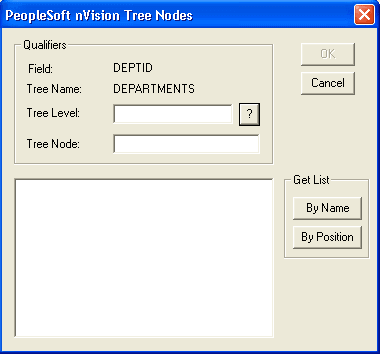
If you selected the All Nodes at Selected Levels, Selected Tree Nodes, Children at a Level, or Detail of Selected Parents options in the PeopleSoft nVision Scope Field dialog box, the PeopleSoft nVision Tree Nodes dialog box appears prompting you to specify the tree levels that contain the nodes you want to use.
This example illustrates the fields and controls on the PeopleSoft nVision Tree Nodes dialog box.
To select tree levels and nodes in PS/nVision:
-
Select from the nVision menu.
-
Click theNew button.
-
Enter a scope name and a description.
You may use up to 10 characters for the scope name and up to 30 characters for the scope description.
-
Enter the setID and other values for this scope.
-
Add fields to the scope definition by clicking the Add button.
The PeopleSoft nVision Scope Field dialog box appears.
-
Select All Nodes at Selected Levels,Selected Tree Nodes,Children at a Level, or Detail of Selected Parents option.
The PeopleSoft nVision Tree Nodes dialog box appears.
-
In the PeopleSoft nVision Tree Nodes dialog box, select a level.
-
Place the cursor in the Tree Node field and click to see a list of nodes either by name or by position.
-
Select the nodes to use for your report.
-
Click the OK button.
The PeopleSoft nVision Scope Definition dialog box shows your fields and tree nodes.
-
Click the Save button to save the scope.
Note:
Make sure to click the Save button when you are finished with your scope. Clicking the OK button closes the PeopleSoft nVision Scope Definition dialog box without saving your scope.