Adding a Root Node
Use the Enter Root Node for Tree page (PSTREEROOTLEVELS) to define tree levels and the root node.
Navigation:
-
Select
-
Create a new one.
-
Click the link.
-
On the Tree Definition and Properties page, enter the appropriate values and click the OK button.
This example illustrates the fields and controls on the Enter Root Node for Tree page.
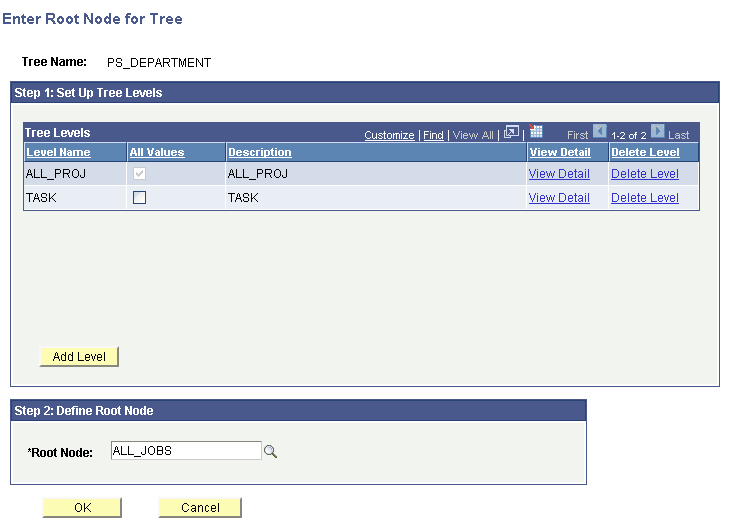
You create a tree from the top down. You start by creating the root node, then add the children of the root node, and continue down to the detail values (if the tree has them). If the tree uses levels, then you must first define the level for the root node. You may want to set up additional levels at this time.
To add a root node for tree:
Note:
If your tree does not use levels and the Add Root Node page does not include level configuration, skip to step 5.
-
In the Enter Root Node for Tree page, add tree levels by clicking the Add Level button.
The Tree Levels page appears.
-
Enter a name for the level.
Use a name that reflects what the nodes at this level represent. For example, the first level in the Department Security tree is CORPORATE, indicating that the root node is Corporate Headquarters. You can also enter the name of a level from another tree.
Note:
You can also use the search box to search for names of existing levels.
-
Specify whether nodes can skip over the level.
The All Values option specifies whether PeopleSoft Tree Manager permits nodes to skip over the level you’re defining to report to a higher level. Select this option to make sure that all values from lower levels report to a node at this level. Clear this option to allow nodes to skip a level. For example, you might want to do this if you have one or more departments that are not part of any division but report directly to the COMPANY level.
Note:
When you are adding a top level (the root node), the All Values option is selected but unavailable. You cannot skip over the top level.
-
Click the OK button.
The Tree Levels page closes. If you entered the name of an existing level from another tree, the level name is added. If you entered a new name, PeopleSoft Tree Manager displays the page for entering tree level information. The displayed page is the page specified for levels in the tree structure. For most trees, it is the Tree Levels page.
-
Enter a new root node name or select an existing root node.
If you are entering new node information, you must enter the information in the Tree Nodes page.
-
Click the OK button.
The tree appears with the root node on the page.
Note:
When the multiuser environment is enabled, a newly created tree appears by default in edit mode.