Understanding Toolbar Buttons
Use toolbar buttons to add icons and connecting lines to maps. Different toolbars (and, therefore, different map objects) are available for business processes and activities.
Business Process Toolbar
This toolbar provides the basic components of a business process, including activities and the lines that link them. This toolbar is visible only when a business process is the active window.
| Term | Definition |
|---|---|
|
|
Click the Link button to connect related activities or steps. This button also appears in the Activity toolbar. You must use the link tool to connect objects on the map; do not use arrows or other drawn shapes. |
|
|
Click the Business Process button to add another business process. |
|
|
Click the Activity button to add an activity. |
|
|
Click the Decision button to add a decision point in a process. A Decision icon in a map is descriptive only; it has no workflow functionality. This button also appears in the Activity toolbar. |


Activity Toolbar
This toolbar provides the basic components of an activity, including steps, workflow events, and workflow routings. This toolbar is visible only when the active window displays an activity.
| Term | Definition |
|---|---|
|
|
Click the Link button to connect related activities or steps. This button also appears in the Business Process toolbar. |
|
|
Click the Step button to add a page. |
|
|
Click the Event button to add a business event. |
|
|
Click the Worklist button to add a worklist. |
|
|
Click the Email button to add email for workflow routing. |
|
|
Click the Batch button to create a descriptive icon for a background process. |
|
|
Click the Manual Process button to create a descriptive icon for a manual process. |
|
|
Click the Decision button to create a descriptive icon for a decision point in a process. This button also appears in the Business Process toolbar. |
|
|
Click the Local Transaction button to create a descriptive icon representing a service operation definition for a transaction that occurs in one database. |
|
|
Click the Transaction other DB (transaction other database) button to create a descriptive icon representing a service operation definition for a transaction that sends a message to another database in the same enterprise. |
|
|
Click the Remote Transaction button to create a descriptive icon representing a service operation definition for a transaction that sends a message to another database in another enterprise by crossing the firewall. Service operation definitions are used in PeopleSoft Integration Broker. |


Modeling Toolbar
This toolbar provides additional buttons for creating icons to graphically enhance maps. Some of the icons are informational only; those that are functional have exact equivalents in either the Business Process or the Activity toolbar. This toolbar is visible when either a business process or an activity is the active window in the workspace.
| Term | Definition |
|---|---|
|
|
Click the Document button to create a descriptive icon for a document. (Informational only.) |
|
|
Click the End Process button to create a descriptive icon for the end of process. (Informational only.) |
|
|
Click the Business Process button to add an icon for a business process. This is the same function as the Business Process button on the Business Process toolbar. When you add this icon to a map, you are prompted to identify an existing business process that the icon represents. This functionality is available only when a business process is the active window in the workspace. |
|
|
Click the Activity button to add an icon for an activity. This is the same function as the Activity button in the Business Process toolbar. When you add this icon to a map, you are prompted to identify an existing activity that the icon represents. This functionality is available only when a business process is the active window in the workspace. |
|
|
Click the Event button to add an icon for an event. This is the same function as the Event button in the Activity toolbar. This functionality is available only when an activity is the active window in the workspace. |
|
|
Click the Page button to add an icon for a page. This is the same function as Step button in the Activity toolbar. This functionality is available only when an activity is the active window in the workspace. |


Drawing Toolbar
This toolbar is visible when either a business process or an activity is the active window in the workspace.
Normally, you add an object to a map by clicking the object in the toolbar and clicking the location on the map. Some of the drawing tools, however, involve extra clicks on the map. For example, to draw a line, first click the Line button as you click any other button. To draw the line on the map, click once at the beginning of the line and again at the end of the line.
| Term | Definition |
|---|---|
|
|
Click the Line button to draw a static line. Drag the cursor from one end of the line to the other. You can move the endpoints later. |
|
|
Click the Arrow Line button to draw a line that terminates with an arrow. |
|
|
Click the Rectangle button to draw a rectangle. Drag the cursor from one corner of the rectangle to the opposite corner. You can move the corners later. |
|
|
Click the Polycurvebutton to draw a curve. Drag from anchor point to anchor point, and double-click at the end of the curve. You can move the anchor points later. |
|
|
Click the Ellipse button to draw an ellipse. Drag from one corner of the surrounding rectangle to the opposite corner. You can move the corners later. |
|
|
Click the Text button to draw a static text field. Place text by clicking at the appropriate location. You can move or resize the text box later. |
|
|
Click the Image button to add a bitmap. Place the bitmap by clicking at the appropriate location. |
|
|
Click the Toggle Grid button to display or hide an optional grid to help you place map objects. |


Alignment Toolbar
This toolbar contains options for aligning objects on several different axes.
| Term | Definition |
|---|---|
|
|
Click the Align Top button to arrange all selected objects so that they are aligned at the top of the base position object. |
|
|
Click the Align Middle button to arrange all selected objects so that they are aligned at the middle of the base position object. |
|
|
Click the Align Bottom button to arrange all selected objects so that they are aligned at the bottom of the base position object. |
|
|
Click the Align Left button to arrange all selected objects so that they are aligned at the left-hand side of the base position object. |
|
|
Click the Align Center button to arrange all selected objects so that they are aligned at the center of the base position object. |
|
|
Click the Align Right button to arrange all selected objects so that they are aligned at the right-hand side of the base position object. |


Layering Toolbar
This toolbar contains options to move objects in front of or behind each other.
| Term | Definition |
|---|---|
|
|
Click the Front button to move the selected object in front of any overlapping objects. |
|
|
Click the Back button to move the selected object behind any overlapping objects. |
|
|
Click the Forward button to move the selected object in front of the overlapping objects that are immediately in front of it. |
|
|
Click the Backward button to move the selected object behind any overlapping objects that are immediately in front of it. |


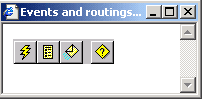
Events and Routings Icons
These icons are actual workflow objects, representing transactions that trigger workflow (events) and the medium through which the trigger sends work to the recipient (routings). You normally add these objects to activities after completing the basic maps.
This example illustrates the events and routings icons.