- Oracle Big Data Manager User’s Guide
- Transferring and Comparing Data
- Copying Data (Including Drag and Drop)
4.1 Copying Data (Including Drag and Drop)
In the Oracle Big Data Manager console, you can copy data between storage providers by creating copy jobs.
To copy data from one storage to another,
- Click Data on the console menu bar to go to the Data explorer.
- If it isn’t already selected, click the Explorer tab (on the left side of the page).
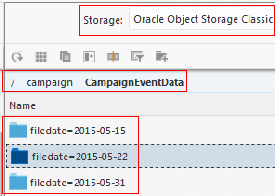
- In one panel, select a destination data provider from the Storage list, and navigate to a folder or container by selecting a location in the breadcrumbs or by drilling down in the list below it, for example:
- In the other panel, select a source data provider from the Storage drop-down list, navigate to the folder or container containing the file, folder, or container you want to copy.
- Do any of the following:
- Drag the source file, folder, or container from the source and drop it on the target. If you drop a file from the source on a single file in the target, that file will be replaced by the one being copied. If your drop an item on a folder or container, it will be copied into the folder or container.
- Right-click the item you want to copy and select Copy from the menu. If a folder or container is selected in the target, the item will be copied into the folder or container. If a single item is selected in the targey, it will be replaced. If nothing is selected in the target, the item will be copied into the current folder or container.
- Click Copy
 . If a folder or container is selected in the target, the item will be copied into the folder or container. If a single item is selected in the targer, it will be replaced. If nothing is selected in the target, the item will be copied into the current folder or container
- In the New copy data job dialog box, choose or enter values as described below.General tab
- Job name: A name is provided for the job, but you can append to it or replace it with a different name.
- Job type: This read-only field describes the type of job. In this case, it’s Data transfer — import from HTTP.
- Run immediately: Select this option to run the job immediately and only once.
- Repeated execution: Select this option to schedule the time and frequency of repeated executions of the job.
Advanced tab- Number of executors: Select the number of executors from the drop-down list. The default number is
3. If you have more then three nodes you can increase execution speed by specifying a higher number of executors. If you want to execute this job in parallel with other Spark or MapReduce jobs, decrease the number of executors to increase performance. - Number of CPU cores per executor: Select the number of cores from the drop-down list. The default number is 5. If you want to execute this job in parallel with other Spark or MapReduce jobs, decrease the number of cores to increase performance.
- Memory allocated for each execution: Select the amount of memory from the drop-down list. The default value is 40 GB. If you want to execute this job in parallel with other Spark or MapReduce jobs, decrease the memory to increase performance.
- Memory allocated for driver: Select the memory limit from the drop-down list.
- Custom logging level: Select this option to log the job’s activity and to select the logging level.
- Click Create.The Data compare job job_number created dialog box shows minimal status information about the job. Click the View more details link to show more details about the job in the Jobs section of console.
- Review the job results. In particular, in the Jobs section of the console, click the Comparison results tab on the left side of the page to display what’s the same and what’s different about the compared items.
