Create a Calculation in a Workbook
You can create a calculated data element and add it to your workbook visualizations. For example, you can use the BIN function to group prescription counts into age ranges, such as 20–39, 40–59, 60–79, and 80 or older.
Calculated data elements are stored in the dataset’s My Calculations folder and not in the workbook. Workbooks have a My Calculations folder for each dataset used (whether joined or not-joined). Calculations are available anytime you use the workbook.
Shareable calculations are stored in the Shared Objects folder in the Data Panel.
When you're writing a new calculation, you can drag and drop columns from the Data Panel into the Expression Editor. You can only drag and drop columns that are joined to the dataset.
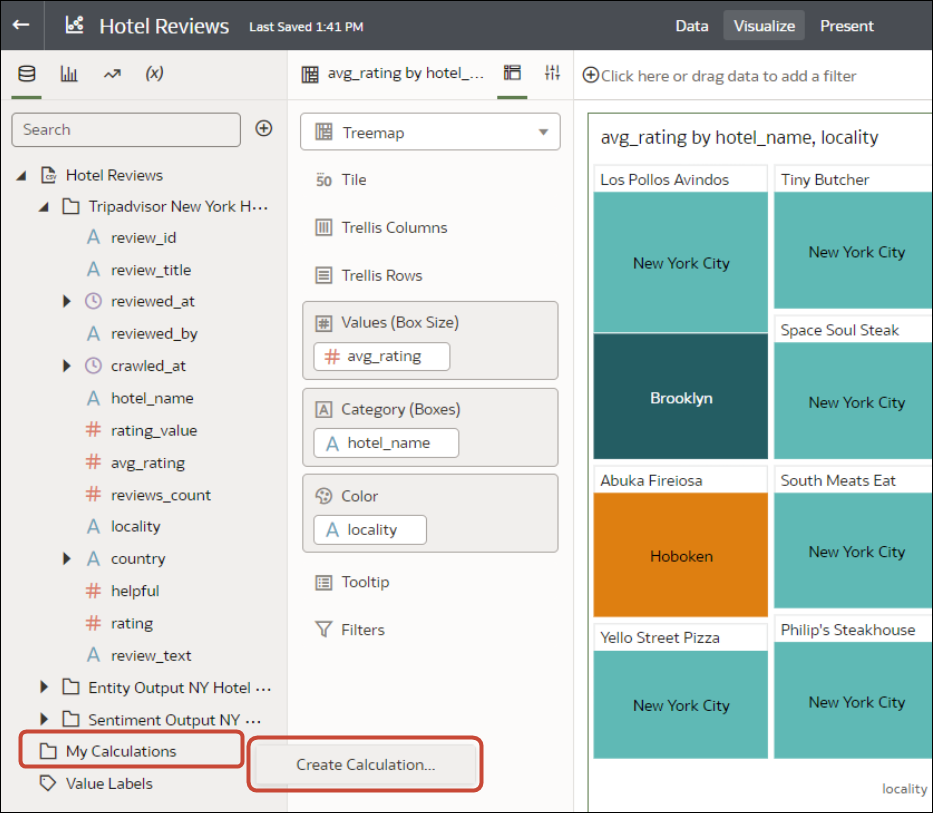
- In the Data pane, right-click My Calculations, and select Create Calculation to open the New Calculation dialog.
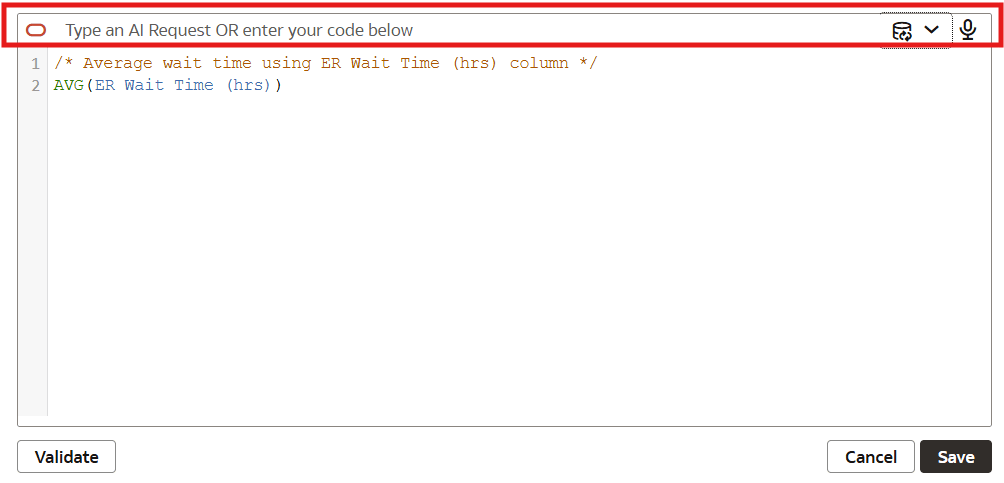
- In the expression builder pane, compose and edit an expression using attributes, measures, and parameters.Tip: Generate an expression automatically by typing or speaking a natural language request in the AI Assistant box at the top of the expression builder. For example, you might type "What's the average Wait Time" to automatically generate the expression
AVG(Wait Time)and a description.