 Create
Business Rules in an Oracle Visual Builder Web Application
Create
Business Rules in an Oracle Visual Builder Web Application Before You Begin
This 15-minute tutorial shows you how to create commonly used business rules for business objects using Oracle Visual Builder.
Background
Most Oracle Visual Builder applications require rules for business objects to execute business logic that deals with the data. These rules can range from a simple validation expression on a field, to more complex rules that validate objects and fields and that trigger actions based on events or on field changes. You can also create and call functions on objects.
In this tutorial, you'll create some business rules for an application that keeps track of business expenses.
Although this tutorial doesn't have any prerequisites, you may want to complete the tutorial Create a Web Application in Oracle Visual Builder first, to become familiar with creating business objects.
What Do You Need?
- Access to Oracle Visual Builder
- A supported browser
 Create
an Application and a Business Object
Create
an Application and a Business Object
- In the web browser, log in to Oracle Visual Builder.
- On the Visual Applications page, click New.

Description of the illustration vbcsbr_cra_s2.png - In the Create Application dialog box, enter:
- Application Name:
Expense Tracker - Description:
Tutorial
                        application
The Application ID text field is automatically populated as you type, based on the Application Name. The Application template field is set to Empty Application.
- Application Name:
- Click Finish.
The application is created and opens on the Welcome page. You'll first create a business object.
- Click the Business Objects
 tile.
tile.

Description of the illustration vbcsbr_cra_s5.png The Business Objects pane of the Navigator opens.
- Click the + Business Object button.

Description of the illustration vbcsbr_cra_s6.png -
In the New Business Object dialog box, enter
Expensein the Name field.Expenseis filled in automatically for the Display Label field. Click Create.
Now we need to add a new field to the basic set of fields that was populated for our business object.
- Click the Fields tab, then click the + button and Field.
- In the dialog box, enter:
- Label:
Amount - Field Name:
amount(automatically populated) - Type: Number

Click Create Field.

Description of the illustration vbcsbr_cra_s9.png - Label:
- Create the following additional fields:
Field Name Type Description String 
Date Incurred Date 
Expense Type String Approved Boolean 
When you've finished, the fields are displayed as follows:

Description of the illustration vbcsbr_cra_s10.png
 Create
a Field Validator
Create
a Field Validator
A field validator is a constraint that you can place on any custom field (that is, a field you created yourself). The expression or script that defines the rule must return a Boolean value.
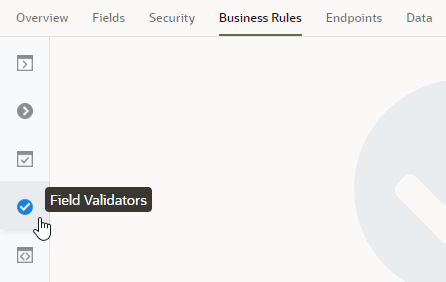
- Click the Business Rules tab, then click
the Field Validators
 tab.
tab.
Description of the illustration vbcsbr_fv_s1.png - Click + New Field Validator. In the Create
Field Validator dialog box, enter or select:
- Validator Name:
Amount Is Greater Than Zero - Field:
Amount - Error Message:
Enter an amount
                        greater than zero.
Click Create Field Validator.
- Validator Name:
- On the page that opens, mouse over newValue
under Field Values and click the Insert
 arrow, then add
 > 0in the text area to create the validator expression.
Description of the illustration vbcsbr_fv_s3.png - Click the Field Validators tab again to return to
the Field Validators page. The field validator is created and active.
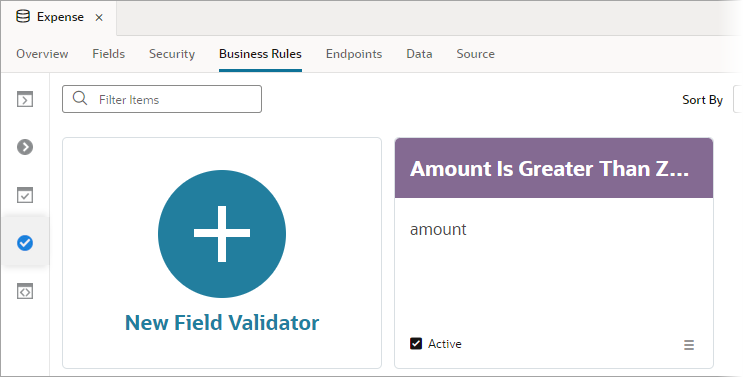
Description of the illustration vbcsbr_fv_s4.png
 Create
an Object Trigger and a Condition
Create
an Object Trigger and a Condition
An object trigger defines a sequence of actions that starts when a specific event occurs, such as inserting or updating a record. When you create an object trigger, you specify the triggering event and the actions that are then executed. You can refine the sequence so that actions are executed only when some criteria are met. A single object trigger can define multiple criteria and multiple actions.
- Click the Object Triggers
 tab.
tab. - Click + New Object Trigger.
- In the Create Object Trigger dialog box, enter
Approve
                    Expenses
in the Trigger Name field. Select the Before Insert option from the Start Event list. Click Create Object Trigger.
Description of the illustration vbcsbr_trig_s3.png - In the Trigger Designer, click the + sign
(Create New Criteria).

Description of the illustration vbcsbr_trig_s4.png - Select Execute Conditionally from the
Choose Criteria Type dialog box to bring up the Criteria pane on the right. Note: If the Criteria pane isn't shown, click
 on the upper right side of the Trigger Designer.
 - In the Criteria Name field, enter
Amount
                    <= 200
. - Click Add Conditions.
- On the Build Conditions page, enter or select:
- Select Field: Amount
- Select Operator:
less than or equals - Fill in the value:
200

Description of the illustration vbcsbr_trig_s8.png - Click Done.
 Add
Actions for the Condition
Add
Actions for the Condition
- Click the Add Actions box (not the + sign).
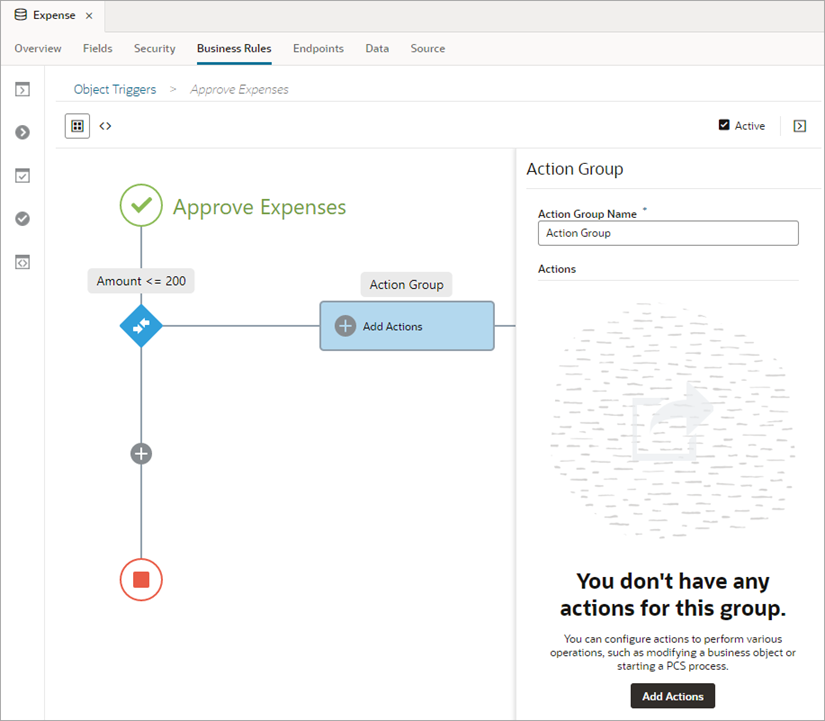
Description of the illustration vbcsbr_cond1_s1.png - In the Action Group pane, enter
Auto-approve Expensein the Action Group Name field and click Add Actions.
Description of the illustration vbcsbr_cond1_s2.png - On the Configure Actions page, drag Update Record
into the Then Do Something Else action builder area.

Description of the illustration vbcsbr_cond1_s3.png - With Expense selected under Data to Update, click Add Value Update.
- Select Approved from the Value
Updates drop-down list, and select true
from the drop-down list of values.

Description of the illustration vbcsbr_cond1_s5.png - Drag Send eMail Notification into the Then Do Something Else action builder area, below Update Record.
- Click Create next to the Select a Template drop-down list.
- On the eMail Template page, select Save for this Action only from the drop-down list.
- In the Subject and Body field, enter
Your
                    expense of
and then click to on the far right side of the field to insert a parameter.
 - Replace
Parameter1inside the brackets withamount. Then enteris approved. - In the email body section, enter
Your
                    expense is approved.
and click Save.
Description of the illustration vbcsbr_cond1_s11.png - In the Send eMail Notification section, enter your email address in the Recipients field.
- From the drop-down list next to the Value field, select Expression.

Description of the illustration vbcsbr_cond1_s13.png - In the Enter Expression dialog box, hover over Amount and click the Insert
arrow to enter
amountin the text area.
Description of the illustration vbcsbr_cond1_s14.png - Click OK to return to the Configure
Actions page. The Send Email Notification action should look
something like this.

Description of the illustration vbcsbr_cond1_s15.png - Click Done. The actions you created appear in the action group box for the condition.
 Create
a Second Condition and Add Actions
Create
a Second Condition and Add Actions
- In the Trigger Designer, click the + sign (Create New Criteria).
- Select Execute Conditionally from the
Choose Criteria Type dialog box to bring up the Criteria pane on the right. Note: If the Criteria pane isn't shown, click
 on the upper right side of the Trigger Designer.
 - In the Criteria pane, for the Criteria Name field, enter
Amount
                    > 200
. - Click Add Conditions.
- On the Build Conditions page, select or enter:
- Select Field:
Amount - Select
Operator:
greater than - Fill in the value:
200
- Select Field:
- Click Done.
- Click the Add Actions box (not the + sign).

Description of the illustration vbcsbr_cond2_s7.png - Enter
Send Email about Pending Approvalin the Action Group Name field and click Add Actions. - Drag Send eMail Notification into the Then Do Something Else action builder area.
- Click the Create button next to the Select a Template drop-down list.
- On the eMail Template page, select Save for this Action only from the drop-down list.
- In the Subject and Body field, enter
Your
                    expense of
and then click to insert a parameter.
 - Replace
Parameter1inside the brackets withamount. Then enteris waiting for approval. - Click Save.
- Enter your email address in the Recipients field.
- From the drop-down list next to the Value field, select Expression.
- In the Enter Expression dialog box, hover over Amount and click the Insert
arrow to enter
amountin the text area. Click OK to return to the Configure Actions page. - Click Done.
- You've now completed the trigger creation. Click the Object
Triggers
tab. The trigger is now active.

Description of the illustration vbcsbr_cond2_s19.png
 Test
the Field Validator
Test
the Field Validator
For this tutorial, you will use the Data tab to create expenses and test the business rules. In a typical web or mobile application, you would create pages to enter data.
- Click the Data tab and click + Row.

Description of the illustration vbcsbr_tv_s1.png - In the Add Row dialog box, enter:
- Amount:
-5(a negative number) - Date Incurred: Select today's date (the default)
- Description:
Coffee - Expense Type:
Dining
Click Add row.
The error message you specified is displayed in the dialog box. The validator works correctly.

Description of the illustration vbcsbr_tv_s2.png - Amount:
- Click Cancel.
 Test
the Trigger
Test
the Trigger
- Click + Row.
- In the Add Row dialog box, enter:
- Amount:
199(less than 200) - Date Incurred: Select today's date
- Description:
Train tickets - Expense Type:
Travel
Click Add row. The new row appears in the table, with the Approved field set to
true. - Amount:
- Click + Row again.
- In the Add Row dialog box, enter:
- Amount:
399(greater than 200) - Date Incurred: Select today's date
- Description:
Airfare - Expense Type:
Travel
Click Add row. The new row appears in the table, with the Approved field set to
false. - Amount:
- View your email. You should have received two messages, one with the auto-approval message and one stating that the expense is waiting for approval.