 Add
Navigation and Data to an Oracle Visual Builder Web Application
Add
Navigation and Data to an Oracle Visual Builder Web Application Before You Begin
This 10-minute tutorial shows you how to create navigation buttons in a web application and how to add data to the application.
Background
In Oracle Visual Builder, you can create buttons for a web page and then specify the actions that are performed when you click the buttons. An action chain is a sequence of actions. You can use and customize predefined actions or define your own. Here, you'll create buttons that navigate between the Departments page and the Employees page in your application.
You can also populate your business objects by importing data from a file. You did this for the Location business object in the first tutorial, and you'll do the same for the Department and Employee business objects here.
What Do You Need?
- Access to Oracle Visual Builder
- A supported browser
- Completion of the previous tutorials
 Create
an Action Chain to Navigate from the Departments Page to the
Employees Page
Create
an Action Chain to Navigate from the Departments Page to the
Employees Page
- In the HR Application, click the Web Applications
 tab in the Navigator, and click main-departments
under the Flows and main
nodes. If necessary, click the Page Designer
tab.
tab in the Navigator, and click main-departments
under the Flows and main
nodes. If necessary, click the Page Designer
tab. - If necessary, click Components in the Page Designer to open the Components palette. Then, drag a Button from the Common components to
the Toolbar, to the right of the Create
button.

Description of the illustration vbcsnd_cse_s2.png - Click Properties, then in the General
tab of the button's Property Inspector, change the Text
field to
Display Employees. - Click the Events tab for the button, then
click the + New Event button. From the menu,
select Quick Start: 'ojAction', the default
action for a button click.

Description of the illustration vbcsnd_cse_s4.png An action chain with the ID ButtonActionChain is created. It contains only the Start action.
- Drag the Navigate action from the Navigation section of the Actions palette to the + sign pointed to by the Start action.
- In the Navigate Property Inspector, select
main-employees from the Target
drop-down list.

Description of the illustration vbcsnd_cse_s6.png The action now has the label
Navigate
                      main-employees
. - Click Preview
 in the header to test the pages and navigation. The
application opens in another browser tab. Click Create
and add another department (
in the header to test the pages and navigation. The
application opens in another browser tab. Click Create
and add another department (ITonFloor 2, for example), then click Save. A success message is displayed briefly. - Click Display Employees Page, then click Create. Add another employee, specifying the new department, and click Save. You'll notice there's no way to get back to the main-departments page from the main-employees page. Close the browser tab.
 Create
an Action Chain to Navigate from the Employees Page to the
Departments Page
Create
an Action Chain to Navigate from the Employees Page to the
Departments Page
- In the Web Apps pane of the Navigator, click main-employees
under the Flows and main
nodes. If necessary, click Reload page
 to display the new employee you created.
 - In the Components palette, locate the Common components and drag a Button component into the Toolbar, to the right of the Create button.
- In the Property Inspector, change the Text
field to
Display Departments. - Click the Events tab for the button, then
click the + New Event button and select
Quick Start: 'ojAction'.
Another empty action chain with the ID ButtonActionChain is created. Because this action chain is for a different page, it doesn't matter that it has the same name as the one for the main-departments page.
- Move the Navigate action from the Navigation section of the Actions palette to the + sign pointed to by the Start action.
- In the Navigate Property Inspector, select
main-departments from the Target
drop-down list.
The action now has the label
Navigate
                      main-departments
. - Click Preview
to test the pages and navigation. The application opens in
another browser tab. Make sure you can get to the
main-departments page from the main-employees page. Close the
browser tab.
- Click main, and then click the Page
Flow tab to view the modified page flow for the web application.
You can now navigate between the main-departments and
main-employees pages.

Description of the illustration vbcsnd_cpc_s9.png
 Import
Data for the Business Objects
Import
Data for the Business Objects
Instead of using the Data Manager to import data, this time you'll use the Data tab of each business object to do the same thing.
- Click this link and
download the
Department.csvfile. The file contains six departments for the application. - Click this link and
download the
Employee.csvfile. The file contains nine employees for the application. - In the Navigator, click the Business Objects
 tab, then click the Objects tab.
 - Click Department, then click the Data tab. The business objects you created are displayed.
- Click Import from File
 .
. - In the Import Data dialog box, select the Replace
option for Row Handling if it's not already
selected. Then click the upload box,
browse, select the
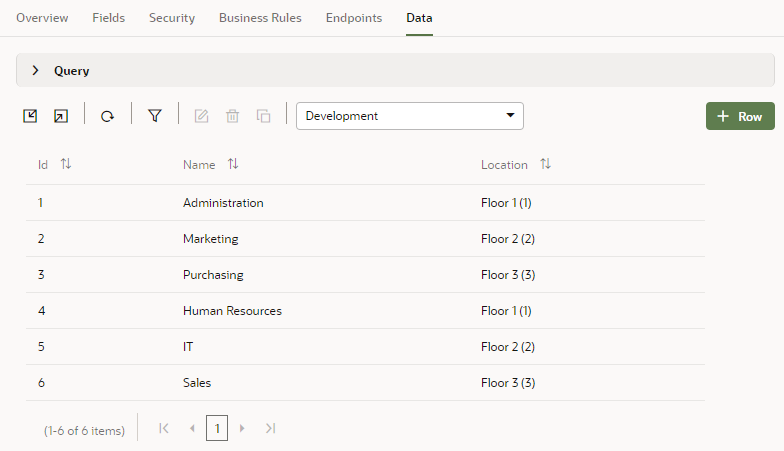
Department.csvfile, and click Import. - Click Close after the file has been
successfully imported. Six departments are displayed in the
table.
Description of the illustration vbcsnd_imp_s7.png - Click Employee under Business Objects, then click the Data tab.
- Click Import from File .
- In the Import Data dialog box, select the Replace
option for Row Handling if it's not already
selected. Then click the upload box,
browse, select the
Employee.csvfile, and click Import. - Click Close after the file has been
successfully imported. Nine employees are displayed in the
table.

Description of the illustration vbcsnd_imp_s11.png