 Create
a Web Application in Oracle Visual Builder
Create
a Web Application in Oracle Visual Builder Before You Begin
This 15-minute tutorial shows you how to use Oracle Visual Builder to create a basic web application and populate it with business objects.
Background
Oracle Visual Builder is a development tool for creating web and mobile applications by dragging and dropping components on a page. These components depend on a business object for their data. A business object is just a resource -- like a purchase order or invoice -- that has fields to hold the data for your application. A business object is similar to database table, as it provides the structure for your data; in fact, business objects are stored in a database. Your web application accesses the business objects through their REST endpoints.
In this tutorial, you'll create the business objects shown here:
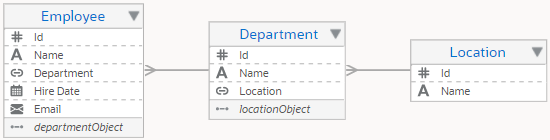
Once you have your business objects, you'll use them to build a very simple Human Resources application in which every employee belongs to a department, and every department has a location. Your goal is to allow your users to add employee names and their departments to the database, and to change that data when necessary.
Note: Although this tutorial shows you how to build a web application using a business object, you can also build Visual Builder applications based on REST services or on databases like Oracle Database Cloud Service. The basic principles of creating applications are the same, no matter what form your data takes.
What Do You Need?
- Access to Oracle Visual Builder
This tutorial does not provide access to a Visual Builder instance. Talk to your administrator to get the URL of a Visual Builder instance as well as user credentials to access the instance.
- A supported browser
 Create
a Web Application
Create
a Web Application
The first thing we'll do is create the web application itself. Later, we'll construct the business objects we need so we can populate the app with data.
- In the web browser, log in to Oracle Visual Builder.
- If you have no current applications, the landing page
appears. If you wish, click the video icon to take an
interactive tour of Oracle Visual Builder.
Then click + New Application.
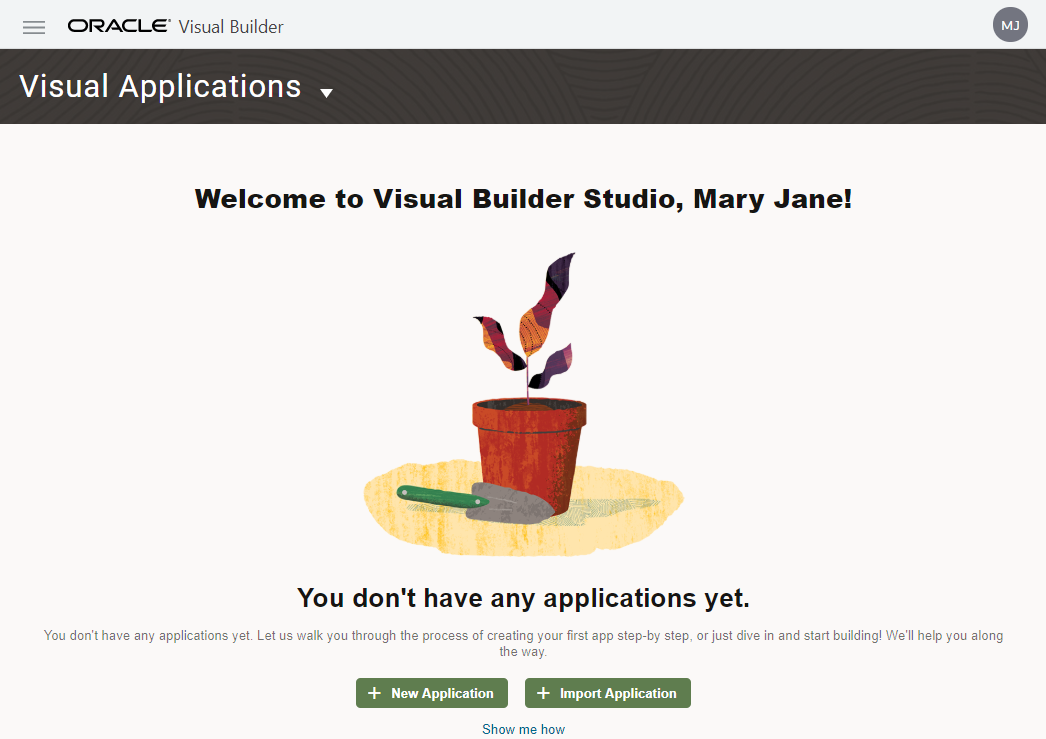
Description of the illustration vbcsca_cra_s1a.png - If you have one or more current applications, the Visual
Applications page shows a list of applications. Click New.

Description of the illustration vbcsca_cra_s1b.png
- If you have no current applications, the landing page
appears. If you wish, click the video icon to take an
interactive tour of Oracle Visual Builder.
Then click + New Application.
- In the Create Application dialog box, enter:
- Application Name:
HR Application - Description:
Tutorial
                        application
The Application ID text field is automatically populated as you type based on the Application Name. The Application Template field is set to Empty Application.
- Application Name:
- Click Finish.
The application is created and opens on the Welcome page.
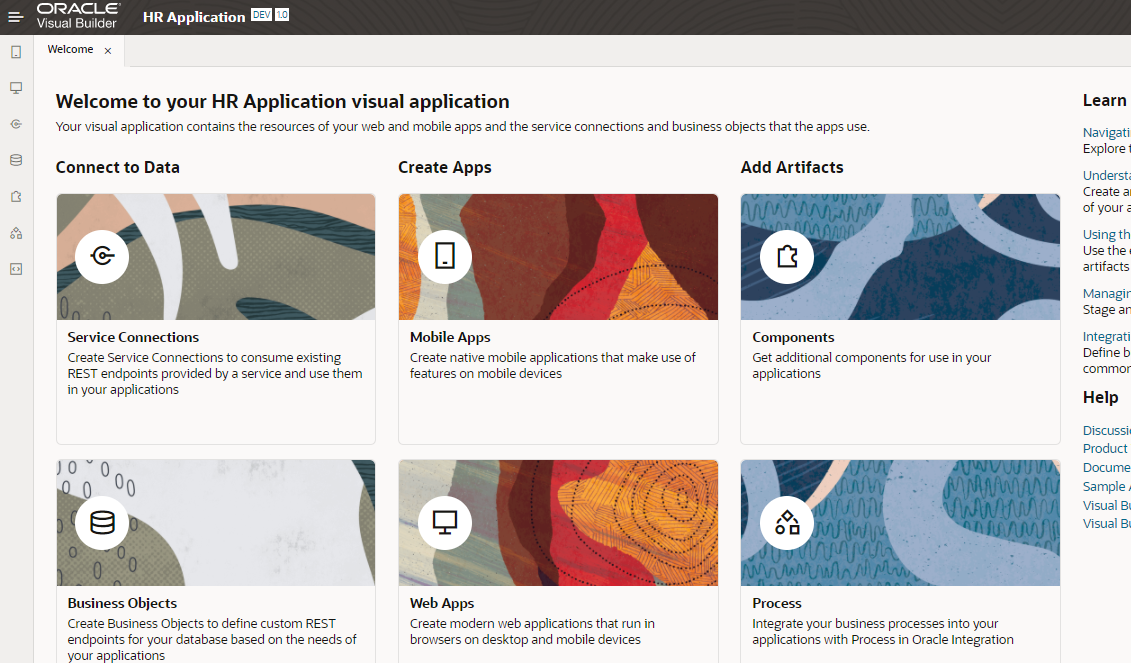
Description of the illustration vbcsca_cra_s3.png The Welcome page contains a set of tiles in three groups: Connect to Data, Create Apps, and Add Artifacts.
In the toolbar, the
DEVand1.0tags next to the application name indicate the status (development) and the version. - We want to create a web app, so under Create Apps,
click Web Apps.
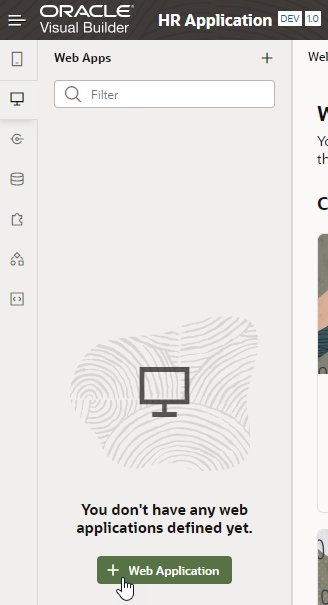
The Navigator opens in the Web Applications pane. On the far left side are tabs for Mobile Applications, Web Applications, Service Connections, Business Objects, Components, Processes, and Source View.
- Click + Web Application (or click the
+ sign at the top of the pane).
Description of the illustration vbcsca_cra_s5.png - In the Create Web Application dialog box, enter
hrwebappin the Application Name field under General Information. (You can specify uppercase as well as lowercase characters in the application name, but the name
is converted to lowercase.) Leave the Navigation Style set to the default, None, and then click Create.The application opens on the main-start page. This is the default name assigned to the first page in your application.
- Expand the hrwebapp node to view the web
application structure, and expand the Flows
and main nodes to view the main-start page,
which is automatically created for you.
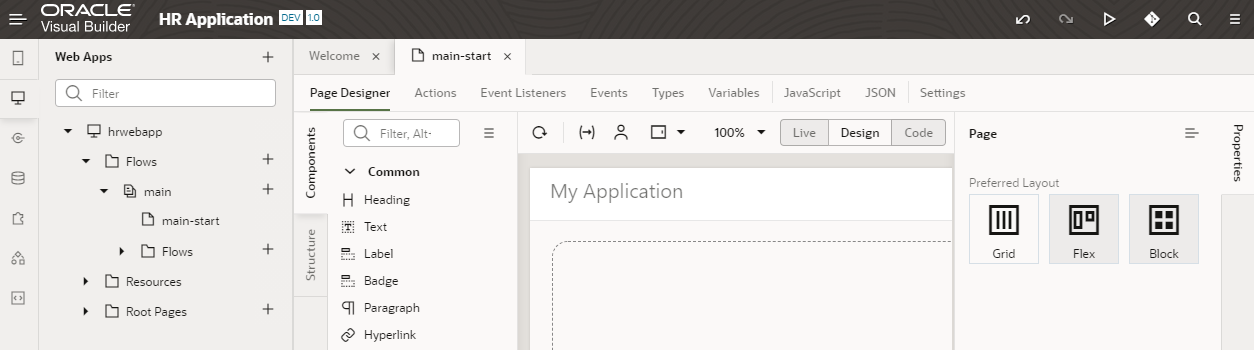
Description of the illustration vbcsca_cra_s7.png By default, the page opens in the Page Designer, showing the Components and the Structure tabs. To design your pages, you'll drag components from the Components palette to the canvas. Once you add components, a structural view of your components will show in the Structure view.
On the far right is the Properties tab, which lets you view or edit a component's properties in the Property Inspector. When the entire page is selected, the Property Inspector shows the Page view, where you choose a preferred page layout. (You can click the Properties tab to hide the Property Inspector.)
 Import
a Location Business Object from a File
Import
a Location Business Object from a File
In this step, you'll create the Location business object and then import data for it.
- Click the Business Objects
 tab in the Navigator.
 - Click the + Business Object button.
- In the New Business Object dialog box, enter
Locationin the Label field and click Create.Locationis also filled in automatically as the Name value. When you create a business object, specify the singular form of the noun. - Click the Fields tab.
Every business object you create has five default fields: an id, plus fields that provide information on who created and updated the object and when.
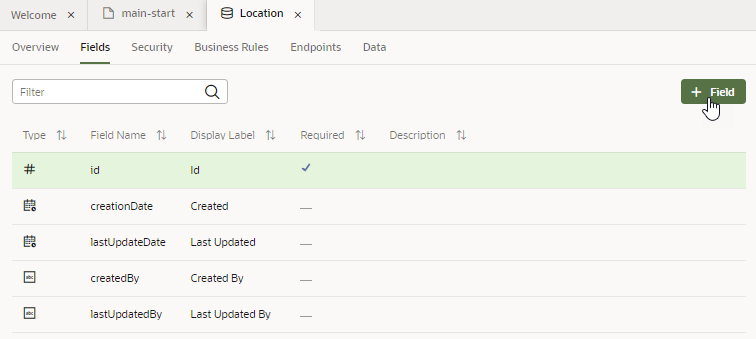
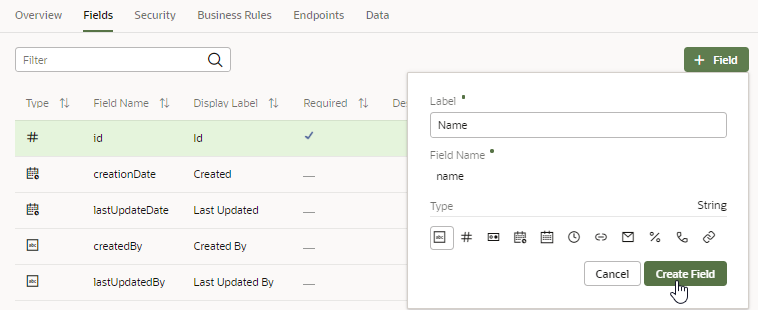
Description of the illustration vbcsca_imp_s4.png - Click + Field to add a field specific to this business object. This is a very simple business object, so we'll add only one new field.
- In the pop-up box, enter:
- Label:
Name - Field Name:
name(automatically populated) - Type: String
 (selected by
default)
(selected by
default)
Click Create Field.
Description of the illustration vbcsca_imp_s6.png - Label:
- In the Property Inspector, select the Required
check box under Constraints.
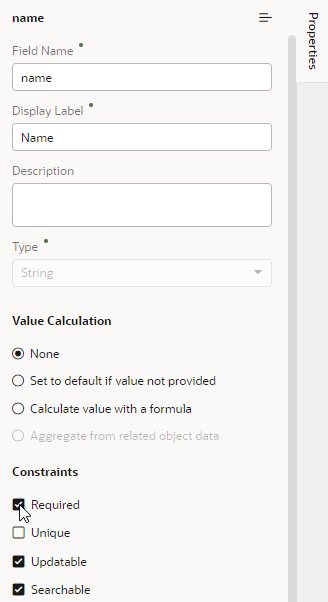
Description of the illustration vbcsca_imp_s7.png A check mark is displayed in the Required column for the Name field.
- Click this link and
download the
Location.csvfile to your file system. The file contains four locations for the application. - In the Business Objects pane of the Navigator, click Menu
 and
select Data Manager.
and
select Data Manager.
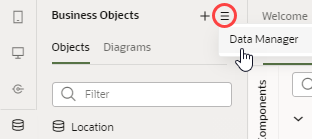
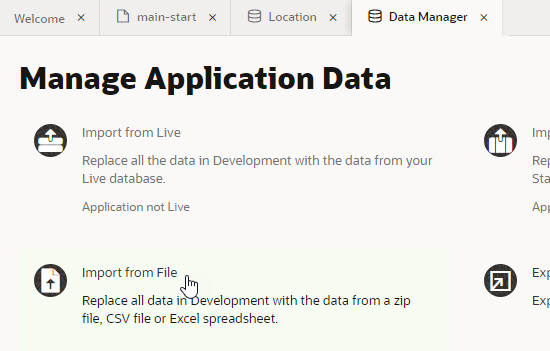
Description of the illustration vbcsca_imp_s9.png The Data Manager is what you use to import data from a variety of sources.
- Click Import from File.
Description of the illustration vbcsca_imp_s10.png - In the Import Data dialog box, click the import box, select
Location.csv, and click Import. When the import succeeds, click Close.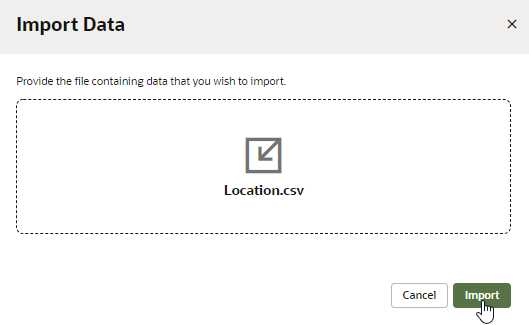
Description of the illustration vbcsca_imp_s11.png - In the Business Objects pane, click Location,
then click the Data tab to view the
locations.
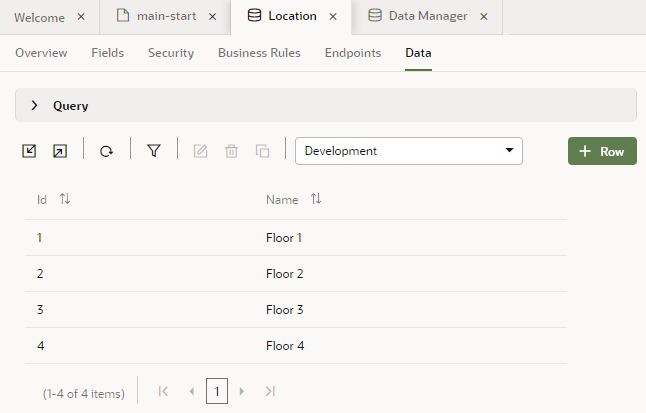
Description of the illustration vbcsca_imp_s12.png In the next step, we'll associate these locations with the departments that are located on these floors.
 Create
a Department Business Object
Create
a Department Business Object
- In the Business Objects pane, click the +
sign, then select Business Object.

Description of the illustration vbcsca_cdb_s1.png - In the New Business Object dialog box, enter
Departmentin the Label field and click Create.Departmentis also filled in automatically as the Name value. - Click the Fields tab, then click + Field.
- In the pop-up box, enter:
- Label:
Name - Field Name:
name(automatically populated) - Type: String (selected by
default)
Click Create Field.
- Label:
- In the Property Inspector for the Name field,
select the Required check box under Constraints.
A check mark is displayed in the Required column for the Name field.
- Click + Field again, then enter or select:
- Label:
Location - Field Name:
location(automatically populated) - Type: Reference

- Referenced Business Object: Location
- Display Field: Name
(automatically populated)
The default for a Referenced Business Object is always the current business object (in this case, Department), so make sure you select Location from the drop-down.
Click Create Field.
- Label:
-

Description of the illustration vbcsca_cdb_s6.png A Reference field is like a foreign key in a database table: it's a field that refers to the key (the Id field) of another business object to link the two business objects together. When you create a department, you'll specify its Location (one of the floors). The Display Field indicates that the Name field will be displayed, not the Id.
 Create
an Employee Business Object
Create
an Employee Business Object
In this step, we'll create the last business object we need, the Employee object, which contains the employee's name and identifying data. In this case, the Employee has a Reference field that refers to the Department.
- In the Business Objects pane, click the + sign, then select Business Object.
- In the New Business Object dialog box, enter
Employeein the Label field and click Create.Employeeis also filled in automatically as the Name value. - Click the Fields tab, then click + Field.
- In the pop-up box, enter:
- Label:
Name - Field Name:
name(automatically populated) - Type: String (selected by
default)
Click Create Field.
- Label:
- In the Property Inspector for the Name field, select the Required check box under Constraints.
- Click + Field again, then enter or select:
- Label:
Department - Field Name:
department(automatically populated) - Type: Reference
- Referenced Business Object: Department
- Display Field: Name
(automatically populated)
Click Create Field.
- Label:
- Click + Field again, then enter or select:
- Label:
Hire Date - Field Name:
hireDate(automatically populated) - Type: Date

Click Create Field.
- Label:
- Click + Field again, then enter or select:
- Label:
Email - Field Name:
email(automatically populated) - Type: Email

Click Create Field. In the property editor, the Format is set to Email.
- Label:
- Click the Endpoints tab and view the
Resource APIs and REST endpoints created for the Employee
business object. Because Employee refers to Department, you
can see endpoints for both objects if you expand the departmentObject node.
Expand the Resource APIs node to see the
URLs for accessing the metadata and data for the business
object, then minimize it again.
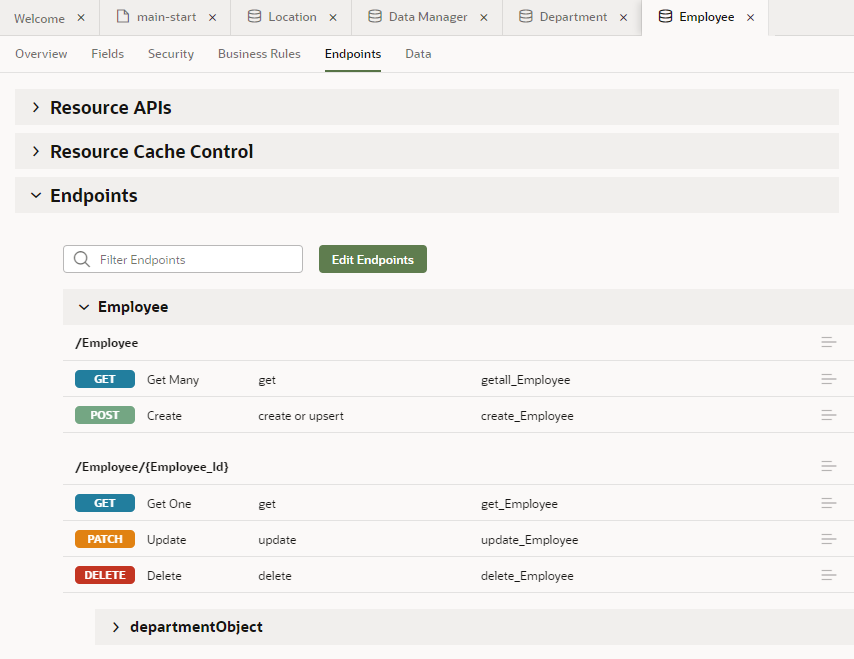
Description of the illustration vbcsca_cde_s9.png If you click an endpoint, an endpoint viewer allows you to perform operations on the endpoints. For example, you can test requests and view responses with specified parameter values:
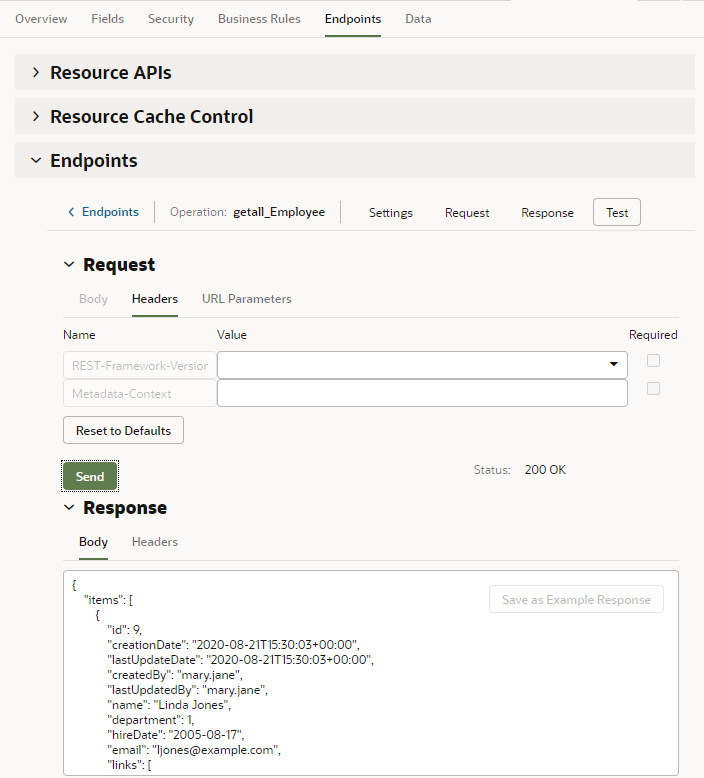
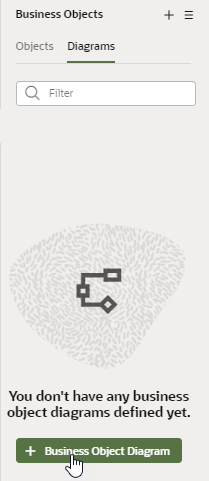
Description of the illustration vbcsca_cde_s9_result.png - In the Business Objects pane of the Navigator, click the Diagrams
tab, then click the + Business Object Diagram
button.
Description of the illustration vbcsca_cde_s11.png - In the Create Business Object Diagram dialog box, enter
HRDiagramin the Diagram name field and click Create. - In the Property Inspector, click Select All
to see the three business objects you created and their
relationships.
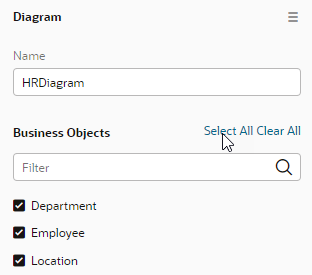
Description of the illustration vbcsca_cde_s12.png The diagram looks just like the graphic in the Before You Begin section.
So far, you've imported data only for the Location object. You'll add data for the Department and Employee business objects in a later tutorial.