 Create
a Multi-language Application in Oracle Visual Builder: Create a Language
Switcher
Create
a Multi-language Application in Oracle Visual Builder: Create a Language
Switcher Before You Begin
This 15-minute tutorial shows you how to create a language switcher in a web application with translation bundles for multiple languages.
Background
To support readers of multiple languages, you can translate the strings in your Visual Builder application’s user interface into other languages and upload them to your application. The strings in a translated application are stored in translation bundles, which are JSON files that contain keys and values.
You can also create a language switcher component to allow users to change from one language to another, which is what you’ll learn how to do in this tutorial.
You should be familiar with the basics of creating an application, adding components and pages, and creating action chains.
In this tutorial sequence, the language you use is French.
What Do You Need?
- Access to Oracle Visual Builder
- A supported browser
- Completion of the Create a Web Application in Oracle Visual Builder workshop
 Specify
Code for a Language Switcher
Specify
Code for a Language Switcher
In this section, you'll declare a localization.locale property for
the application and set it to a value stored in the browswer's local storage (translationApplication.locale). Visual Builder uses the application's localization.locale property to set the translatable strings to the language specified by the property. For instance, if localization.locale is set to fr-FR, which specifies the language and country (language-COUNTRY), the strings are set to the French language used in France.
- If you completed the previous tutorial, Create a Multi-language Application in
Oracle Visual Builder: Translate Application Strings,
go to step 2 and continue to work in the Translation Application app that you created in that tutorial.
Otherwise, click this link and download
TranslationApplicationPart2.zip. If necessary, log in to Oracle Visual Builder. On the Visual Applications page, click Import and select Application from file. In the Import dialog box, drop the downloaded zip file into the Drag and Drop area and click Import. Click TranslationApplicationPart2 to open it. - In the Navigator, click the Source
 tab and expand the webApps then transwebapp node.
 - Click app-flow.json to open it in the JSON tab.
- If not already present, insert a comma after
"security":{}near the end of the file. On the next line, add thelocalizationdefinition (inboldhere) with a function call to set the locale property value.
  "userConfig": {
    "type": "vb/DefaultSecurityProvider",
    "configuration": {},
    "embedding": "deny"
  },
  "security": {},
  "localization": {
    "locale": "{{ window.localStorage.getItem('translationApplication.locale') || navigator.language }}"
  },
This code sets the value of the
localeproperty to a locale value it retrieves from a language switcher, or to the browser locale if there is no locale value. - Under transwebapp, expand the flows, main, and pages nodes.
- Click main-start-page.js to open it in the
JavaScript tab.
You'll put the language switcher on the main-start page, so that's where you'll define the JavaScript function.
- In the
PageModuleclass, add thissetAppLanguagefunction, which sets thelocaleif theselectedLocaleinput parameter is set. The function to add is shown inbold.
  class PageModule {

      setAppLanguage(selectedLocale){
        if (selectedLocale)  {
          window.localStorage.setItem('translationApplication.locale',selectedLocale);
        }
      }
  }
  return PageModule;
The
setAppLanguagefunction sets the language switcher locale value to that of theselectedLocaleinput parameter. The next task provides a way to set that input parameter.
 Create
Buttons for the Language Switcher
Create
Buttons for the Language Switcher
For this simple application, you'll use a pair of buttons to select the language. A more complex application could use a Select (Single) or other component to select the language.
- In the Web Apps tab, select the main-start page, then click the page's Page Designer tab.
- On the main-start page, drag a Button from
the Components pane to the Grid Row between
the Create button and the table.
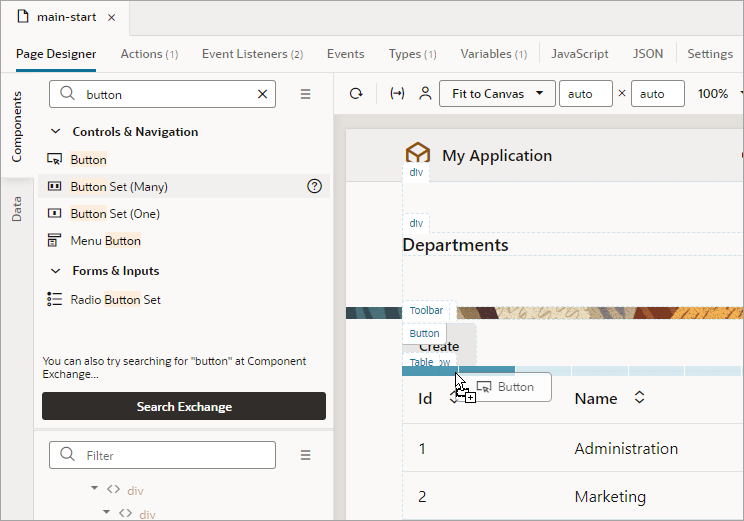
Description of the illustration vbcsta_sec2_s2.png - In the Button's Properties pane, enter
Englishin the Label field. - Drag another Button component to the right
of the first button and enter
Frenchin its Label field. If necessary, expand the width of the browser or canvas to position the button. - For each button, mouse over its Label
field and select the Make String Translatable
 icon. Click Save in the dialog box to
make its label translatable.
icon. Click Save in the dialog box to
make its label translatable. - Click the Web Apps
 tab in the Navigator.
Under Resources/strings/app/nls/root, copy the
added key strings for the English and French buttons from
tab in the Navigator.
Under Resources/strings/app/nls/root, copy the
added key strings for the English and French buttons from app-strings.jsonintoapp-strings.jsonunder fr-FR. Make sure to copy the comma after theSavestring, too. The code to be copied is highlighted in yellow here: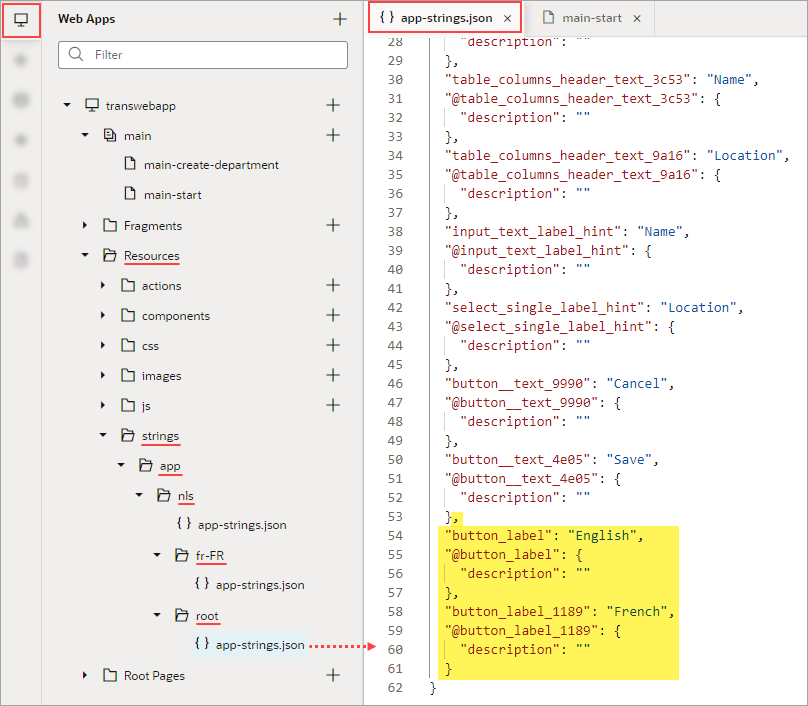
Description of the illustration vbcsta_sec2_s3.png In the app-strings.json under fr-FR, add the text below in bold, and make sure to include the comma after both of the
descriptionkey and value pairs:"button_label": "English", "@button_label": { "description": "", "source_text" : "English" }, "button_label_4334": "French", "@button_label_4334": { "description": "", "source_text" : "French" } }We could have returned to the application settings, downloaded the new strings, translated them, and uploaded them again, but this would take too long for only two strings. However, this way you have to make sure to use the correct JSON syntax.
- In the
app-strings.jsonfile under fr-FR, for both buttons, replace the text for their labels on the first line with the French version:English Label French Label English Anglais French Français
 Define
an Action Chain for the Buttons
Define
an Action Chain for the Buttons
In this section, you'll define an action chain that you'll use for both buttons, with an input parameter to set a different locale value for each action chain.
- Return to the main-start page, select the English button, and then click the Events tab in the Properties pane.
- Click the + New Event button and select On 'ojAction'.
- In the action chain's properties, click the Add
link next to Parameters.
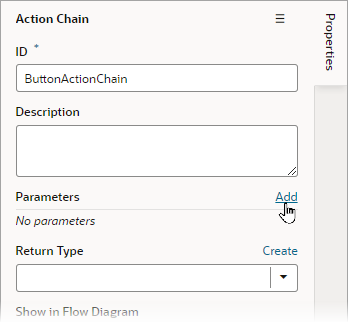
Description of the illustration vbcsta_sec3_s3.png - In the dialog box, enter
localein the Name field and click Create.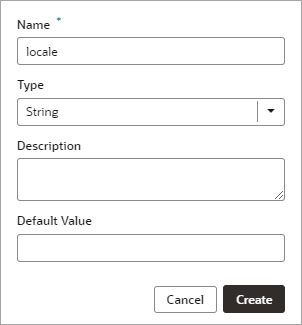
Description of the illustration vbcsta_sec3_s4.png - Add the Call Function action from the Actions palette to the canvas.
- In the Call Function's Properties pane, click the Function Name drop-down and select setAppLanguage under Page.
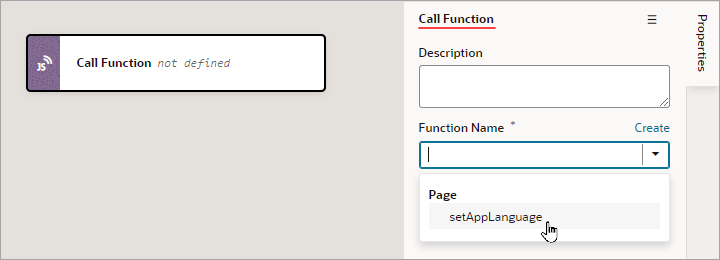
Description of the illustration vbcsta_sec3_s6.png This is the JavaScript function you defined in
main-start-page.js. - Under Parameters, hover over the selectedLocale parameter and click the down arrow that appears. Under the Action Chain node, select the locale
parameter.
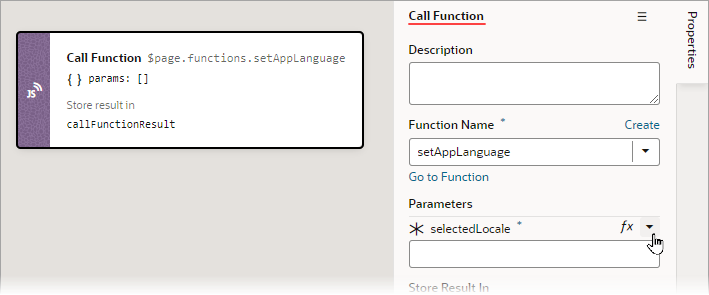
Description of the illustration vbcsta_sec3_s7.png - Add an Open URL action from the Actions palette to the canvas.
- In the URL field, enter
index.html. This navigation will refresh the page after you specify the language. The action chain looks like this: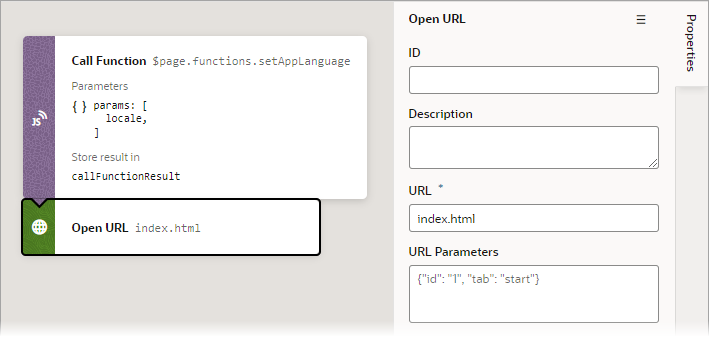
Description of the illustration vbcsta_sec3_s9.png
 Assign
Input Parameters
Assign
Input Parameters
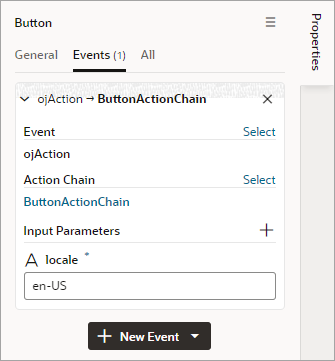
- Click the Page Designer tab, then click the English button. In the Events
tab of the Properties pane, the value for the
localeinput parameter hasn't been provided. Enteren-USfor the parameter.
Description of the illustration vbcsta_sec4_s1.png - Next, select the French button, and click the Events tab in the Properties pane.
- Click + New Event and select New Custom Event.
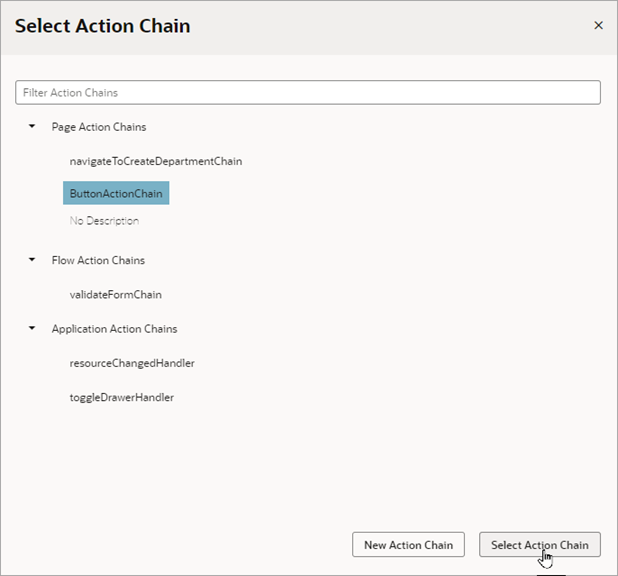
- In the Select Event dialog box, under the Suggested node, ojAction is selected by default. Click the Select button to accept the default.
- In the Select Action Chain dialog box, select ButtonActionChain
and click the Select Action Chain button.
- On the Events tab for the button, for the
localeinput parameter, enterfr-FR.Both input parameters are now provided for the buttons, which are passed to the action chain that's started by the buttons.
 Test
the Application
Test
the Application
- Click the Preview
 icon. The application opens
in a new browser tab.
icon. The application opens
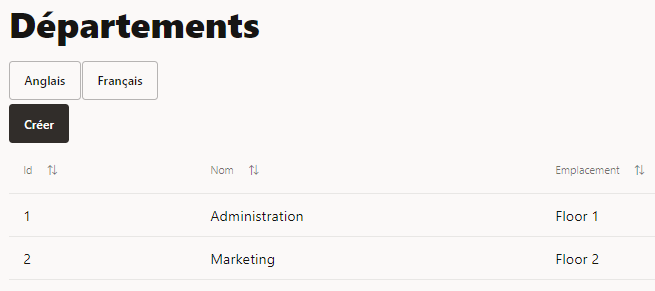
in a new browser tab. - On the Departments page, click the French
button.
The page refreshes, and you can see the translated strings.
Description of the illustration vbcsta_sec5_s2.png - Click Créer. Enter a new department name,
select a location, and click Préserver.
A success message appears briefly, and the new department appears in the table.
- Click the Anglais button to return to English. Close the browser tab.
 Want
to Learn More?
Want
to Learn More?
- Work with Translations in Developing Applications with Oracle Visual Builder
- Blog post: Multi-Language Translations and Locale Switching in Visual Builder Applications