 Create
a Mobile Application in Oracle Visual Builder
Create
a Mobile Application in Oracle Visual Builder Before You Begin
This 10-minute tutorial shows you how to create a basic mobile application in Oracle Visual Builder and populate it with data from a business object.
Background
Oracle Visual Builder is a development tool for creating web and mobile applications that lets you create an application by dragging and dropping components onto a page. It also allows you to manipulate the application and your business objects through the underlying source code, to create types and variables, to access REST endpoints, and to create action chains.
You’ll create a business object and a mobile application that you'll later use to display, edit, and delete data about departments. You’ll also create build configurations that enable Oracle Visual Builder to build mobile applications for Android and iOS.
What Do You Need?
- Access to Oracle Visual Builder
This tutorial does not provide access to a Visual Builder instance. Talk to your administrator to get the URL of a Visual Builder instance as well as user credentials to access the instance.
- A supported browser
 Create
a Mobile Application
Create
a Mobile Application
- In the web browser, sign in to Oracle Visual Builder.
- If you have no current applications, the landing page appears. Click + New Application.
- If you have one or more current applications, the Visual Applications page appears. Click New.
- In the Create Application dialog box, enter
HR
                    Application
in the Application Name field andTutorial applicationin the Description field.The Application ID text field is automatically populated based on the value that you enter in the Application Name field.
- Make sure the Empty Application template
is selected in the Application template list, and click Finish.
The new application opens in the Welcome screen. The
DEVand1.0tags next to the application name indicate the status (development) and the version.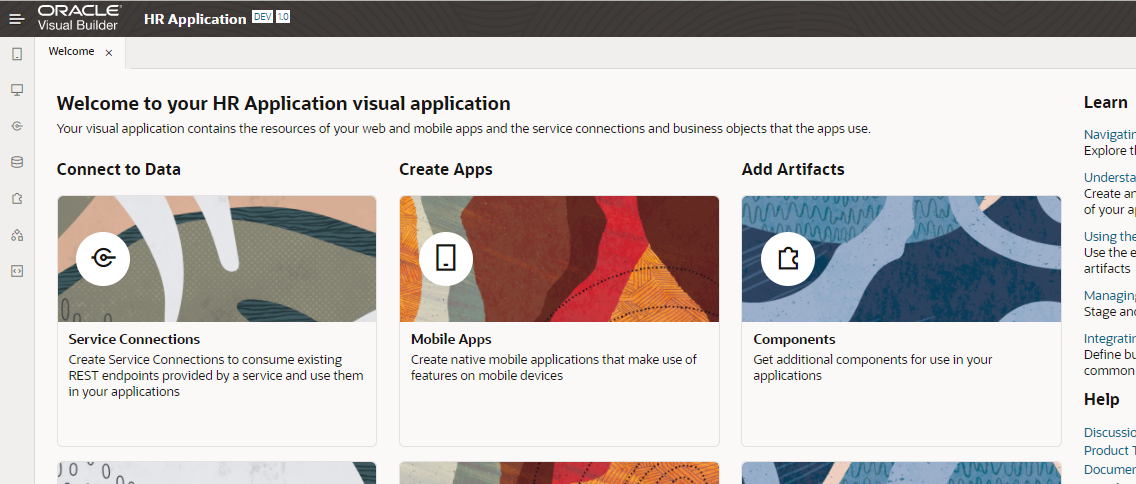
Description of the illustration vbmca_cra_04.png - Click Mobile Apps and click + Mobile Application in the Mobile Apps tab that opens.
- In the General Information screen of the Create Mobile
Application wizard, enter
hrmobileappin the Application Name field, select None as the navigation style, and click Next.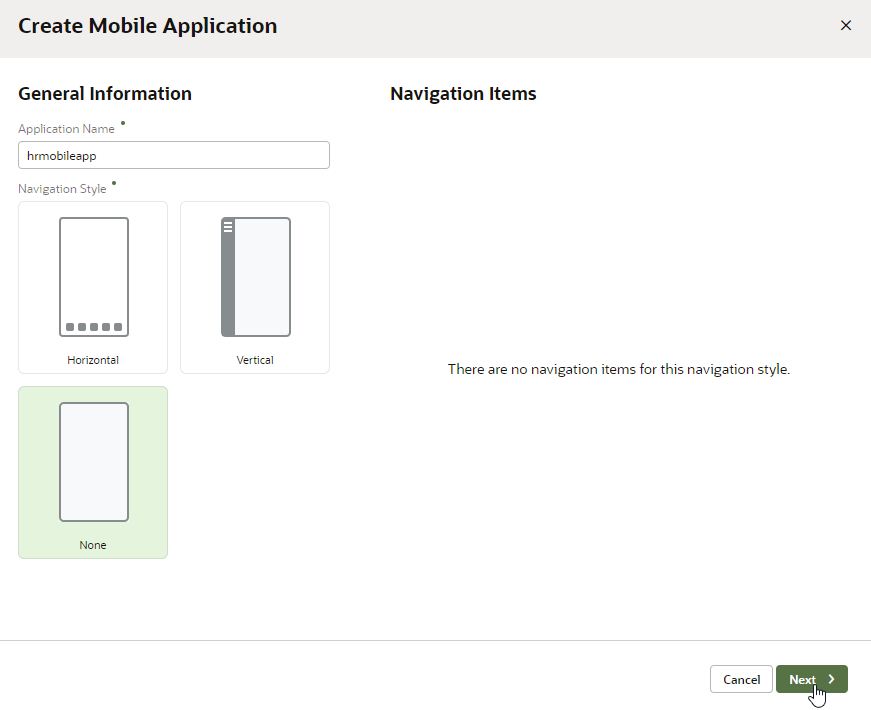
Description of the illustration vbmca_cra_05.png - In the Page Template – main page of the Create Mobile
Application wizard, select Custom and click
Create.
Oracle Visual Builder creates the mobile application and opens the main-start page in the Page Designer.
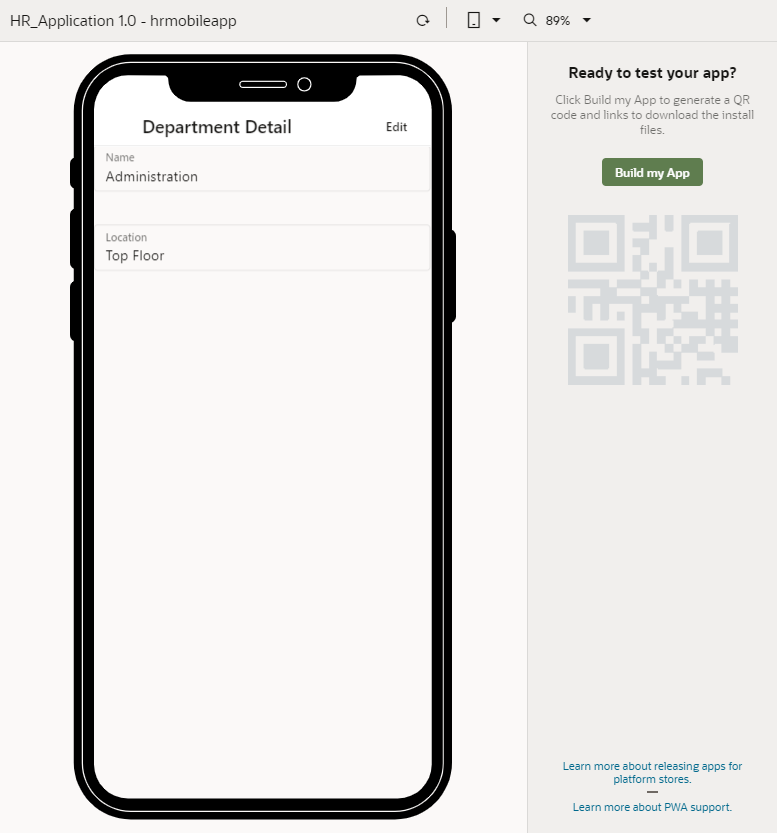
- Click Page Title, then click the Properties tab and enter
Departmentsas the page title in the Mobile Page Template's Property Inspector.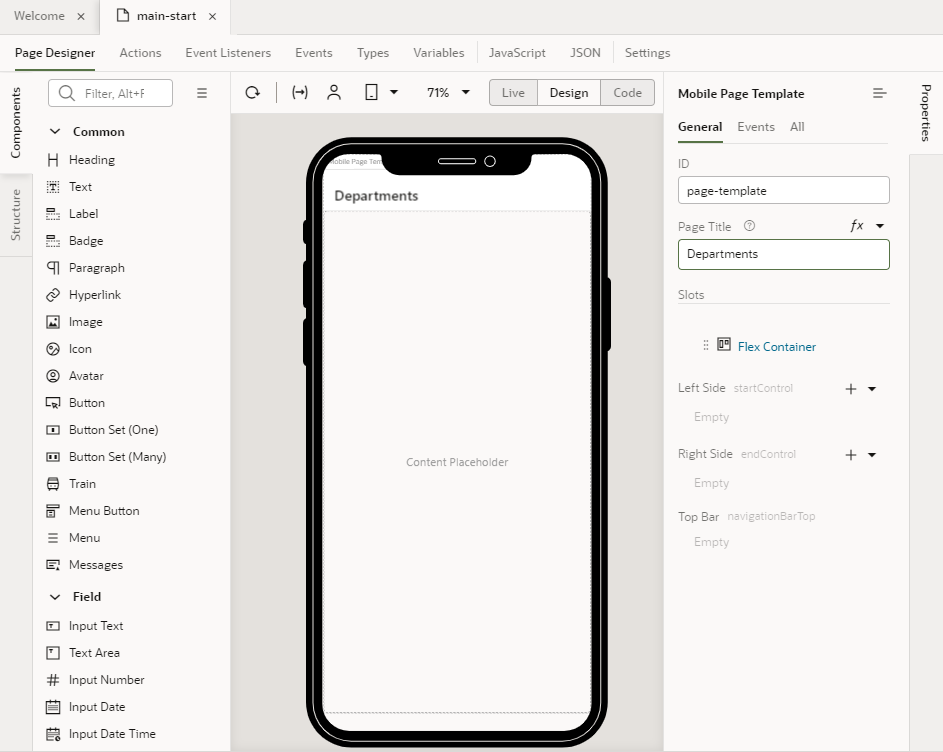
Description of the illustration vbmca_cra_07.png
 Create
a Department Business Object
Create
a Department Business Object
- Click the Business Objects
 tab.
tab. - Click + Business Object.
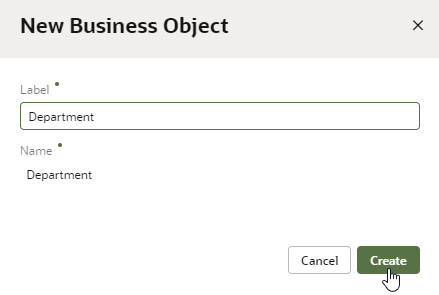
- In the New Business Object window, enter
Departmentin the Label field and click Create.The Name field is automatically populated based on the value that you enter in the Label field. When you create a business object label, use the singular form of the name.
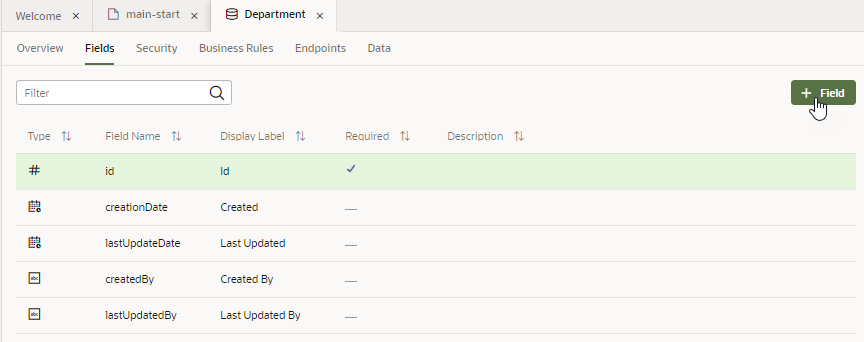
Description of the illustration vbmca_cdb_03.png - Click the Fields tab, then click +
Field.
Description of the illustration vbmca_cdb_04.png - In the New Field window, enter
Namein the Label field, and click Create Field.The name value is automatically populated in the Field Name field, and String
 is
selected by default in the Type field.
is
selected by default in the Type field.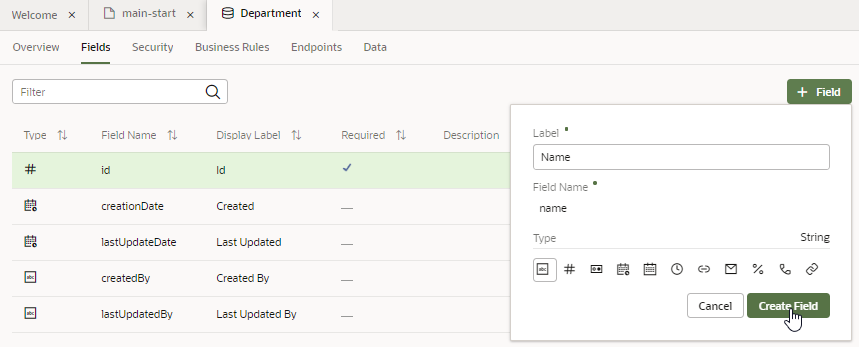
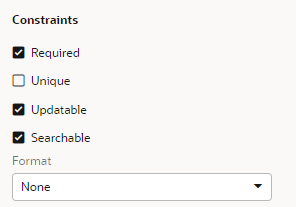
Description of the illustration vbmca_cdb_05.png - In the Property Inspector for the Name
field, select the Required check box under Constraints.
Description of the illustration vbmca_cdb_06.png - Click + Field again. In the New Field
window, enter
Locationin the Label field, and click Create Field.The location value is automatically populated in the Field Name field, and String
is
selected by default in the Type field. - Click the Endpoints tab and view the REST
endpoints created for the Department business object.
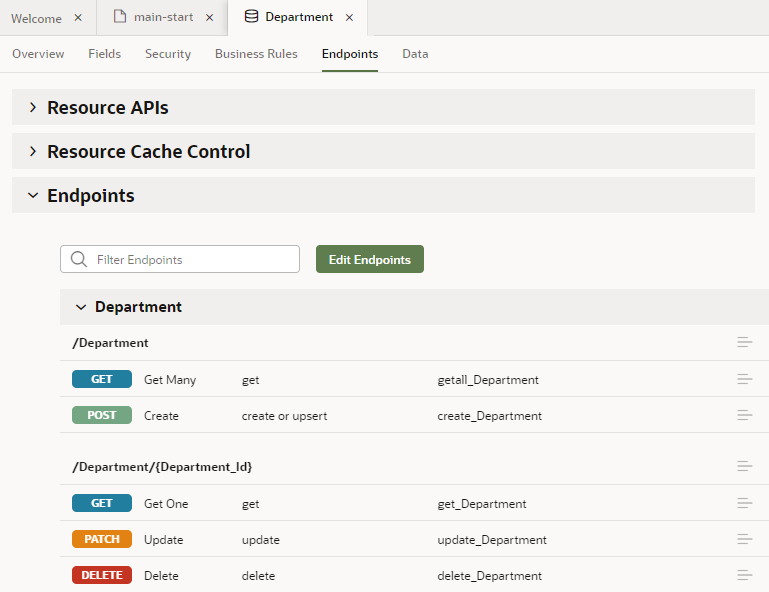
Description of the illustration vbmca_cde_s9.png