 Create
a Multi-language Application in Oracle Visual Builder: Translate
Application Strings
Create
a Multi-language Application in Oracle Visual Builder: Translate
Application Strings Before You Begin
This 15-minute tutorial shows you how to create a web application with translatable strings and how to download, translate, and upload the strings.
Background
To support readers of multiple languages, you can translate the strings in your user interface into other languages and upload them to your Visual Builder application.
You can also create language switcher components to allow users to change from one language to another. You'll complete this task in the next tutorial.
The strings in a translated application are stored in translation bundles, which are JSON files that contain keys and values.
In this tutorial, you'll translate the strings into French. Feel free to use another language if you prefer.
What Do You Need?
- Access to Oracle Visual Builder
- A supported browser
- Familiarity with the basics of creating an application, adding components and pages, and creating action chains.
 Import
an Application and Generate Translatable Strings
Import
an Application and Generate Translatable Strings
In this step, you'll upload a simple application with two pages and two business objects for use with this tutorial.
- Click this
link and download the
TranslationApplication.zipfile. - In the web browser, log in to Oracle Visual Builder.
- On the Visual Applications page, click Import.

Description of the illustration vbcsta_sec1_s3.png - In the Import dialog box, select Application from file.
- On the next Import dialog box, click the Drag and Drop area to select the downloaded
zipfile, or drop the file into the area.The application name is loaded into the Application Name and Application ID fields.
- Click Import.
A success message appears briefly, and TranslationApplication appears on the Visual Applications page.
- Click TranslationApplication to open it.
The web application, transwebapp, has two pages, main-start and main-create-department, and two business objects, Location and Department. The business objects contain some data.
- In the Web Apps pane of the Navigator, expand the main node, and then click main-start
to open that page in the Page Designer.
We'll begin by making the "Departments" text at the top of the page translatable.
- In the Structure pane, type "bind" in the search box, then click Bind Text (Departments). In the Properties pane, mouse over the area opposite
the Value label and select the Make
String Translatable
 icon.
icon.

Description of the illustration vbcsta_sec1_s9.png The Translatable String dialog dialog opens. The translatable text,
Departments, appears in the String field: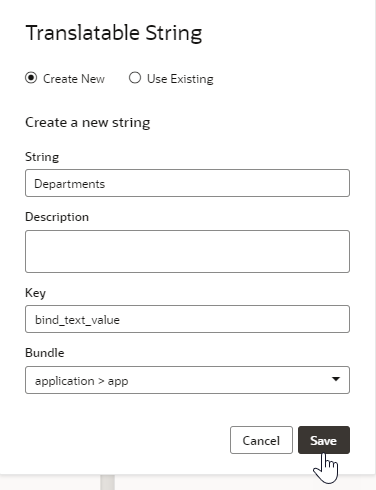
Description of the illustration vbcsta_sec1_s10.png If you intended to send the strings to a translation team, you could enter a description in the Description field to provide context for the translator.
The Key field, which is editable, contains the key that identifies the field. The Bundle field specifies the location of the translation bundle in the application.
- Click Save.
The original text is replaced by an expression that specifies the key. The generated key value uses the component and property names, followed by a randomly assigned value:
[[$application.translations.app.bind_text_value]]
- Select the Create button in the Design canvas. In the Properties pane, mouse over the right side of the Text label and select the Make String Translatable icon that appears. Click Save in the dialog box.
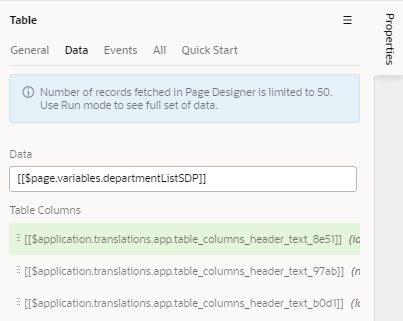
- To make a table column header translatable, select the table and click the
Data tab in the Properties pane. Hover over the first column label in the Table Columns list, then click the Column Detail
 icon on the right.
 - To make the string translatable, hover over the Columns, Header Text field and click the Make String Translatable
icon that appears. Click Save in the dialog box.
- Click
 Table
Columns to return to the main Data tab and repeat Steps 12 and 13 for each column. After the
first time, you might have to scroll all the way to the right to
find the Column Detail icons.
Table
Columns to return to the main Data tab and repeat Steps 12 and 13 for each column. After the
first time, you might have to scroll all the way to the right to
find the Column Detail icons.
When you're finished, the Data tab looks something like this:
- In the Web Apps pane, click the main-create-department page to open it in the Page Designer.
- Make the Input Text (Name field) and Single Select (Location field) label hints translatable.
- Make the Cancel and Save button text translatable.
 View
and Export the Strings
View
and Export the Strings
- In the Web Apps pane, expand the Resources
node, then expand the strings, app,
and nls nodes.
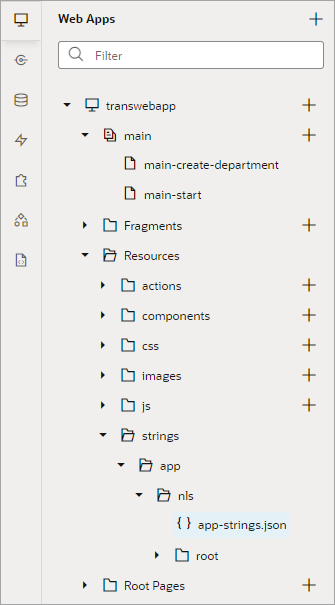
Description of the illustration vbcsta_sec2_s1.png - Click the app-strings.json file. It
contains only one key-value definition.
{ "root": true } - Expand the root node and click the app-strings.json
file. It contains all nine translatable string definitions at the end of the file, something like this:
{
    ...
  "bind_text_value": "Departments",
  "@bind_text_value": {
    "description": ""
  },
  "button__text": "Create",
  "@button__text": {
    "description": ""
  },
  "table_columns_header_text": "Id",
  "@table_columns_header_text": {
    "description": ""
  },
  "table_columns_header_text_8775": "Name",
  "@table_columns_header_text_8775": {
    "description": ""
  },
  "table_columns_header_text_80d3": "Location",
  "@table_columns_header_text_80d3": {
    "description": ""
  },
  "input_text_label_hint": "Name",
  "input_text_label_hint": {
    "description": ""
  },
    ...
This file contains the translatable strings set by Visual Builder, as well as those that you set in the previous step.
- From the application menu in the toolbar, select Settings.
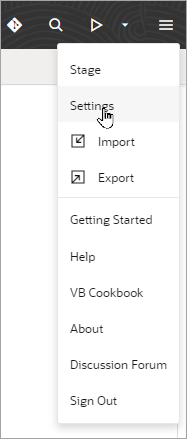
Description of the illustration vbcsta_sec2_s4.png - Click the Translations tab.
- Under All Strings, click JSON.
The
TranslationApplication-strings-all--json.zipfile is placed in your Downloads folder.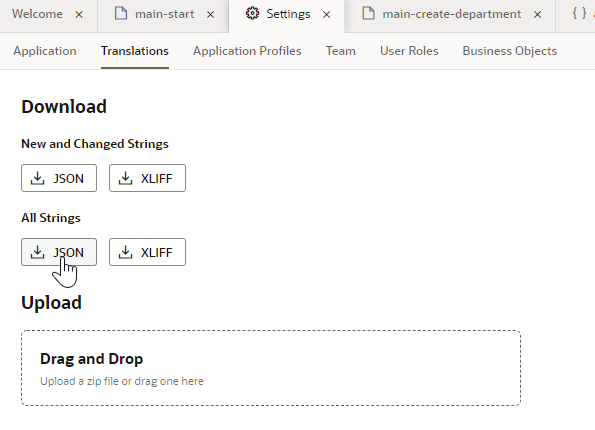
Description of the illustration vbcsta_sec2_s6.png The .zip file contains an ARB (Application Resource Bundle) file. The XLIFF 1.2 format (XML Localization Interchange File Format) is also available for use. The ARB format is easy to use if you are translating the strings yourself. If you are sending the strings to a translation team, you might want to use the XLIFF format.
As you update an application, you can download and translate only the strings that are new or have been changed since you last downloaded them.
Keep the Translations tab open.
 Translate
and Upload the Strings
Translate
and Upload the Strings
- In your Downloads folder, extract the zip file.
- Open the
transwebapp_appfolder. It contains one file,app-strings.arb. - Make a copy of
app-strings.arband name itapp-strings-fr-FR.arb.The
fr-FRlanguage tag indicates the translation language and country, French (France). Depending on your locale, you may be able to specify just the language code, but adding the country is a good idea. - Open
app-strings-fr-FR.arbin a text editor.The ARB file has two properties at the top that indicate the name and location of the translation bundle. For each string, it specifies a
source_textproperty, in addition to thedescriptionproperty.{ "@@x-bundleName" : "app", "@@x-bundlePath" : "webApps/transwebapp/resources/strings/app/nls/app-strings", ... "bind_text_value" : "Departments",
"@bind_text_value" : {
"description" : "",
"source_text" : "Departments"
},
"button__text" : "Create",
"button__text" : {
"description" : "",
"source_text" : "Create"
},
"table_columns_header_text" : "Id",
"@table_columns_header_text" : {
"description" : "",
"source_text" : "Id"
},
... - For each generated key, replace the key value for the displayed text with the
French translation. (The Id value is not translated.)
English French Departments Départements Create Créer Id Id Name Nom Location Emplacement Name Nom Location Emplacement Cancel Annuler Save Préserver For example, the first key definition looks like this.
  "bind_text_value" : "Départements",
  "@bind_text_value" : {
    "description" : "",
    "source_text" : "Departments"
}, - Save and close the
app-strings-fr-FR.arbfile. - Zip up the
transwebapp_appdirectory, which contains theapp-strings-fr-FR.arbfile, intotranswebapp_app.zip. - In the Translations tab, drag the zip file
into the Drag and Drop box.
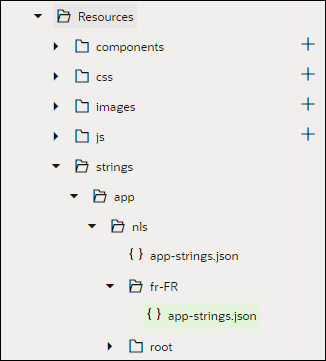
A success message appears briefly along the window's bottom. In the Web Apps pane, an fr-FR node now appears under Resources > strings> app > nls.
- Expand the fr-FR node and click app-strings.json
to view the French strings. If you don't see it right away, refresh your browser.
Description of the illustration vbcsta_sec3_s9.png - Click the top-level app-strings.json file
under the nls node. It now sets both
"root"and"fr-FR"totrue.{ "root" : true, "fr-FR" : true }You've now finished translating the application strings.
 Next
Tutorial
Next
Tutorial
Create a Multi-language Application in Oracle Visual Builder: Create a Language Switcher