Creating a Custom Fetch Action Chain - An Example
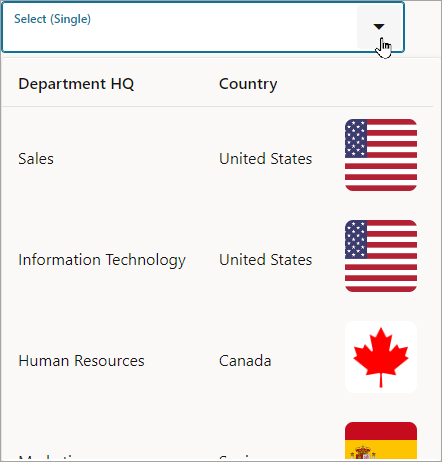
Let's go through an example of creating a custom fetch action chain for an SDP. In this example, we'll add a Single Select component to a page and bind it to an SDP in order to list the department headquarters from a business object. We'll then configure the Single Select component to show additional fields, and create a custom fetch action chain for the SDP to retrieve the data for the additional fields. Each row in the list will show the department headquarters' name, the country that the headquarters is in, and an image of the country's flag.
Before we begin, we'll need to create a Departments HQ business object with a Name and a Country field. We'll also need to add a Single Select component to a page and to use a Quick Start to map it to the Departments HQ business object.
Let's begin by creating the Departments HQ business object:
- Select the Business Object
 tab, then click + at the top right to create a new business object called Departments_HQ.
- On the Departments HQ tab, select the Fields tab and add a
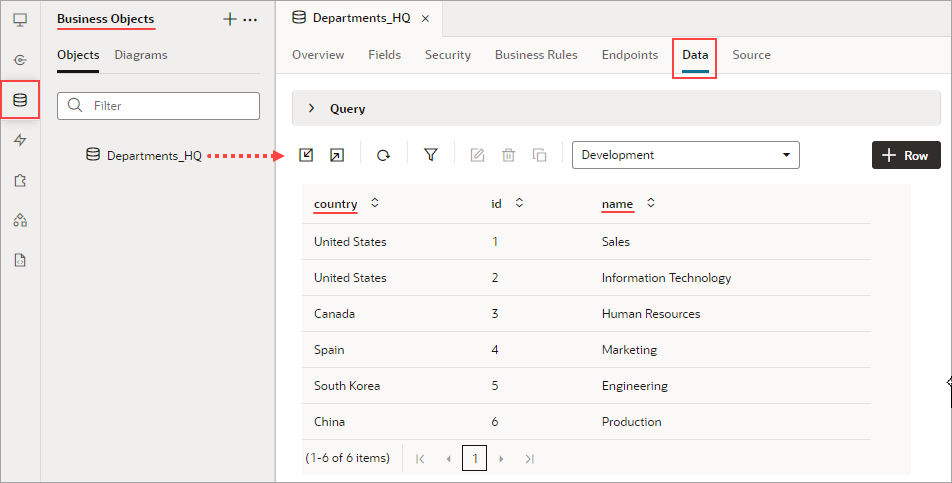
name(String) and acountry(String) field. - On the Data tab, add a few rows for the Select Single component to list:
Next, we'll add a Select Single component to a page, and then use its Add Options Quick Start to map it to the Departments HQ business object.
- Create a new page, then in the Page Designer tab, add a Select (Single) component to the page.
- To map the component to the Department HQ business object, on the Properties pane's Quick Start tab, select Add Options.
- For the Locate Data step of the Add Options wizard, under Business Objects, select Departments_HQ. Click Next.
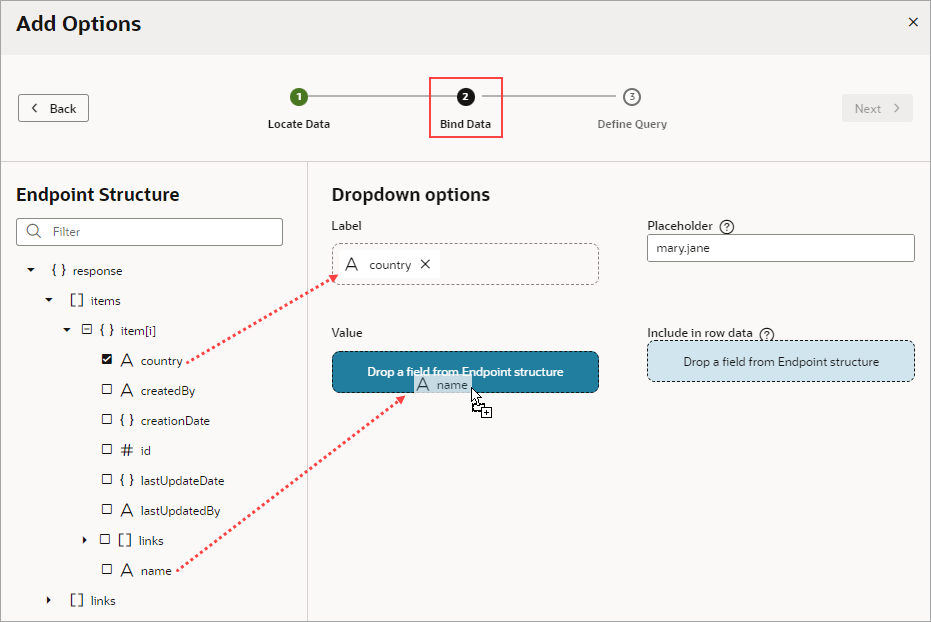
- For the wizard's Bind Data step, drag-and-drop the
namefield (department name) into both the Label and Value box. Click Next. - For the wizard's Define Query step, click Finish.
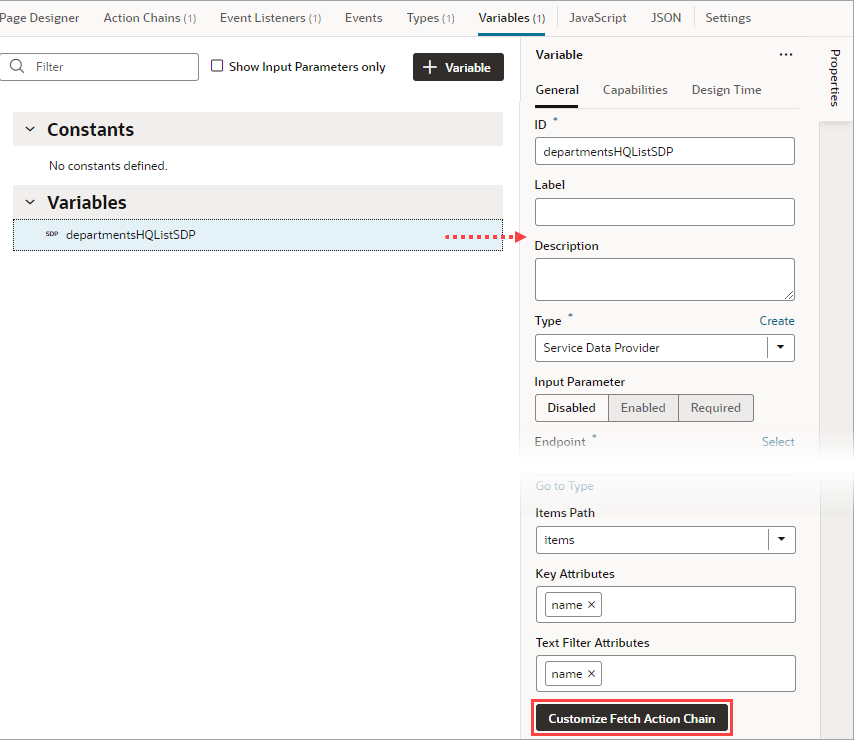
An SDP is automatically created for Department HQ, which fetches the
namefields from the business object. You can see the new SDP on the page's Variables tab. You can also see that the Select Single component has automatically been bound to the SDP on the Properties pane's Data tab. If you switch the Page Designer to Live mode, you'll see the department names that were fetched by the SDP listed in the Select Single component: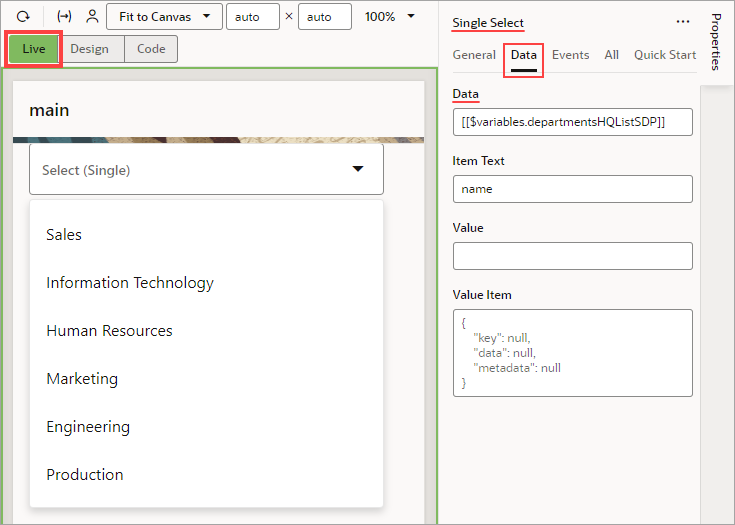
Description of the illustration sdp-single-select-live.pngWe now need to configure the Single Select component to show additional fields, including an image to show each country's flag.
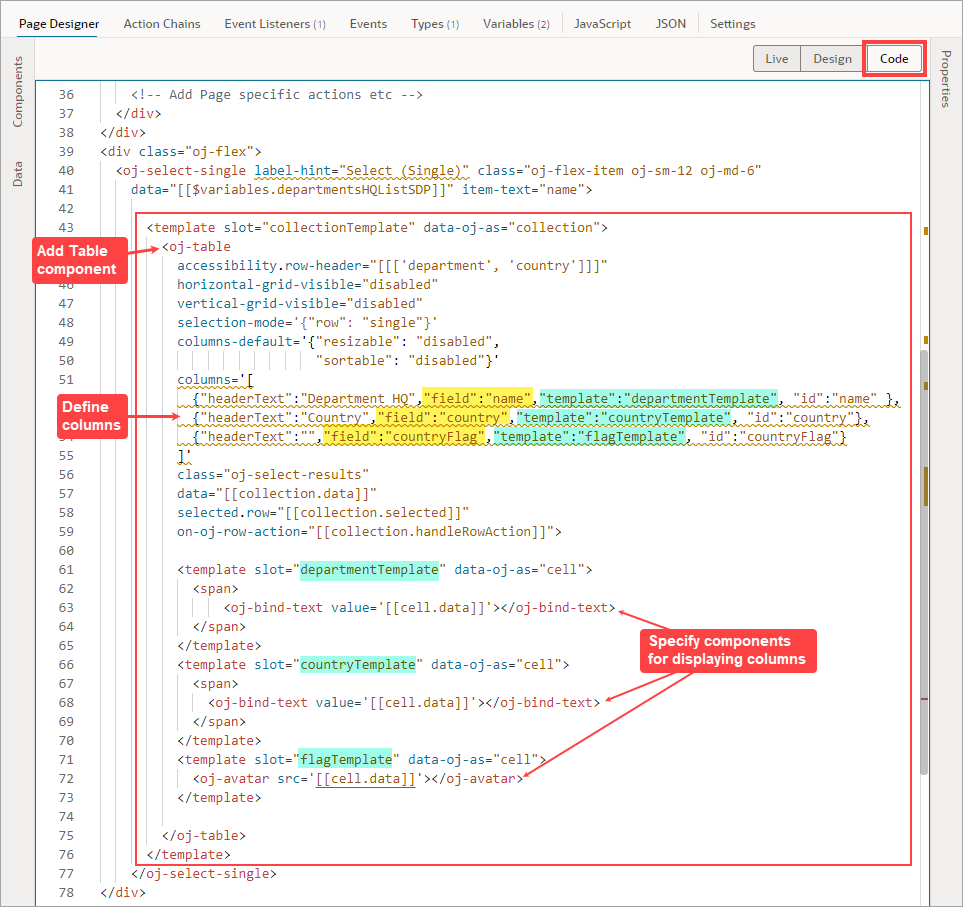
Click the Page Designer's Code button to edit the page's HTML code. Add the following HTML code to theoj-select-singletag, which adds a table to the Single Select component so that it can show additional fields:<template slot="collectionTemplate" data-oj-as="collection"> <oj-table accessibility.row-header="[[['department', 'country']]]" horizontal-grid-visible="disabled" vertical-grid-visible="disabled" selection-mode='{"row": "single"}' columns-default='{"resizable": "disabled", "sortable": "disabled"}' columns='[ {"headerText":"Department HQ","field":"name","template":"departmentTemplate", "id":"name" }, {"headerText":"Country","field":"country","template":"countryTemplate", "id":"country"}, {"headerText":"","field":"countryFlag","template":"flagTemplate", "id":"countryFlag"} ]' class="oj-select-results" data="[[collection.data]]" selected.row="[[collection.selected]]" on-oj-row-action="[[collection.handleRowAction]]"> <template slot="departmentTemplate" data-oj-as="cell"> <span> <oj-bind-text value='[[cell.data]]'></oj-bind-text> </span> </template> <template slot="countryTemplate" data-oj-as="cell"> <span> <oj-bind-text value='[[cell.data]]'></oj-bind-text> </span> </template> <template slot="flagTemplate" data-oj-as="cell"> <oj-avatar src='[[cell.data]]'></oj-avatar> </template> </oj-table> </template>Next, we need to create a service connection for retrieving the flag images.
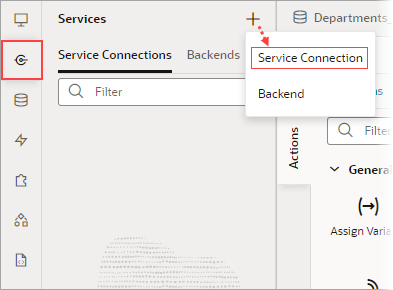
- Select the Services pane, then click its plus (+) icon and select Service Connection:
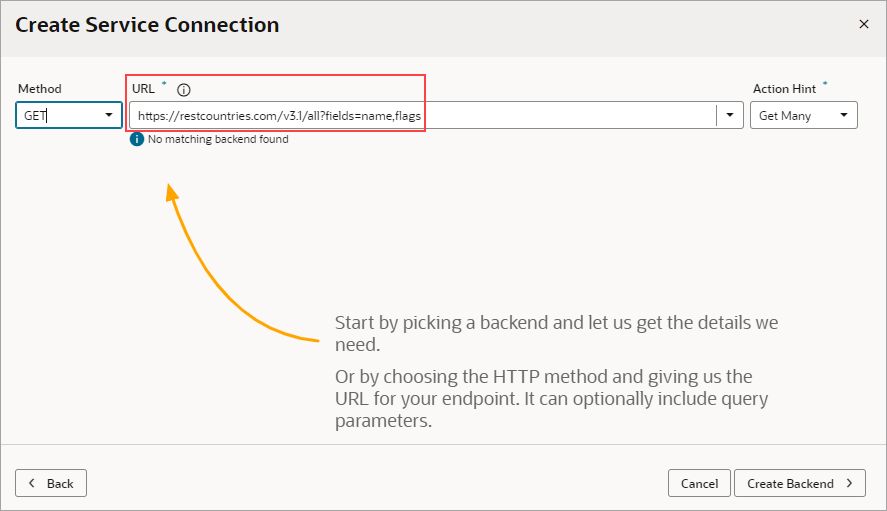
- In the Create Service Connection wizard, under Select Source, select Define by Endpoint.
- In the URL field, enter the endpoint
https://restcountries.com/v3.1/all?fields=name,flagsto retrieve the flag images, then click Create Backend:A backend is created for this service connection, which stores the server details. You can use this backend to create related service connections, and to apply endpoint requests and response transform functions to them all.
- On the Backend Specification step, enter GetFlagsBackend as the Backend Name and click Next.
- On the next step, enter GetFlags for the Service Name.
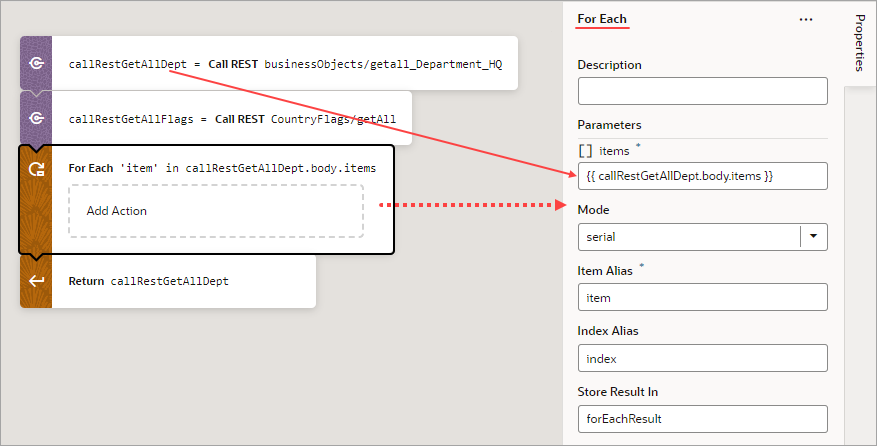
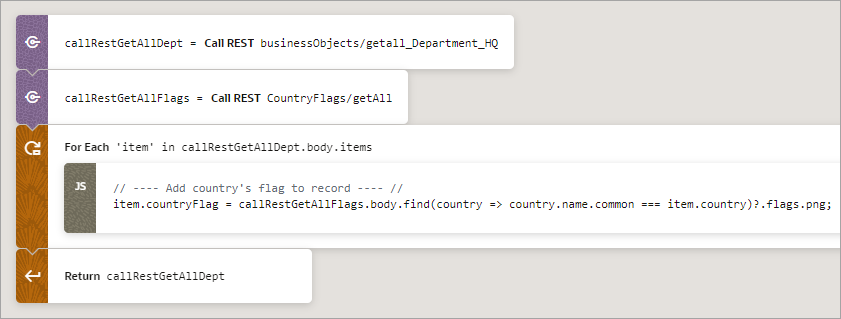
Now that the preliminary work has been completed, we can see how to create a custom fetch action chain for an SDP that's bound to a component. We'll first customize the fetch action chain that was automatically created for the SDP when it was mapped to the Departments HQ business object, so that it'll also retrieve flag images. To keep things simple, we won't do any error handling.
To begin:
