 Connect a Node.js Application to Oracle Database Exadata Express Cloud Service
 Before You Begin
This 15-minute tutorial shows you how to connect a Node.js application to Oracle Database Exadata Express Cloud Service using Oracle Application Container Cloud Service.
Background
Oracle Application Container Cloud Service lets you deploy Java SE, Node.js, PHP, and Python applications to the Oracle Cloud.
Oracle Database Exadata Express Cloud Service delivers a managed Oracle Database 12c Release 2 Enterprise Edition with options, running on Oracle Exadata engineered systems – all at a highly affordable entry-level price. It is a full Oracle Database experience, compatible with what you get on-premises or in other Oracle Database Cloud Services, provisioned within minutes, and suitable for small to medium sized data.
This tutorial shows you how integrate both services using a Node.js application.
What Do You Need?
- Access to an instance of Oracle Application Container Cloud Service (Make a note of your account information: identity domain, user name, and password.)
- An Oracle Database Exadata Express Cloud Service account
 Create the Node.js Application
- Create a directory named
connection-test-appin your local system. - In the
connection-test-appdirectory, create themanifest.jsonfile and add the following content:{ "runtime":{ "majorVersion":"6" }, "command": "node index.js", "release": {}, "notes": "" } - In the same directory, create the
index.jsfile with the following content:const http = require('http'); const oracledb = require('oracledb'); let error; let user; oracledb.getConnection( { user: process.env.EECS_USER, password: process.env.EECS_PASSWORD, connectString: 'dbaccess' }, function(err, connection) { if (err) {error = err; return;} connection.execute('select user from dual', [], function(err, result) { if (err) {error = err; return;} user = result.rows[0][0]; error = null; connection.close(function(err) { if (err) {console.log(err);} }); }) } ); http.createServer(function(request, response) { response.writeHead(200, {'Content-Type': 'text/plain'}); if (error === null) { response.end('Connection test succeeded. You connected to Exadata Express as ' + user + '!'); } else if (error instanceof Error) { response.write('Connection test failed. Check the settings and redeploy app!\n'); response.end(error.message); } else { response.end('Connection test pending. Refresh after a few seconds...'); } }).listen(process.env.PORT);
 Obtain the Oracle
Database Exadata Express Cloud Service
Client Credentials
Obtain the Oracle
Database Exadata Express Cloud Service
Client Credentials
- Login into Oracle Database Exadata Express Cloud Service.
- Navigate to the Service Console for Exadata Express and open the service console.
- Click Develop.
-
If Client Access
is not currently
enabled, click Client Access.
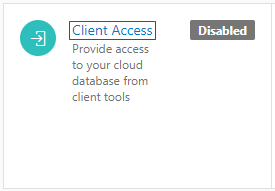
Description of the illustration credentials_01.png - In the Client Credentials dialog box, click Enable Client Access.
- On the Develop page, click Client Credentials.
-
In the Client Credentials dialog box, enter Password,
Confirm Password,
and click Download.
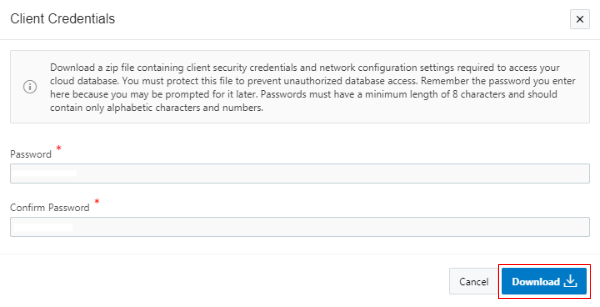
Description of the illustration credentials_02.png -
Save the client
wallet
client_credentials.zipfile. - Extract the content of the
client_credentials.zipfile to theconnection-test-appdirectory. - Open the
connection-test-app/sqlnet.orafile in a text editor and change the value ofDIRECTORYfrom?/network/adminto/u01/app/client_credentials - Compress the contents of the
connection-test-appdirectory in azipfile namedconnection-test-app.zip.
 Deploy the Application to Oracle Application
Container Cloud Service
Deploy the Application to Oracle Application
Container Cloud Service
- Open the Oracle Application Container Cloud Service console.
- In the Applications list view, click Create Application.
- In the Create Application dialog box, click Node.
- In the Application section, enter
TestNodeEecsfor the name of your application. Click Browse. - In the File Upload dialog box, select the
connection-test-app.zipfile, and click Open. - Keep the default values in the Instances and Memory fields and click Create.
 Add the Environment Variables
In this section, you add three environment variables: TNS_ADMIN, EECS_USER, and EECS_PASSWORD.
- In the Applications list view, click the TestNodeEecs application name.
- Select the Deployments tab.
- Click Add under Environment Variables.
- In the Add Environment Variable diaglog box, enter the following values, and click Save:
- Name:
TNS_ADMIN - Value:
$APP_HOME/client_credentials
- Name:
- Repite the steps 3 and 4 to add the
EECS_USERandEECS_PASSWORDenvironment variables.Note: This tutorial uses the
PDB_ADMINuser for speed and simplicity, but it's not recommended in a production environment. You should create another user in your Oracle Database Exadata Express Cloud Service instance.Name Value EECS_USERPDB_ADMINEECS_PASSWORD<Enter the password of the PDB_ADMIN user>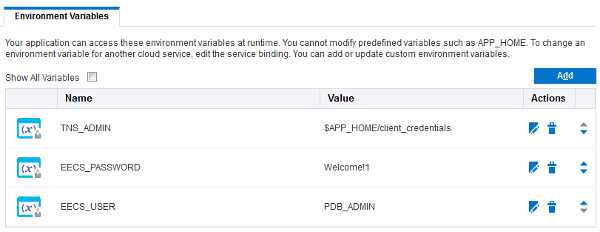
Description of the illustration environment_variables_01.png - In the Deployments dialog box, click Apply Edits.
 Test Your Application
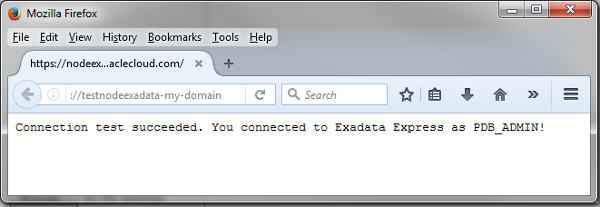
Wait until the application is completly restarted and then click the URL.
 Want to Learn More?
- Oracle Application Container Cloud Service in the Oracle Help Center
- Oracle Database Exadata Express Cloud Service in the Oracle Help Center